
If you found this article useful and would like to thank the author, you can do so via the corresponding link on boosty
Password recovery in Authentik#
I’m assuming that by this point you already have Authentik installed and configured (see the general overview and initial setup articles). As an administrator (even for a homelab), first and foremost we must force (yes, force) our existing or future users to create complex passwords, rather than the simple passwords muggles love, like 12345 or password123. In this article, we’ll talk about how to do that, and we’ll also set up the ability for users to recover their passwords themselves (if you, as the administrator, want that).
For this setup, and generally for Authentik to work correctly going forward, you should have already configured your mail server details in the .env environment variables file, from which notifications will be sent to both you and your users. You can verify the mail server is configured correctly with the simple command docker exec authentik_worker ak test_email your_email@domain.com
The application settings described in this article are accurate as of the time of writing.
The video guide linked below is accurate as of when it was created, but the configuration logic hasn’t changed.
Creating a policy for password complexity settings#
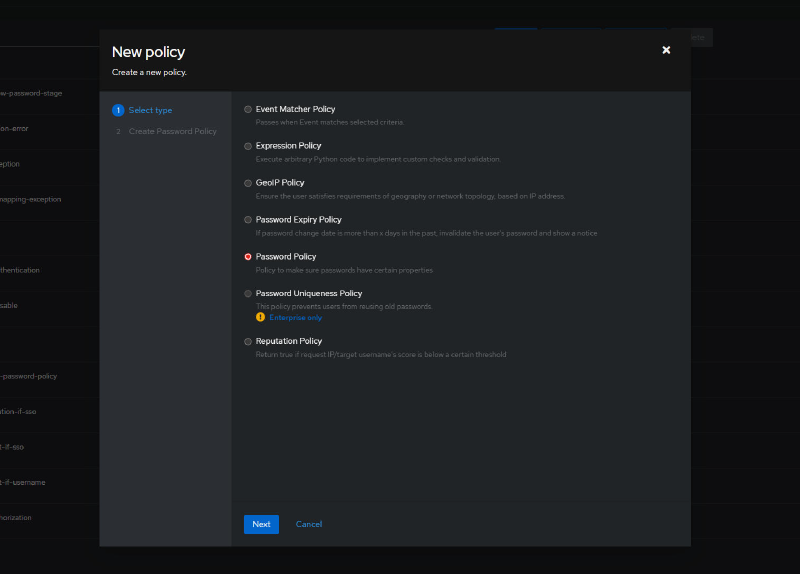
Go to Customisation > Policies. Click the Create button. Select the Password Policy policy.
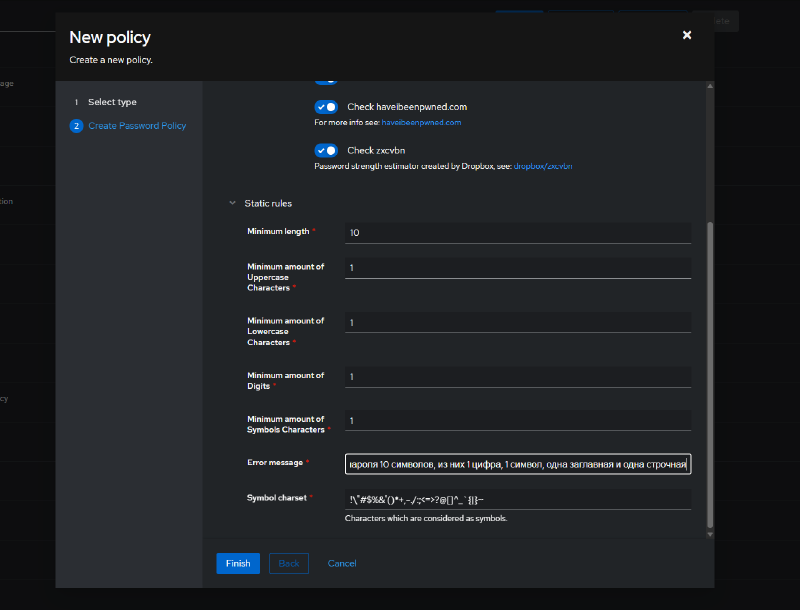
First, give the policy a name. I prefer to name things in Authentik with a lowercase first letter, so the names don’t stand out from the rest, since Authentik’s default names start with a lowercase letter. Let’s say our policy will be called password-complexity. You’re free to use any name in whatever language is convenient for you. Scroll down and in the Static rules section, set the password complexity parameters - i.e., password length, number of characters, and so on.
In the Error Message section, specify the message that will be shown if a user sets a password that doesn’t comply with the policy you’ve configured.
Here’s roughly what I ended up with:
Leave all other fields in this menu at their defaults.
Click Finish.
Creating Flows and Stages#
Now we need to create a Flow and Stages.
In the Flow and Stages section, select Stages. We need to create two stages.
Identification Stage#
The first is user identification. Click Create > Identification Stage. Unfortunately, due to a bug in application version 2025.10.3, part of the menu is displayed in Russian for me, despite explicitly disabling automatic translation in the application, but I think you’ll get the idea.

Click Next. In the next menu, give the stage a name, something like recovery-authentication-identification.
For the user fields, select Username and Email.

Leave the rest of the menu sections alone for now - we won’t need them at this stage of the setup. Click Finish.
The next stage we need to create is password recovery with email confirmation.
Email Stage#
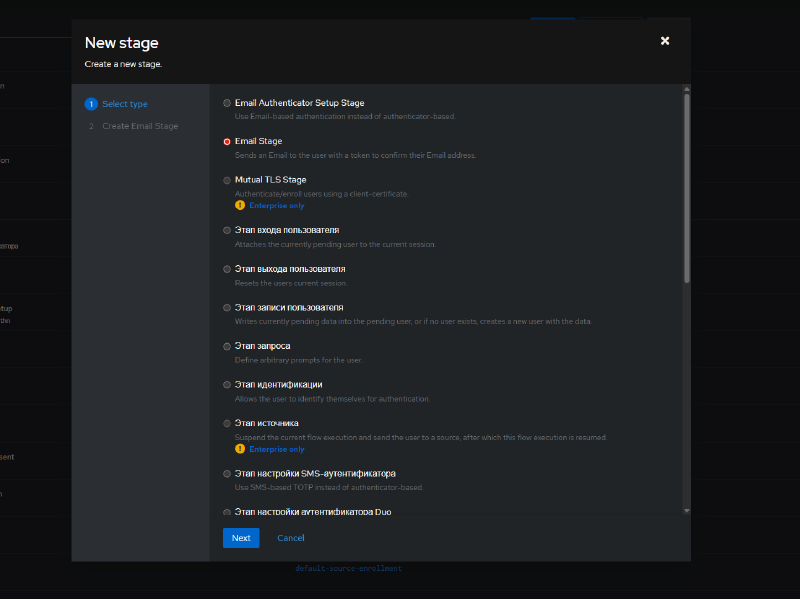
In the Flow and Stages section, select Stages > Create > Email Stage.
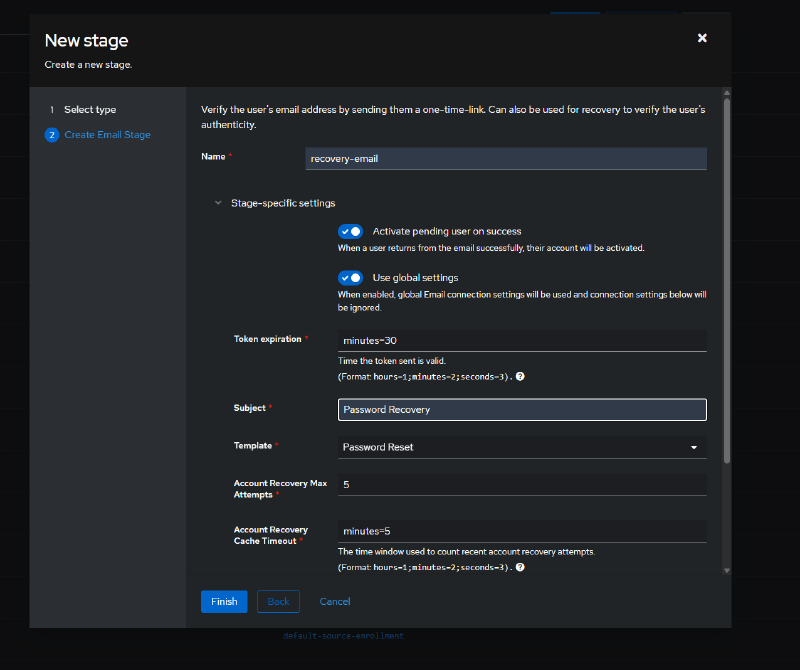
For the email subject you can put something like “Password Recovery”. For the template, leave Password Reset. Click Finish.
Now we need to create the password recovery flow.
Recovery Flow#
In Flow and Stages, select Flows > Create.
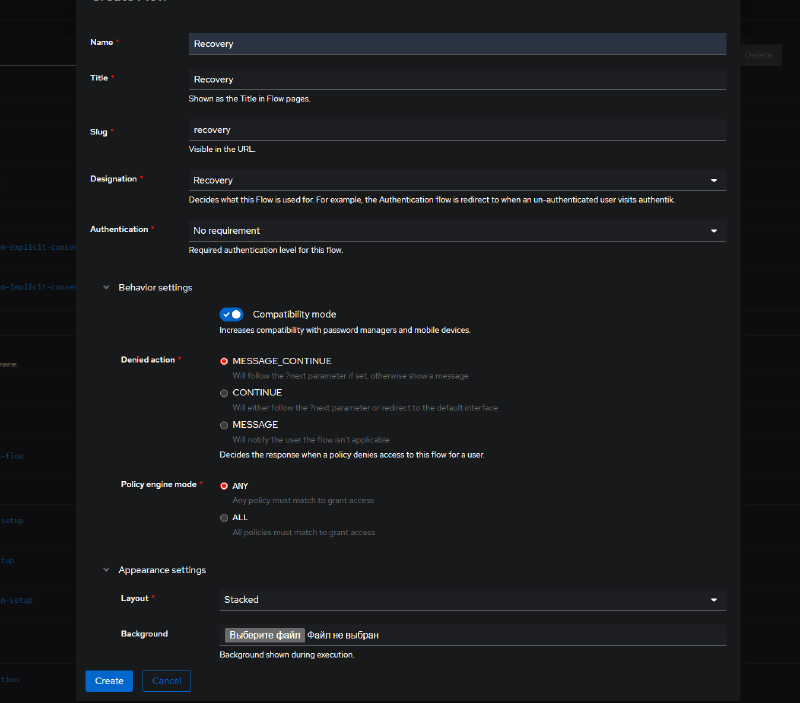
Set the values following the screenshot below. I enabled compatibility mode - this improves compatibility with password managers and mobile devices.
I left the other values at their defaults, but if you need additional customization for each individual flow, you’re free to make the corresponding changes.
In the Flows section, click the flow we just created - in my case it’s called recovery - and select Stage Bindings.

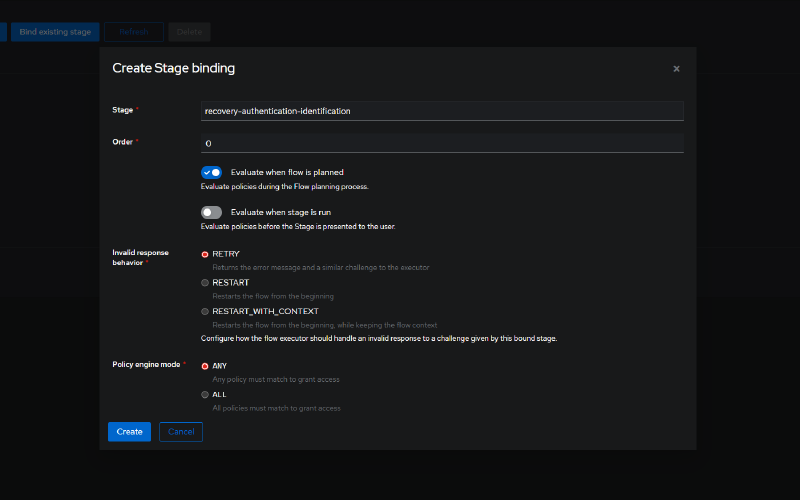
Click Bind existing stage and select the recovery-authentication-identification stage we created earlier (as you probably guessed, you can also create stages from this menu by clicking Create and Bind Stage, but I think my approach is more illustrative).
Leave the processing order for the stage at 0. Click Finish.
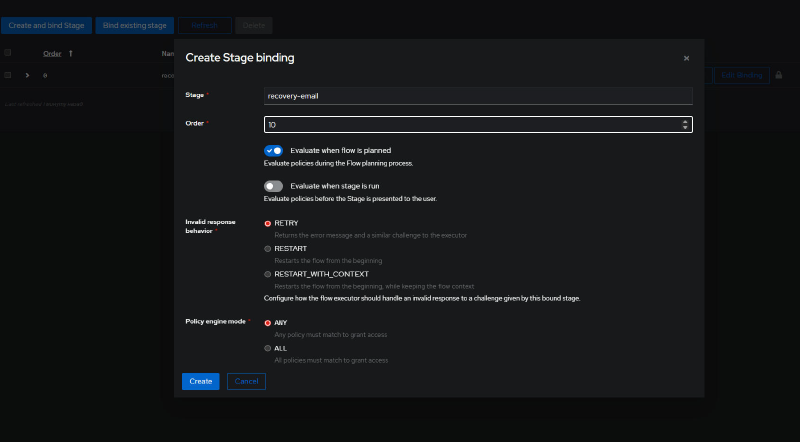
Bind another stage via Bind existing stage, and this time select the password recovery stage. I set the processing order to 10, because it’s more convenient to work with values like this, so there’s always room for new stages if needed later (and the developers do the same). Click Finish.
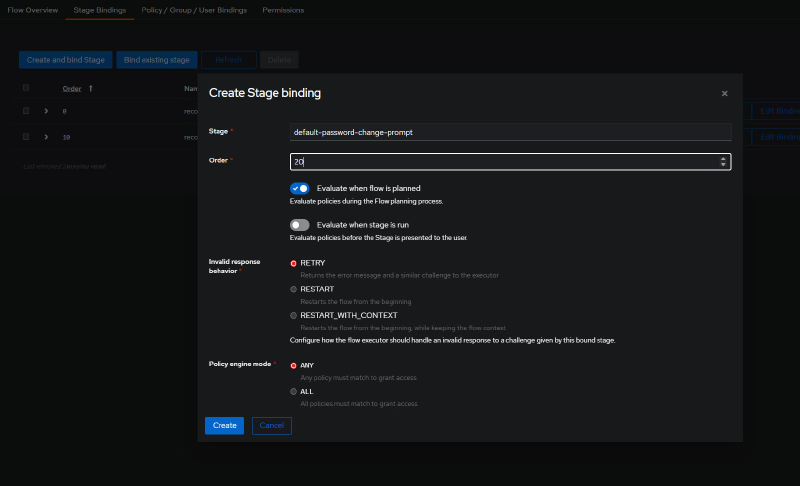
Bind another stage, this time an existing default one: Bind existing stage > default-password-change-prompt.
And the last stage for this flow - Bind existing stage > default-password-change-write. Again, pay attention to the stage processing order.

In the end, we get the following picture:
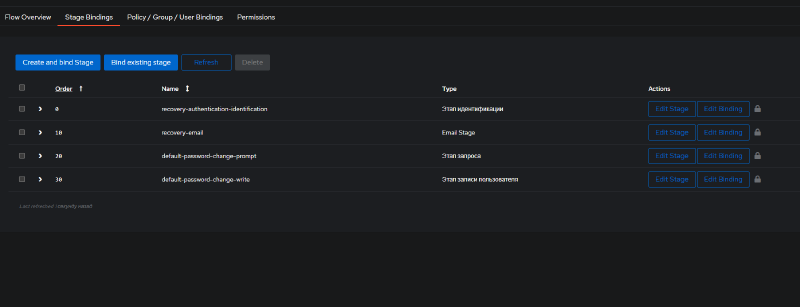
Once again, pay attention to the stage processing order.
Now, in this menu, select default-password-change-prompt and click Edit Stage. In the Validation Policies section, you need to select the previously created password-complexity policy and drag it into the menu on the right. Click Update.

Configuring the Authentication Flow#
Go to the main Flows page, select default-authentication-flow > Stage bindings.
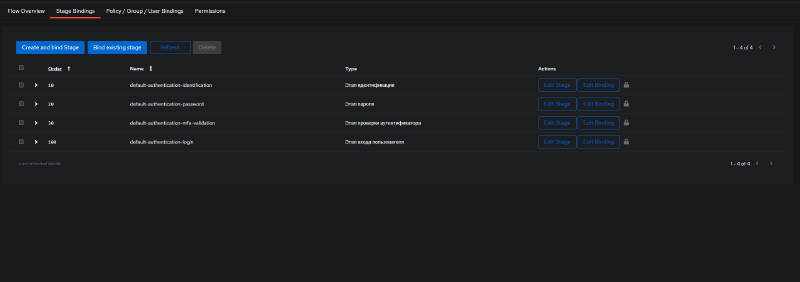
On this page, select Edit stage next to default-authentication-identification.
In the Password Stage section, you can select default-authentication-password. As noted below: “If this option is enabled, the password field is shown on the same page rather than a separate one. This prevents username enumeration attacks.” This seems like a good setting, but if you later want to disable verification for local addresses (I’ll show how to do that in a future article), you’ll need to disable this option. So the decision is up to you.
Scroll all the way to the bottom of the menu, and in the Recovery Flow section, select the password recovery flow we created earlier.
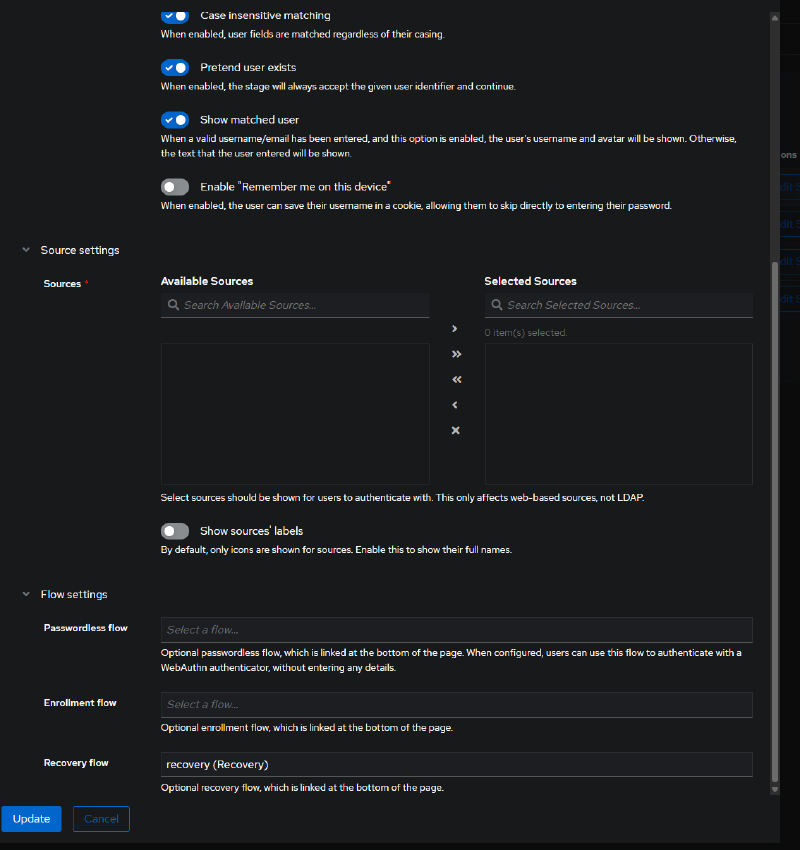
Click Update.
If you selected default-authentication-password in the Password Stage section, then in this flow’s main menu you need to remove the default-authentication-password stage. Otherwise it will conflict with the setting you chose.

Result#
Log out of our account, and at the bottom of the welcome page a note appears offering to recover the user’s login or password. If you configured showing the username and password on the same page, you’ll already see the password entry menu on this page.
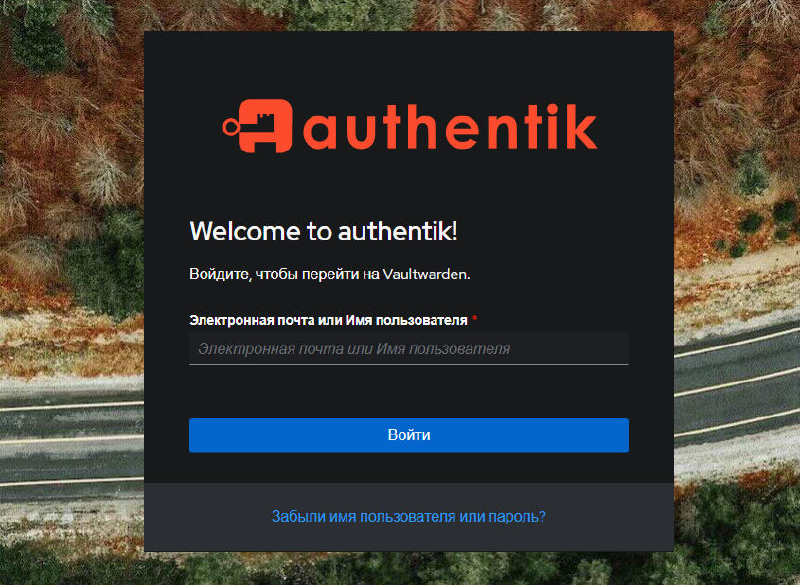
From here everything is fairly simple and intuitive. Choose the corresponding menu item, enter the email address of the user whose password you’ve forgotten, you’ll receive a notification by email offering to click a link, where Authentik will let you create a new password matching the complexity policy we set.
Now your future users will be able to register in the application themselves or recover forgotten passwords. If you’d also like to automate the registration process itself, check out the article on the enrollment and invitation flow.