
If you enjoyed this article, you can become a sponsor on Boosty.
I’m assuming you already have Authentik installed and configured (see the general overview and initial setup articles). Policies provide configuration and flexibility when defining the user login and authentication process.
Essentially, policies decide whether a given stage will be applied within a flow, as well as whether specific users can access that flow at all.
For example, you can create a policy that skips the MFA prompt stage for certain users. Or you could define a policy that only allows access to the login flow if certain conditions are met. In this article, I’ll look at the reputation policy.
Reputation Policy#
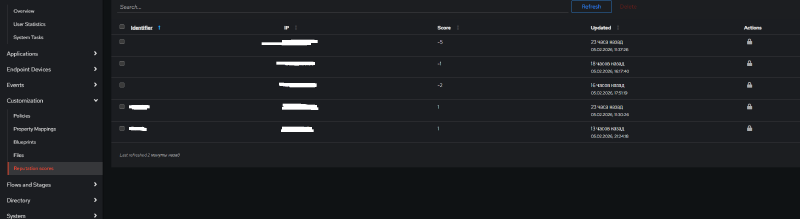
Authentik tracks recent login attempts for each “identifier (username, email address, etc.) + client IP address” pair. These values are stored as scores. Every failed login attempt lowers the score by 1. A successful login raises it by 1 - or, if the score was negative at that point, resets it to 0.
The score has a floor and a ceiling: -5 to 5 by default (configurable under System > Settings via Reputation: lower limit and Reputation: upper limit). Reputation records don’t last forever either - by default they live for a day and are then removed.
You can use this policy, for example, to make users with a low score pass a CAPTCHA check before continuing to log in - I covered setting that up in the article on Cloudflare Turnstile in Authentik. Or you can take a harder line and not let them through at all - which is the option we’ll walk through below.
Under the administrator account, go to the Flows and Stages > Flows menu
Select your main identification flow, in my case default-authentication-flow, then go to the Policy/Groups/User Bindings section
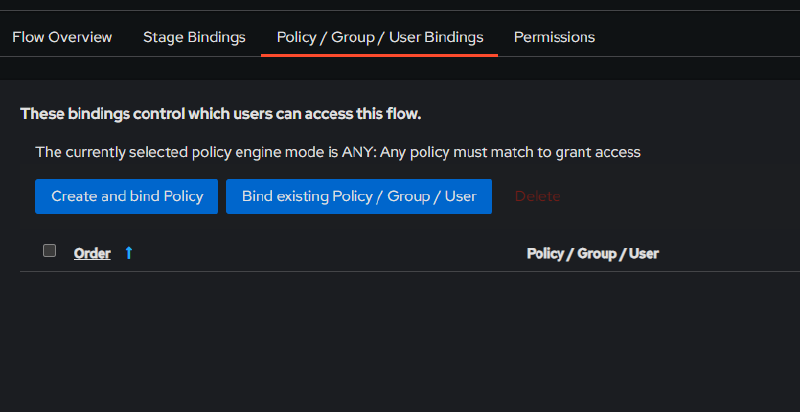
Next, go to Create and Bind Policy, and select Reputation Policy from the menu.
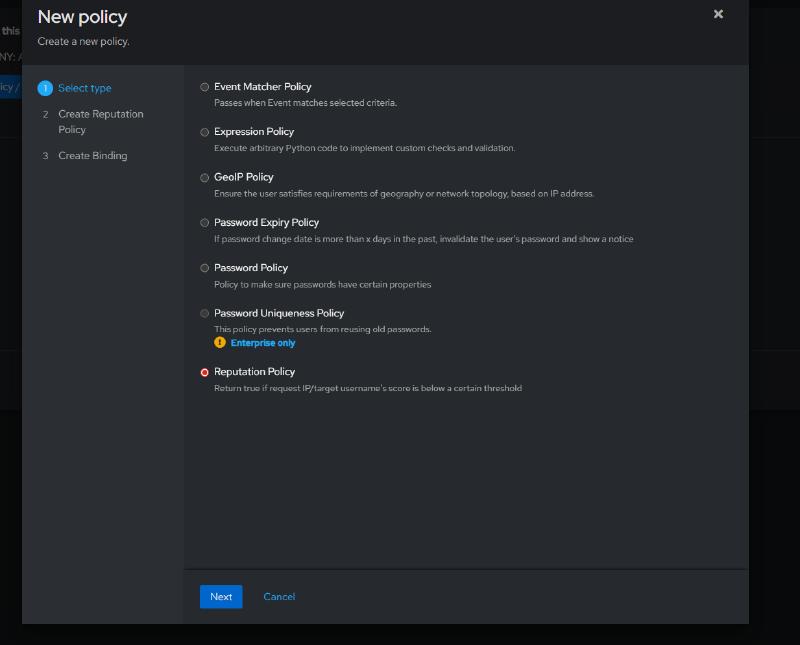
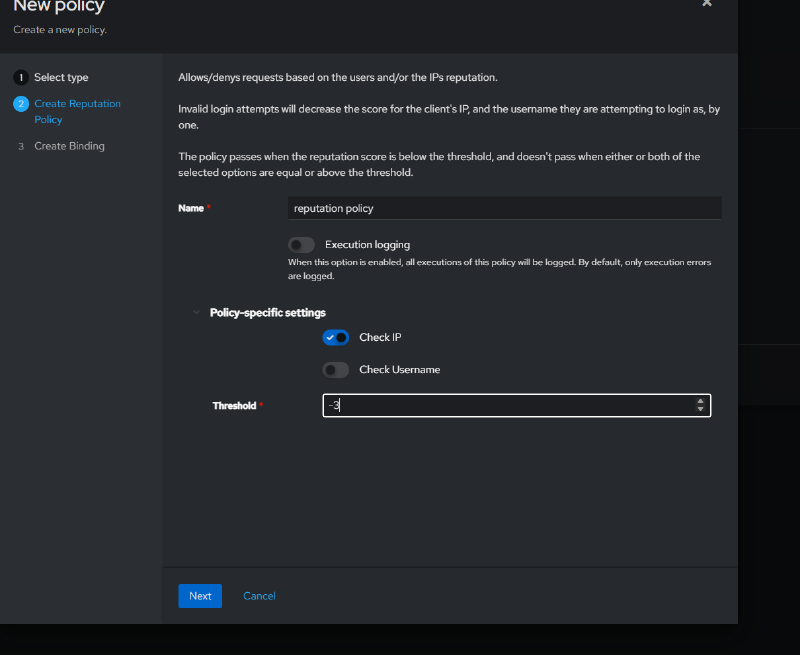
In the next section, give the policy a name that makes sense to you.
Next comes a very important point to keep in mind: what exactly the policy is going to count.
If you select only check ip, the policy adds up the scores of all login attempts from that IP address, regardless of username. A few failed attempts from one IP, and logins from it are blocked for everyone.
If you select only check username, the policy adds up the scores of all login attempts under that username, regardless of the IP address it’s coming from. Only that specific user gets blocked.
If you select both check ip and check username, the scores are combined: every attempt from that IP address and every attempt under that username count together. In practice, this means that if, say, user Vanya fails to log in a few times from a particular IP address, then, say, Galya logging in from the same IP address takes the hit too: Vanya’s failures land in her total as well. The only thing that can save Galya is her own good track record of successful logins, if it outweighs Vanya’s mistakes.
Choose whichever option best fits your needs.
Threshold is the cutoff value. The policy fires (returns true) when the score is at or below the threshold. The default is -5.
In the next section, enable the Negate the result option.
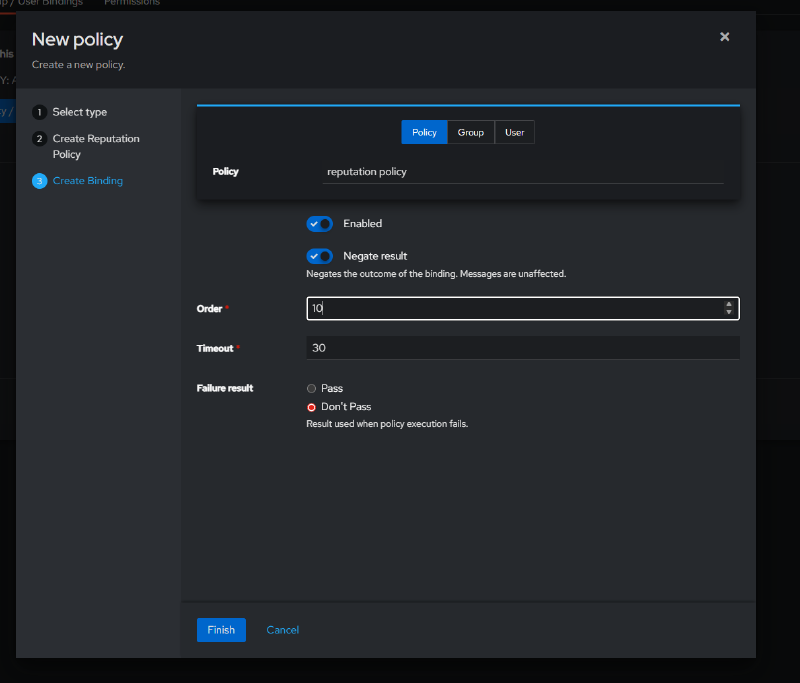
In short: Negate the result is a flag that inverts the policy’s outcome.
Put simply:
- disabled → the policy works “as is”
- enabled → the policy’s result gets flipped
For example, suppose the policy returns:
true- conditions are metfalse- conditions are not met
If you enable Negate the result:
true→ becomesfalsefalse→ becomestrue
Why is this needed in Authentik: it’s handy when a policy defines a “bad” condition but you need to react to the “good” one, or vice versa.
The Reputation Policy is exactly that kind of “bad” condition: it returns true when the score has dropped to the threshold or below - in other words, when the reputation is bad. That gives you two scenarios:
- Show a CAPTCHA only to suspicious requests. Bind the policy to the CAPTCHA stage without
Negate the result: the stage runs when the policy fires, i.e. when the reputation is bad. The Authentik docs recommend enablingEvaluate when stage is runon the stage binding in this case, so the policy takes the most recent login attempts into account. - Don’t let suspicious requests in at all. Bind the policy to the whole flow with
Negate the result: the flow is available when the policy does not fire, i.e. when the reputation is fine. That’s exactly what we’re doing in this article.
Also specify the policy’s order number.
In the Flow overview section, you can see how the flow now works.
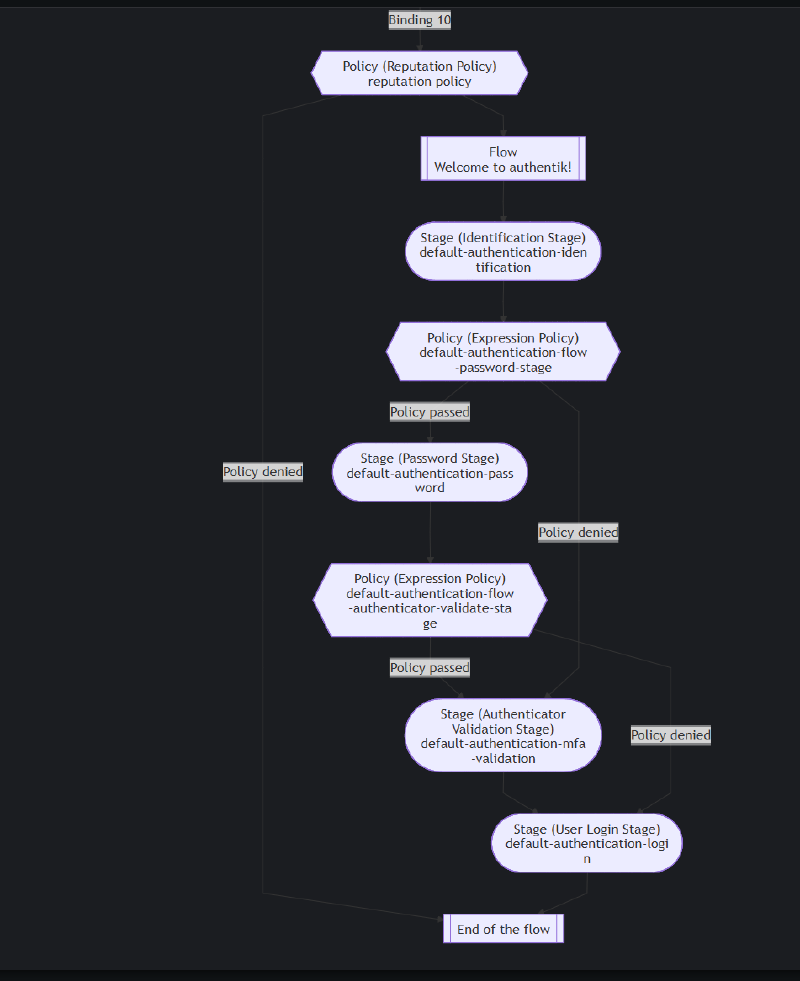
If your reputation is good, you’ll be able to go through all authentication stages. If your reputation is below the configured threshold (in my case, three failed login attempts from the same IP address), Authentik simply won’t let you proceed further.
With the “don’t let them in at all” option, be careful not to lock yourself out: a few password typos and logins from your own IP are closed until the score climbs back above the threshold (reputation records live for a day by default). Keep a second way into the admin panel or a backup account handy - and you can reset the score by deleting the corresponding entry under Reputation scores.
You can view reputation values in the Customization → Reputation scores menu.