
If you found this article useful and would like to thank the author, you can do so via the corresponding link on boosty
In previous articles, we talked about how to create and recover passwords according to a policy we defined, and how to set up automated user registration. In this article, we’ll talk about setting up two-factor authentication, and we’ll configure it so that all users are required to set up two-factor authentication. I’ll show you how to set up authentication with TOTP codes and WebAuthn devices, and we’ll also set up passwordless login.
The most secure authentication is using Yubikey solutions, but that’s an expensive option, you always need a spare key in case you lose the first one, and unfortunately I don’t have that hardware for a demo. And the Cisco Duo service is temporarily unavailable in Russia as of the time of writing.
There’s already an article published on the site about the differences between TOTP, WebAuthn, and Passwordless Login. You can check it out here. So I’ll assume you already know what TOTP, WebAuthn, and Passwordless Login are.
First of all, I should note that in this article I describe automating the process, which in my view is the most optimal approach. But everything can also be done manually. To do that, each user goes to their personal settings by clicking the gear icon in the top-right corner, and selects MFA Devices > Enroll

In the dropdown menu, select a TOTP or WebAuthn device and follow the instructions.

We’ll do the same thing, but at the global level, so that every Authentik user is required to set up two-factor authentication. For TOTP codes to work properly, you need to have any authenticator app you like installed: Google Authenticator, Vaultwarden, Bitwarden, Yandex.Key, or even Kaspersky Password Manager. Choose whichever solution is most convenient and comfortable for you. For WebAuthn and Passwordless Login, any device with fingerprint login or Windows Hello will work (I’m sure the Mac equivalent works too). I personally use a combination of Vaultwarden + Google Authenticator + Windows Hello. I’m performing all these actions from an administrator account.
Setting up TOTP codes#
In principle, as in previous articles, we could create all the necessary flows from scratch. But to keep things simple, let’s use the default flow.
Go to Flow and Stages > Flows > default-authentication-flow. Within default-authentication-flow, go to Stage Bindings.
Right now our stages look like this

Now we need to make changes to the default default-authentication-mfa-validation stage. The thing is, it’s present in the list of stages for the default-authentication-flow, but it’s not configured and doesn’t do anything. Don’t worry, my young viewers, we’re about to fix that.
In the list that appears, under not configured action, select force the user to configure an authenticator. This forces the user to use two-factor authentication. In the configure stages menu that appears, select TOTP Authenticator Setup Stage and click Update.

My personal opinion is that an admin should have several two-factor authentication options in case one of them fails.
Now let’s log out of our account (it’s highly advisable to do everything in an incognito browser window to avoid later confusion about why nothing works). Log back in with our account, and after entering our login and password, we’ll be greeted by a TOTP device registration window. Scan the code with your smartphone using your TOTP app, enter the resulting six-digit code. That’s it, the device is registered. Now, on every login, after entering our username and password, we’ll need to enter a 6-digit code from our authenticator app.

The 6-digit code generated by the smartphone app is normally valid for 30 seconds. So it’s extremely important that the time zone is set correctly everywhere, especially in Authentik. Otherwise, if devices become desynchronized, your code may expire before you manage to enter it into Authentik.
Setting up WebAuthn#
WebAuthn (Web Authentication API) is a W3C and FIDO Alliance standard that lets you log in using cryptographic keys built into your device. This includes fingerprints, Windows Hello, Face ID, etc.
Actually, the whole procedure is virtually identical to what we did with TOTP, except for one detail.
Go to Flow and Stages > Flows > default-authentication-flow. Within default-authentication-flow, go to Stage Bindings, and make changes to the default default-authentication-mfa-validation stage. In addition to the existing TOTP, add WebAuthn Authenticator Setup Stage.

In not configured action, leave force the user to configure an authenticator.
Log out of the account, and now when we try to log in from our mobile device or computer using a fingerprint or face scan, we’ll have a choice: TOTP or WebAuthn. Note that if some form of two-factor auth is already registered on your account, you won’t get a list to choose an authentication method from, since you’ve already committed to one method earlier. So if you want to add another option alongside an existing one, you’ll have to add it manually in the user settings. From then on, you’ll have two-factor options to choose from.
Passwordless Login#
As I mentioned above, there’s an article on the site describing the specifics of passwordless login and why webauthn and passwordless login shouldn’t be seen as opposites. Specifically in our case, Passwordless login will let us skip entering a username and password and then scanning a fingerprint or face, and instead scan immediately. The scan serves as confirmation of both the login and the password.
To set up passwordless login, you must first configure the WebAuthn login method.
Go to Flow and Stages > Flows > Create.
Create a new flow. Give the flow whatever name you find suitable. For Designation, select Authentication and click Create
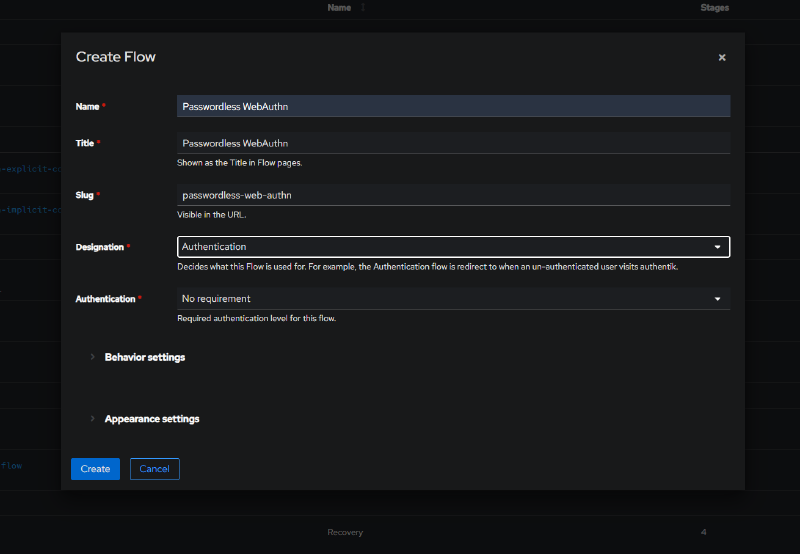
In the Flows section, click on our new flow > Stage Bindings > Create and bind stage > Authenticator Validation Stage
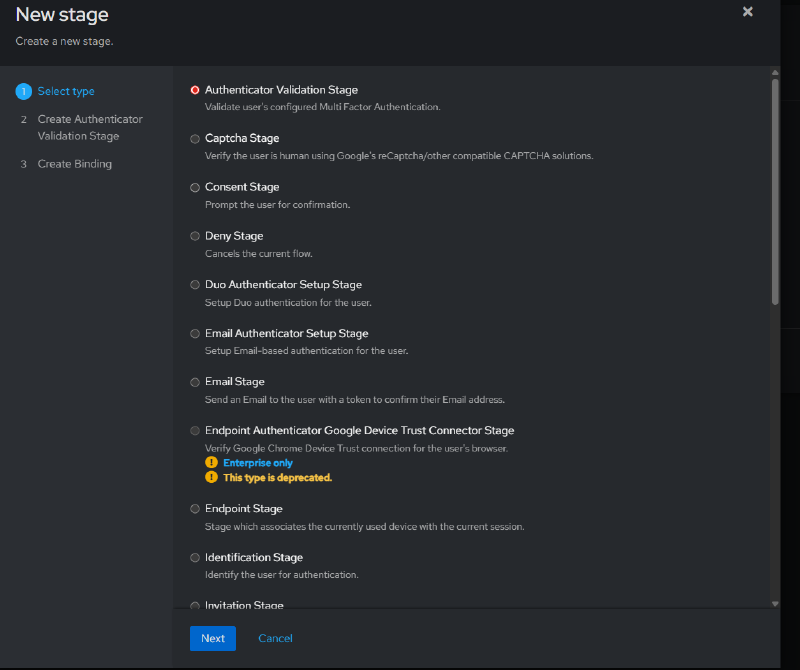
Next. Again, give the stage a name. In the Device Classes section, select WebAuthn. This is needed because currently only security keys, like a Yubikey, or biometrics are supported.
In not configured action, leave force the user to configure an authenticator.
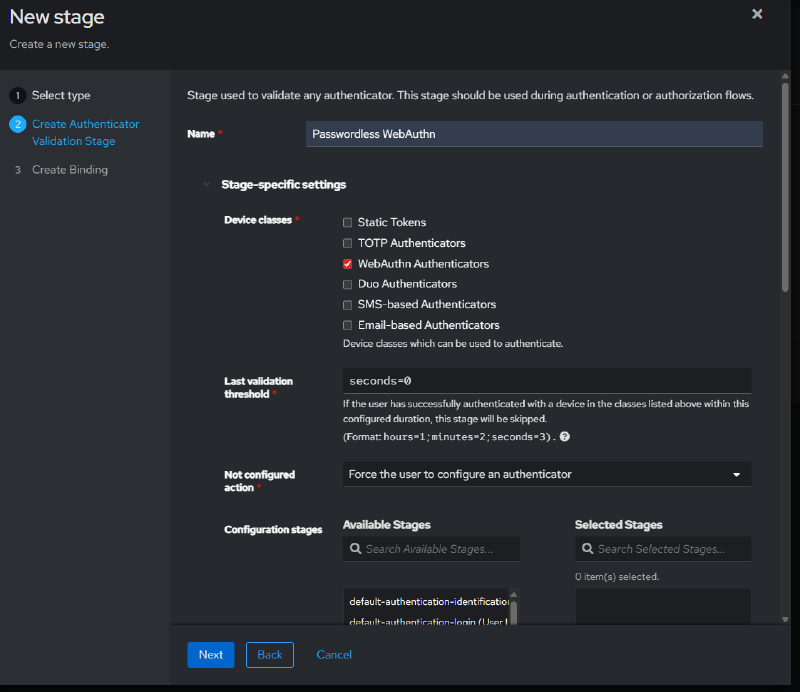
Scroll down a bit, and in the WebAuthn User verification field, choose whichever option suits your needs. I choose User verification must occur. In the Configuration Stages section, select WebAuthn Authenticator Setup Stage.
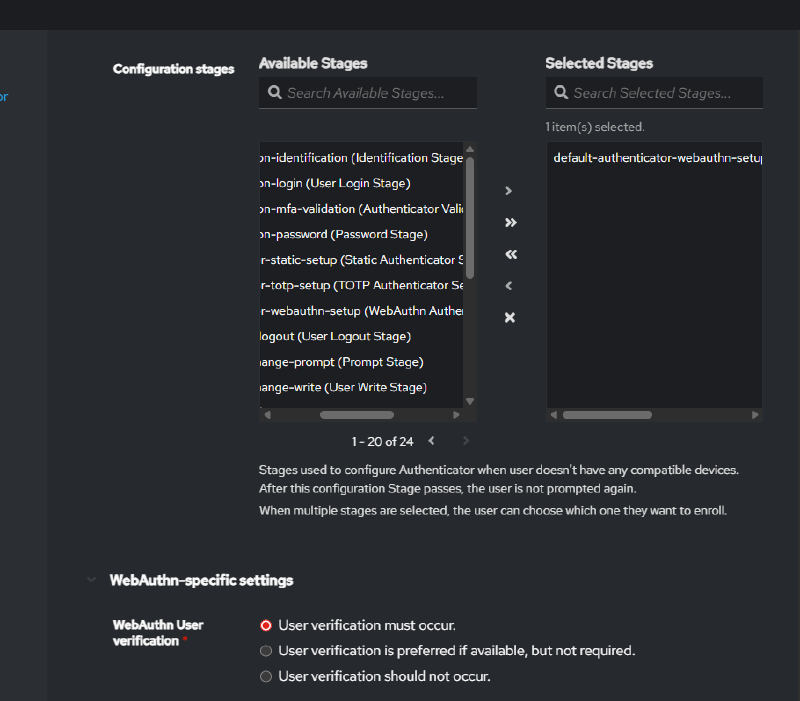
Click Next and in the next menu choose the stage’s execution order and evaluate when stage is run.
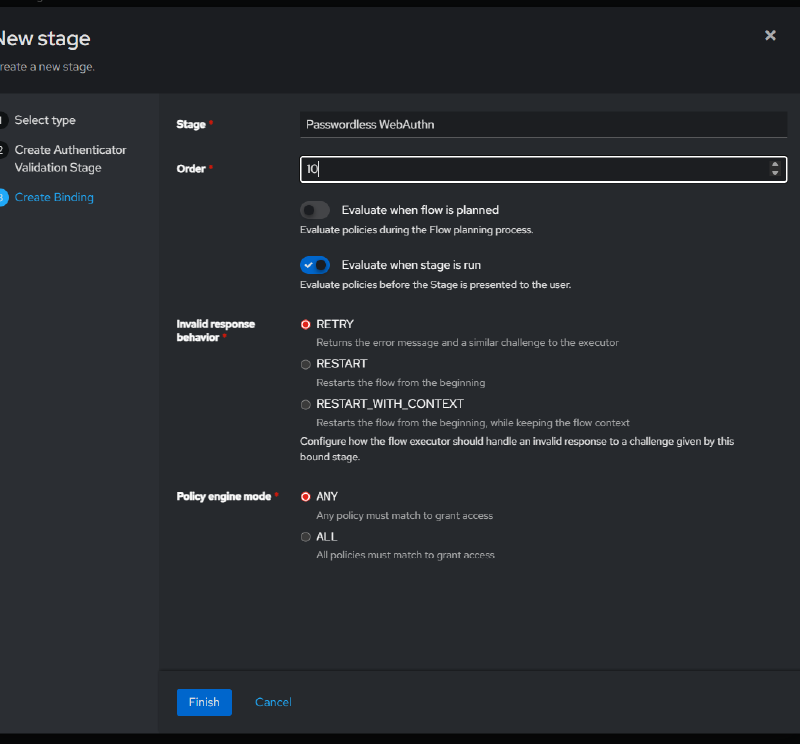
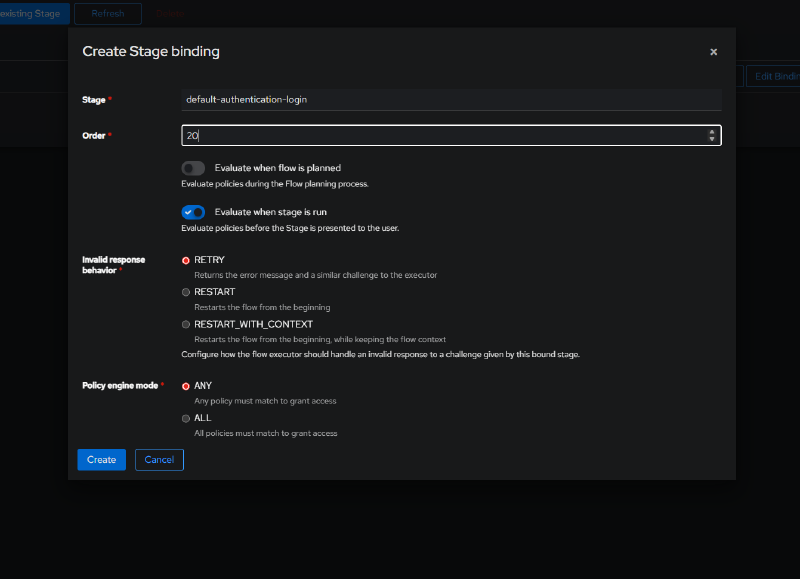
That’s still not all. Now we need to bind the existing login stage.
Bind existing stage, select default-authentication-login and the order in which this stage should run, which must come after the new stage created in this section. Be sure to select evaluate when stage is run, then Create
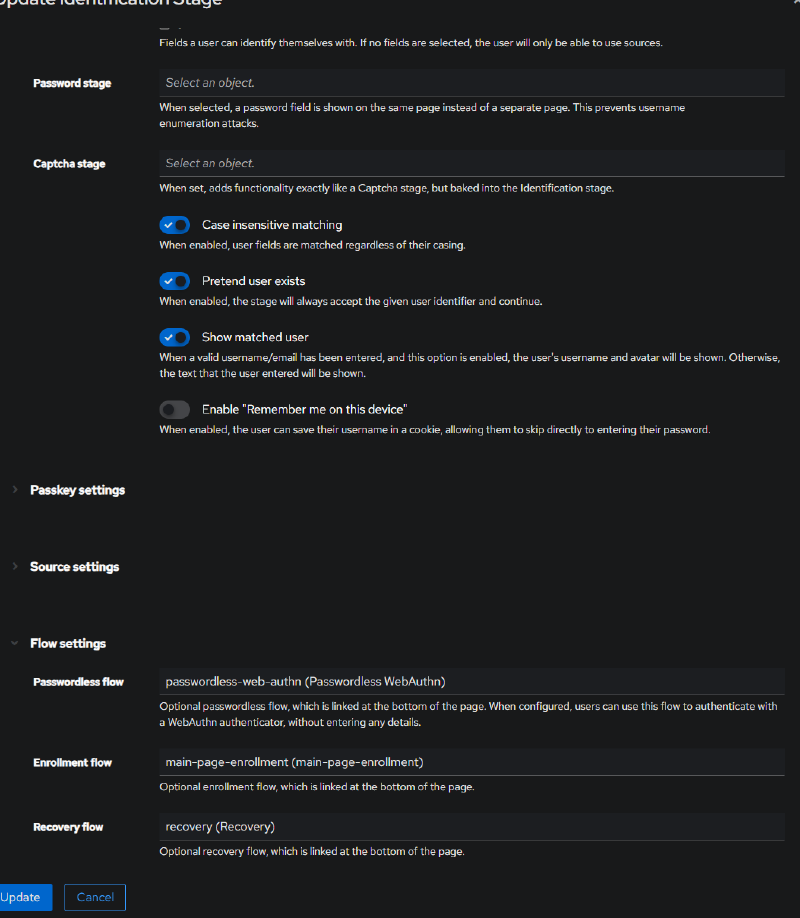
Go to Flows > default-authentication-flow > Stage Bindings > default-authentication-identification > Edit Stage. Scroll all the way down, and for Passwordless flow, select the flow we created, in my case passwordless-web-authn > Update.
Log out of the application - now it depends on which device you’re using. If you’re on a laptop, you’ll be prompted to insert a USB key; just click cancel and choose whichever method you prefer instead. The same applies to mobile devices. Either way, you’ll now see a new button in the login window for using a key.