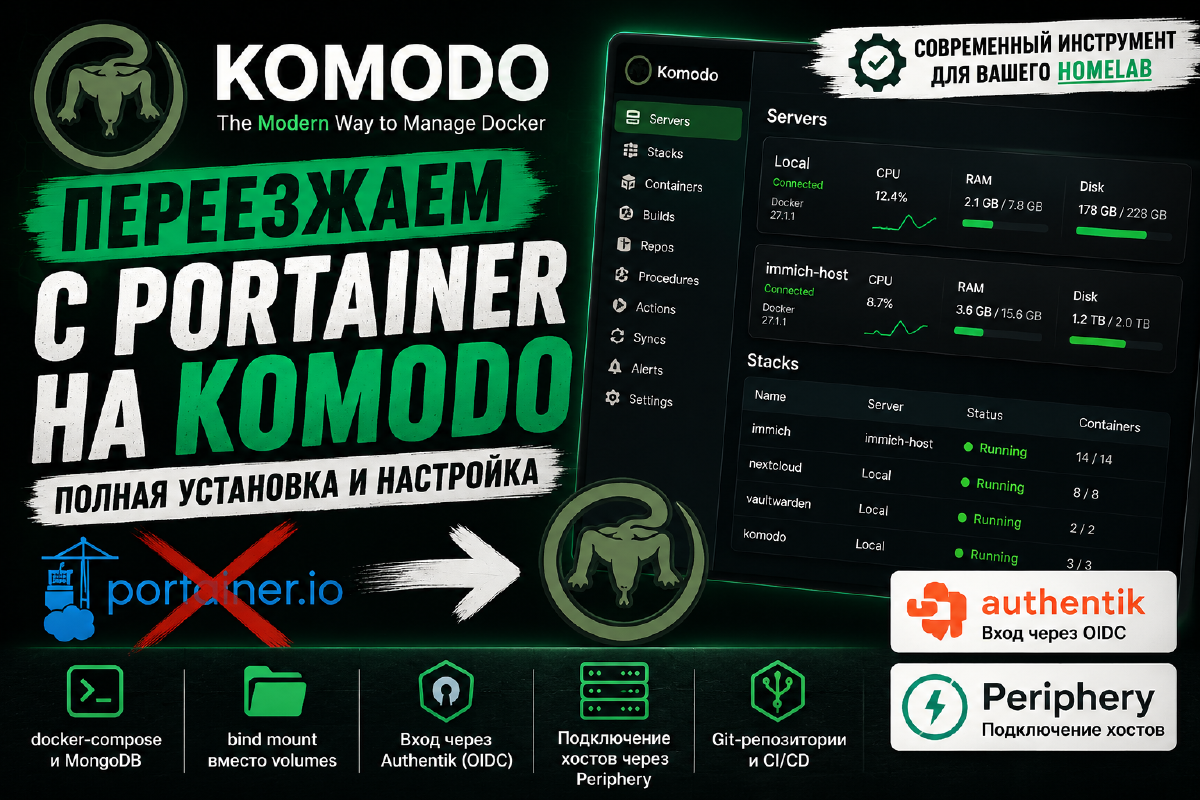

Why Move from Portainer to Komodo#
Portainer has more or less been the default choice for managing Docker through a web UI for years now, but it’s got some real limitations:
- No real CI/CD workflow to speak of. Technically there’s something, but it doesn’t come close to what the competition offers.
- Git integration that’s more “technically works” than actually good. You can hook Portainer up to GitHub and it’ll function, sure, but a lot of the functionality is missing, and what’s there feels bolted on rather than built in.
- A UI that’s starting to show its age. I know interface taste is subjective - some people like retro, some like Metro - but plenty of things in there are just genuinely confusing.
- And some features are locked behind a paywall.
Komodo is a newer project (source on GitHub) built to close exactly these gaps: it deploys stacks straight from git, handles multiple hosts through its Periphery agent as a first-class architectural feature rather than a bolted-on afterthought, and takes a genuinely modern approach to CI/CD for a home setup. Judging by where the effort clearly went, that’s exactly what the developers were aiming for. You’ll find the full feature rundown in the official “What is Komodo” page.
In this article I’m covering the whole installation, start to finish - from the docker-compose file all the way to SSO through Authentik and hooking up an extra host as a remote agent.
Architecture#
Komodo consists of three components:
- Core - the central service, web interface, and API.
- Periphery - an agent that runs on each managed host and talks to Core. This component is required for installation even on the main host.
- Database - Core keeps everything (resource configs, users, logs) in a MongoDB-compatible database.
The database bit deserves its own paragraph: Komodo will happily talk to either plain MongoDB, or FerretDB - a proxy that speaks the MongoDB protocol on the outside while actually storing everything in Postgres underneath. Those are your only two options right now. For this article - and for my own setup - I went with plain MongoDB, since it’s the officially recommended, most battle-tested path (see the Core setup docs for details). Why there’s no option to talk to Postgres directly is honestly a bit baffling. From where I sit, that’s a real weak spot.
Preparation: Directory Structure#
I’m a bind-mount person, not a named-volume person - it just makes backups and poking at data directly from the host so much easier. The tradeoff is a bit more friction around directory permissions. My project data sits at /home/stilicho/docker/komodo.
Let’s set up the directory structure up front:
mkdir -p /home/stilicho/docker/komodo/{mongo/data,mongo/configdb,keys,backups}As you might’ve guessed, I already scoped out the project structure and tested this ahead of time, so that command isn’t just something I made up on the spot.
This is something you want to think through now, not six steps from now. If, like me, all your other docker-compose projects sit side by side in one shared parent folder (say, /home/stilicho/docker/vaultwarden, /home/stilicho/docker/gotify, and so on), point PERIPHERY_ROOT_DIRECTORY at that parent directory (/home/stilicho/docker) - not at some subfolder inside komodo. Skip this now and, later on, when you go to migrate your existing stacks into Komodo (there’s a whole section on that below), Periphery simply won’t be able to see their files and will throw No such file or directory at you, even with the path set correctly in the UI. More on this in the migration section - I’m speaking from painful experience here.
Installation Configuration#
docker-compose.yaml#
Here’s the compose file I ended up with. It’s based on the official MongoDB example, with a couple of tweaks that matter:
- volumes swapped for bind mounts under our own path;
- every service given a
container_nameso things stay readable;
################################
# 🦎 KOMODO COMPOSE - MONGO 🦎
################################
# This Docker Compose file deploys three Komodo components:
# 1. MongoDB - Komodo's database.
# 2. Komodo Core - Komodo's main server and web interface.
# 3. Komodo Periphery - the agent that performs Docker
#    operations on the managed server.
services:
  # ============================================================
  # MongoDB
  # ============================================================
  mongo:
    # MongoDB Docker image.
    # Without a tag specified, the latest tag will be used.
    image: mongo
    # Fixed container name.
    # This makes the container named komodo-mongo,
    # regardless of the name of the Compose project directory.
    container_name: komodo-mongo
    labels:
      # Empty label that tells Komodo itself
      # that this container should not be stopped when performing
      # the StopAllContainers operation.
      #
      # This is especially important because MongoDB is
      # Komodo's own database.
      komodo.skip:
    # Additional MongoDB startup parameters.
    #
    # --quiet disables some of MongoDB's informational messages.
    #
    # --wiredTigerCacheSizeGB 0.25 limits the WiredTiger cache size
    # to about 256 MB.
    #
    # For a small home server this keeps MongoDB
    # from hogging extra RAM.
    command: --quiet --wiredTigerCacheSizeGB 0.25
    # Automatically restarts the container after a crash,
    # as well as after the Docker host reboots.
    #
    # If the container was stopped manually, Docker will not
    # automatically start it again.
    restart: unless-stopped
    # Publishing MongoDB's port externally is disabled.
    #
    # MongoDB doesn't need to be reachable from the host:
    # Komodo Core connects to it directly
    # via the internal Docker network komodo.
    #
    # ports:
    #   - 27017:27017
    volumes:
      # Persistent storage for MongoDB data.
      #
      # Left side - directory on the Docker host.
      # Right side - directory inside the MongoDB container.
      #
      # This makes the database data persist across container recreation.
      - /home/stilicho/docker/komodo/mongo/data:/data/db
      # Persistent storage for MongoDB configuration data.
      - /home/stilicho/docker/komodo/mongo/configdb:/data/configdb
    networks:
      # Connect MongoDB to Komodo's internal network.
      #
      # On this network, Komodo Core can reach MongoDB
      # by the service name "mongo" and port 27017.
      - komodo
    environment:
      # MongoDB admin username.
      #
      # The value comes from the KOMODO_DATABASE_USERNAME variable,
      # defined in the Compose environment.
      MONGO_INITDB_ROOT_USERNAME: ${KOMODO_DATABASE_USERNAME}
      # MongoDB admin password.
      #
      # The value comes from the KOMODO_DATABASE_PASSWORD variable.
      MONGO_INITDB_ROOT_PASSWORD: ${KOMODO_DATABASE_PASSWORD}
  # ============================================================
  # Komodo Core
  # ============================================================
  core:
    # Komodo Core Docker image.
    #
    # The COMPOSE_KOMODO_IMAGE_TAG variable lets you choose
    # the image version.
    #
    # If the variable is not set, tag "2" is used.
    image: ghcr.io/moghtech/komodo-core:${COMPOSE_KOMODO_IMAGE_TAG:-2}
    # Fixed name for the Komodo Core container.
    container_name: komodo-core
    # Runs an init process inside the container.
    #
    # This helps correctly handle signals and processes
    # inside the container.
    init: true
    # Automatically restarts the container after a crash
    # or Docker host reboot.
    restart: unless-stopped
    depends_on:
      # Komodo Core depends on MongoDB.
      #
      # Compose will first start the mongo container,
      # then the core container.
      #
      # Important: depends_on doesn't guarantee that MongoDB is fully
      # ready to accept connections - it only controls startup order.
      - mongo
    ports:
      # Publishes port 9120 of the Komodo Core container
      # to port 9120 on the Docker host.
      #
      # In this Compose file, this allows accessing Core directly,
      # bypassing Traefik.
      #
      # If access to Komodo should only go through Traefik,
      # this port publication can be removed later.
      - 9120:9120
    # Loads environment variables from the compose.env file.
    #
    # This lets you avoid storing secrets directly
    # in docker-compose.yml.
    env_file: ./compose.env
    environment:
      # MongoDB address for Komodo Core.
      #
      # "mongo" - the MongoDB service's DNS name inside the Docker network.
      # 27017 - MongoDB's standard port.
      #
      # So Core reaches the DB as:
      # mongo:27017
      KOMODO_DATABASE_ADDRESS: mongo:27017
    volumes:
      # Keys used for communication between Komodo Core
      # and Komodo Periphery.
      #
      # Host directory:
      # /home/stilicho/docker/komodo/keys
      #
      # Directory inside the container:
      # /config/keys
      - /home/stilicho/docker/komodo/keys:/config/keys
      # Directory for Komodo database backups.
      #
      # Backups are saved on the Docker host and therefore
      # won't disappear when the Core container is recreated.
      #
      # Komodo documentation:
      # https://komo.do/docs/setup/backup
      - /home/stilicho/docker/komodo/backups:/backups
    networks:
      # Connection to the proxy network.
      #
      # This network is used by Traefik to reach
      # the Komodo Core container.
      - proxy
      # Connection to Komodo's internal network.
      #
      # Through this, Core communicates with MongoDB
      # and other Komodo components.
      - komodo
    security_opt:
      # Prevents the container from gaining new privileges.
      #
      # This is an additional security measure.
      # It prevents privilege escalation of a process inside the container.
      - no-new-privileges:true
    labels:
      # ========================================================
      # Traefik
      # ========================================================
      # Allow Traefik to discover and serve this container.
      - "traefik.enable=true"
      # --------------------------------------------------------
      # HTTP router
      # --------------------------------------------------------
      # Komodo's HTTP router works via the web entrypoint,
      # usually corresponding to port 80.
      - "traefik.http.routers.komodo.entrypoints=web"
      # The router triggers if the request's Host header
      # equals komodo.stilicho.ru.
      - "traefik.http.routers.komodo.rule=Host(`komodo.stilicho.ru`)"
      # Creates a middleware that redirects HTTP requests
      # to HTTPS.
      - "traefik.http.middlewares.komodo-https-redirect.redirectscheme.scheme=https"
      # Attaches the redirect middleware to the HTTP router.
      - "traefik.http.routers.komodo.middlewares=komodo-https-redirect"
      # --------------------------------------------------------
      # HTTPS router
      # --------------------------------------------------------
      # The HTTPS router uses the websecure entrypoint,
      # usually corresponding to port 443.
      - "traefik.http.routers.komodo-secure.entrypoints=websecure"
      # The HTTPS router also only serves requests
      # for the domain komodo.stilicho.ru.
      - "traefik.http.routers.komodo-secure.rule=Host(`komodo.stilicho.ru`)"
      # Enable TLS for this router.
      - "traefik.http.routers.komodo-secure.tls=true"
      # Explicitly specify that the HTTPS router should use
      # the Traefik service named komodo.
      - "traefik.http.routers.komodo-secure.service=komodo"
      # Tell Traefik that inside the Docker network
      # the Komodo Core app listens on port 9120.
      #
      # Traefik talks to the container directly,
      # so publishing port 9120 on the host isn't required for it.
      - "traefik.http.services.komodo.loadbalancer.server.port=9120"
      # Tell Traefik which Docker network to use
      # to connect to the container.
      #
      # The proxy network is used here.
      - "traefik.docker.network=proxy"
  # ============================================================
  # Komodo Periphery
  # ============================================================
  # Periphery can be run in two ways:
  #
  # 1. As a Docker container - this is the variant shown below.
  #
  # 2. As a systemd service directly on the host
  #    using the Periphery binary.
  #
  # The containerized variant is convenient when Docker is already
  # the primary environment for managing services.
  periphery:
    # Komodo Periphery Docker image.
    #
    # Uses the same version variable as Core.
    # If the variable is not set, tag "2" is used.
    image: ghcr.io/moghtech/komodo-periphery:${COMPOSE_KOMODO_IMAGE_TAG:-2}
    # Fixed name for the Periphery container.
    container_name: komodo-periphery
    # Adds an init process inside the container.
    init: true
    # Automatically restarts Periphery after a crash
    # or Docker host reboot.
    restart: unless-stopped
    depends_on:
      # Periphery depends on Komodo Core.
      #
      # Compose starts Core first,
      # then Periphery.
      - core
    # Loads environment variables from compose.env.
    env_file: ./compose.env
    volumes:
      # Shared keys for Core and Periphery.
      #
      # This directory is used for authenticated
      # communication between Komodo components.
      - /home/stilicho/docker/komodo/keys:/config/keys
      # Docker socket.
      #
      # Through this socket, Periphery gets the ability
      # to manage the Docker daemon on the host:
      #
      # - create containers;
      # - stop containers;
      # - start containers;
      # - get information about containers;
      # - manage Docker Compose.
      #
      # IMPORTANT:
      # access to docker.sock effectively grants the container
      # a very high level of access to the Docker host.
      - /var/run/docker.sock:/var/run/docker.sock
      # Mount the host's /proc inside the container.
      #
      # This lets Periphery get information
      # about processes and the host's system state.
      - /proc:/proc
      # Periphery's root directory.
      #
      # The PERIPHERY_ROOT_DIRECTORY variable determines
      # which directory Periphery will use
      # for storing working data.
      #
      # If the variable is not set, /etc/komodo is used.
      #
      # For example:
      #
      # PERIPHERY_ROOT_DIRECTORY=/etc/komodo
      #
      # then you get:
      #
      # /etc/komodo:/etc/komodo
      - ${PERIPHERY_ROOT_DIRECTORY:-/etc/komodo}:${PERIPHERY_ROOT_DIRECTORY:-/etc/komodo}
    networks:
      # The proxy network connects Periphery to the shared Docker network
      # with Traefik and other services.
      - proxy
      # Komodo's internal network for communication
      # between Komodo components.
      - komodo
# ================================================================
# Docker networks
# ================================================================

networks:
  # --------------------------------------------------------------
  # proxy network
  # --------------------------------------------------------------
  proxy:
    # This is an external Docker network.
    #
    # external: true means Compose does NOT create this network.
    # It must already exist.
    #
    # Usually such a network is created once:
    #
    # docker network create proxy
    #
    # After that, various Compose projects can connect to it,
    # such as Traefik, Komodo, and other services.
    external: true
  # --------------------------------------------------------------
  # komodo network
  # --------------------------------------------------------------
  komodo:
    # External Docker network for Komodo's internal components.
    #
    # It is used for communication between:
    #
    #   Komodo Core
    #        │
    #        ├── MongoDB
    #        │
    #        └── Periphery
    #
    # Like proxy, this network must be created beforehand.
    external: true
flowchart LR

    Internet["Internet / LAN"]
    Traefik["Traefik"]
    Core["Komodo Core
:9120"]
    Mongo["MongoDB
:27017"]
    Periphery["Komodo Periphery"]
    Host["Docker Host"]

    Internet -->|HTTPS| Traefik

    subgraph Networks["Docker Networks"]
        direction LR

        subgraph Proxy["proxy"]
            Traefik
        end

        subgraph Komodo["komodo"]
            Core
            Mongo
            Periphery
        end

        Traefik --> Core
        Core --> Mongo
        Core --> Periphery
    end

    Periphery -->|docker.sock| Host
In short: Traefik reaches Core over proxy, while Core, MongoDB, and Periphery chat among themselves over komodo.
Both networks are external, so you need to create them yourself ahead of time - Compose won’t do it for you:
docker network create proxy   # if not already created for the reverse proxy
docker network create komodoA gotcha with networks worth knowing. The moment you explicitly list networks: on a service (like core does, for the proxy network Traefik needs), Compose stops auto-adding that service to the project’s default network. That’s exactly why all three services that need to talk to each other (mongo, core, periphery) are explicitly wired to the separate komodo network - it exists purely for internal Komodo-to-Komodo chatter, while proxy only shows up where a service actually needs to be visible to Traefik, which in this case is just core.
compose.env - environment variables#
The second file, compose.env, is where all the settings and secrets live. It’s a required file, and the developers ship it as part of the standard setup. You’ll need to generate a few of the values yourself.
####################################
# 🦎 KOMODO COMPOSE - VARIABLES 🦎 #
####################################
COMPOSE_KOMODO_IMAGE_TAG="2"
COMPOSE_KOMODO_BACKUPS_PATH=/home/stilicho/docker/komodo/backups
## Database access credentials - be sure to change from defaults!
KOMODO_DATABASE_USERNAME=<pick_a_username>
KOMODO_DATABASE_PASSWORD=<pick_a_strong_password>
TZ=Europe/Moscow
#=-------------------------=#
#= Komodo Core Environment =#
#=-------------------------=#
KOMODO_HOST=https://komodo.stilicho.ru
KOMODO_TITLE=Komodo
KOMODO_PERIPHERY_PUBLIC_KEY=file:/config/keys/periphery.pub
## Local admin in case of OIDC issues
KOMODO_LOCAL_AUTH=true
KOMODO_INIT_ADMIN_USERNAME=admin
KOMODO_INIT_ADMIN_PASSWORD=<strong_password>
KOMODO_FIRST_SERVER_NAME=Local
KOMODO_DEFAULT_PAGINATION_LIMIT=50
## Secrets - generate random strings, e.g.: openssl rand -hex 32
KOMODO_WEBHOOK_SECRET=<random_hex_32>
KOMODO_JWT_SECRET=<random_hex_32>
KOMODO_JWT_TTL="1-day"
KOMODO_MONITORING_INTERVAL="15-sec"
KOMODO_RESOURCE_POLL_INTERVAL="1-hr"
## Enable this so OIDC users don't require manual activation
KOMODO_ENABLE_NEW_USERS=true
## OIDC Login (Authentik)
KOMODO_OIDC_ENABLED=true
KOMODO_OIDC_PROVIDER=https://authentik.stilicho.ru/application/o/komodo/
## Uncomment only if Core reaches Authentik via an internal address
## different from the public domain above
# KOMODO_OIDC_REDIRECT_HOST=https://auth.stilicho.ru
KOMODO_OIDC_CLIENT_ID=<client_id_from_Authentik>
KOMODO_OIDC_CLIENT_SECRET=<client_secret_from_Authentik>
KOMODO_OIDC_AUTO_REDIRECT=false ## if set to true, there will be no login-choice option. Leave false until an admin has been created
#=------------------------------=#
#= Komodo Periphery Environment =#
#=------------------------------=#
PERIPHERY_CORE_ADDRESS=ws://core:9120
PERIPHERY_CONNECT_AS=${KOMODO_FIRST_SERVER_NAME}
PERIPHERY_CORE_PUBLIC_KEYS=file:/config/keys/core.pub
## All Periphery stacks/repos/builds must live inside this path.
## Point this to the parent folder containing ALL your compose
## projects (including komodo, but also everything else) - otherwise
## Periphery won't be able to read the files of existing stacks
## when you migrate them into Komodo.
PERIPHERY_ROOT_DIRECTORY=/home/stilicho/docker
PERIPHERY_INCLUDE_DISK_MOUNTS=/etc/hostname
For the complete, annotated list of variables, check the original file on GitHub - there’s a ton of them, and I only kept what’s actually needed to get a working install off the ground. You can always tack on more later once you know you want them.
Setting Up Login via Authentik#
If you’re running Authentik as the single sign-on point for your homelab like I am, you’re in luck - Komodo integrates with it really cleanly, and there’s even a dedicated Authentik integration page in the official docs.
Configuring Authentik for Komodo#
To get Komodo authenticating users through Authentik, you’ll first need an Application + OAuth2/OpenID Connect Provider pair set up in Authentik, then feed the resulting parameters into Komodo’s config.
Important for Authentik 2026.5 and newer: this version added the ability to specify the Redirect URI type separately. For Komodo you need to add a Redirect URI of type Authorization.
In Authentik versions before 2026.5, all Redirect URIs were automatically treated as Authorization-type URIs. In that case it’s enough to add just the Authorization URL and not configure a Post Logout URI.
1. Creating the Application and Provider in Authentik#
Log in to Authentik as an administrator. Open the Authentik admin interface and go to:
Applications → Applications
Click New Application.
Authentik lets you create a pair right away:
- Application
- OAuth2/OpenID Connect Provider
Application#
In the Name field, enter a clear application name:
KomodoIf needed, you can select an application group and configure display settings. Pay attention to the Slug field.
For example:
komodoYou’ll need this slug for Komodo’s config later. It’s actually been auto-generated by Authentik since around 2023, so I’m honestly not sure why every guide feels the need to call it out.
2. Creating the OAuth2/OpenID Connect Provider#
In the Choose a Provider type section, select:
OAuth2/OpenID ConnectThen configure the Provider.
Name#
You can enter:
Komodo OIDCor leave the name Authentik suggests automatically.
Authorization flow#
Choose an appropriate Authorization Flow.
If you already use a standard flow for OIDC applications, you can use it here.
Client ID#
Authentik will automatically create a:
Client IDSave this value - you’ll need it in Komodo’s configuration.
Client Secret#
Also save the:
Client SecretThis is the secret Komodo will use when communicating with Authentik.
Important: the Client Secret must not be published or placed in a public Git repository.
3. Configuring the Redirect URI#
This is one of the most important integration parameters. In the Provider settings, find Redirect URIs.
For Komodo, add:
https://komodo.stilicho.ru/auth/oidc/callbackFor Authentik 2026.5 and newer, set:
Type: Strict
Mode: Authorization
The resulting entry should look roughly like this:
Strict | Authorization | https://komodo.stilicho.ru/auth/oidc/callbackWhy This Particular Address?#
Once authorization succeeds, Authentik has to hand the user back to Komodo somehow.
Komodo listens for the OIDC result at:
/auth/oidc/callbackSo the full URL just combines Komodo’s address:
https://komodo.stilicho.ruand the callback:
/auth/oidc/callbackWhich gives you:
https://komodo.stilicho.ru/auth/oidc/callbackImportant: the URL has to match Komodo’s real address exactly. You can’t sneak in
http://if Komodo is only actually reachable overhttps://.
4. Signing Key#
Pick any available signing key here. If Authentik’s default one is already sitting there, that works fine too.
5. Bindings - optional#
Configure Bindings is where you can lock the application down to specific users. For instance, you could create a binding that limits Komodo access to a particular group. Don’t need that kind of restriction right now? Skip it.
6. Launch URL - optional#
For the Launch URL you can specify:
https://komodo.stilicho.ru/auth/oidc/loginThat way you can kick off Komodo’s login straight from Authentik’s Application Dashboard.
7. Saving the Application#
Once you’re happy with the config, hit:
Submit
Authentik now has this chain wired up:
Application
    │
    └── OAuth2/OpenID Connect Provider
             │
             ├── Client ID
             ├── Client Secret
             ├── Redirect URI
             └── Signing Key
Save the following values:
Application Slug
Client ID
Client Secret
You’ll need all three for the Komodo side of things.
Configuring Authentik in Komodo’s Environment File#
Time to feed Komodo the Authentik connection details. These go into:
compose.envThis file is loaded into the Komodo Core container via:
env_file: ./compose.envAdd or change the following variables:
KOMODO_HOST=https://komodo.stilicho.ru
KOMODO_OIDC_ENABLED=true
KOMODO_OIDC_PROVIDER=https://Authentik.stilicho.ru/application/o/<application_slug>/
KOMODO_OIDC_CLIENT_ID=<client_id_from_Authentik>
KOMODO_OIDC_CLIENT_SECRET=<client_secret_from_Authentik>
For example:
KOMODO_HOST=https://komodo.stilicho.ru
KOMODO_OIDC_ENABLED=true
KOMODO_OIDC_PROVIDER=https://Authentik.stilicho.ru/application/o/komodo/
KOMODO_OIDC_CLIENT_ID=xxxxxxxxxxxxxxxxxxxxxxxx
KOMODO_OIDC_CLIENT_SECRET=xxxxxxxxxxxxxxxxxxxxxxxxxxxxxxxx
One thing to keep in mind: Komodo has no way to spin up an OIDC user with admin rights straight away. Your very first login always goes through the local admin account set up via KOMODO_INIT_ADMIN_USERNAME/PASSWORD.
Launching#
Before you bring the containers up, there’s one small trick worth doing - a symlink that lets Docker Compose pick up the variables automatically, without needing the --env-file flag every time:
cd /home/stilicho/docker/komodo
ln -s compose.env .env
docker compose up -d
Skip the symlink and run docker compose up -d without --env-file compose.env, and Compose simply won’t substitute the
KOMODO_DATABASE_USERNAME/PASSWORD variables into the mongo service’s environment: block - you’ll get a warning about empty values, and MongoDB will happily initialize with empty credentials. Already ran into this? Wipe the data and start over:
docker compose down
rm -rf mongo/data/* mongo/configdb/*
docker compose up -d
Check the logs to make sure nothing’s on fire:
docker logs komodo-mongo --tail 50
docker logs komodo-core --tail 50
First Login and Activating the OIDC Account#
- Open
https://komodo.stilicho.ru. - Log in as the local admin (
admin/ whatever password you set incompose.env). - Hit the OIDC button and log in through Authentik - Komodo creates your user account on the spot, already active thanks to
KOMODO_ENABLE_NEW_USERS=true. - Log back in as the local admin → Settings → Users → find your freshly created OIDC user → bump them up to Admin.
From here on, Authentik login is your daily driver, and the local admin just sits in reserve as a fallback.
A nuance worth knowing about KOMODO_OIDC_AUTO_REDIRECT=true. Turn this on and it’ll automatically bounce every unauthenticated visitor straight to Authentik, skipping right past Komodo’s own login form - even in incognito. Which means you can’t log in as the local admin the normal way anymore. If you need the local login form back (say, to promote that fresh OIDC user to admin), flip the redirect off temporarily:
# in compose.env
KOMODO_OIDC_AUTO_REDIRECT=false
docker compose up -dLog in as admin, make whatever changes you need, then flip KOMODO_OIDC_AUTO_REDIRECT back to true and run docker compose up -d once more.
Komodo’s Features and Where to Find Things#
Before we get into configuration, let’s take a quick tour of the interface - what Komodo actually does, and where to find it once you’re logged in. The left-hand menu breaks into a handful of resource sections:
- Servers - your connected Docker hosts (you’ll have at least one - the local box - plus anything hooked up via Periphery, like the Immich host further down). Connection status, CPU/RAM/disk, Docker version - it’s all here.
- Stacks - basically Portainer’s “Stacks,” Komodo-flavored: this is where you manage docker-compose projects, and where your migrated stacks land (more on that below).
- Containers - a flat, all-servers view of every container, with start/stop/restart/logs/exec at your fingertips, no stack context required.
- Builds - for when you want Komodo itself building Docker images straight from a git repo (this is the CI piece Portainer just doesn’t have).
- Repos - git repositories Komodo clones and watches for you, ready to trigger an auto-redeploy on webhook.
- Procedures and Actions - multi-step automation chains (“stop stack A → back it up → update the image → bring it back up”), runnable by hand, on a schedule, or via webhook.
- Syncs - declarative config: describe your stacks, servers, and procedures as TOML files in git, and Komodo reconciles reality to match - Terraform, but for your homelab.
- Alerts - your alert history.
- Settings - users, roles, API keys, and notification webhooks (Discord, Slack, Telegram, Gotify, take your pick).
For a typical homelab, Servers and Stacks will eat up 80% of your time - everything else kicks in as your setup grows more ambitious (git builds, config sync, and so on).
Migrating Existing docker-compose Stacks into Komodo#
Here’s the thing to understand up front: unlike Dockge, Komodo does not scan your host or pick up already-running compose projects on its own. Every stack has to be explicitly declared - you tell Komodo where its files live and which server it belongs to (the full mechanics are in the official Docker Compose / Stacks docs). There’s no built-in tool for auto-migrating from Portainer specifically - the devs say as much themselves in a GitHub discussion - so it’s manual, stack by stack (there’s a community utility, komodo-import, that generates config from existing folders, but it’s third-party, not something Komodo ships with). I just did it by hand.
The good news is you don’t need to stop anything while you do this. Portainer and Komodo happily coexist while you migrate one stack at a time, so nothing in your running setup gets interrupted.
How to Migrate One Stack#
Servers → pick a host (or just go to Stacks → Create Stack).
Name the stack - and it has to match the existing compose project’s name. Not sure what that is? Check:
docker compose lsPick a file source - there are three options:
- UI Defined - paste your compose file straight into the web UI; Komodo writes it to the host itself at deploy time.
- Files on Server - point at a compose file that already exists on the host. This is the one you want for migrating existing stacks - just point it wherever they’re already sitting, e.g.
/home/alaricus/docker/vaultwarden. - Git Repo - Komodo clones the repo onto the host and deploys from there; changes get tracked in git, and you can wire up auto-redeploy on push via webhook.
Going with Files on Server? Make sure
Run Directory(the folder holding the compose file) andFile Paths(usuallydocker-compose.yaml,docker-compose.yml, orcompose.yaml) are both correct.If the stack has its own
.envfile - and plenty of mine did - don’t try to rebuild it inside the Environment field in the UI. Use Additional Env Files instead, point it at.env(relative toRun Directory), and be sure to uncheck “Track” - that checkbox exists for files you’re going to keep editing by hand on disk, not through Komodo.Attach the stack to whichever Server it belongs on (for the local box, that’s the one named
Local).Hit Deploy - or Refresh first, if you just want Komodo to read the current state without touching the containers. If containers with that same project name are already running, Komodo just adopts them into management instead of recreating them from scratch.
A path gotcha with remote hosts. Migrating a stack onto a host running a Periphery agent? The compose file’s path has to fall inside that agent’s
root_directory. This isn’t just a container thing - it applies to both install methods. I initially assumed the systemd install was exempt from this restriction; it isn’t.root_directoryis a hard limit baked into Periphery itself, not some side effect of Docker mounts. For the container, that means the path needs to sit inside the mountedPERIPHERY_ROOT_DIRECTORY; for systemd, it needs to matchroot_directoryinperiphery.config.toml. Either way, every stack has to physically live inside that path.
If You Hit “No Such File or Directory”#
This is far and away the most common error on your first stack migration, and it almost always boils down to one thing: the containerized Periphery literally can’t see the directory you pointed it at, because PERIPHERY_ROOT_DIRECTORY is scoped too narrowly - pointing at just komodo itself, say, instead of the parent directory holding all your projects (see the warning near the top of this article).
Here’s how to track it down step by step:
1. Confirm Periphery can actually see the stack’s directory:
docker exec komodo-periphery ls /home/stilicho/docker/<stack_name>Getting No such file or directory? The mount’s too narrow - on to step 2.
2. Make sure the .env → compose.env symlink actually exists (skip it, and PERIPHERY_ROOT_DIRECTORY from compose.env never gets substituted into docker-compose.yaml on container recreation):
ls -la ~/docker/komodo/.envNothing there? Create it (see “Launching” above).
3. Point PERIPHERY_ROOT_DIRECTORY in compose.env at the parent folder holding all your stacks, then recreate the containers from the project folder itself:
cd /home/stilicho/docker/komodo
docker compose down
docker compose up -d
Important: it’s down + up, not restart.
4. Verify the actual mount on the running container:
docker inspect komodo-periphery --format '{{range .Mounts}}{{.Source}} -> {{.Destination}}{{"\n"}}{{end}}'You should see your new parent directory listed there, not the old, narrower path.
5. Head back to the stack page in the Komodo UI and hit Refresh again (the UI sometimes hangs onto a cached result from your last attempt - if the error’s stubborn, refresh the whole browser tab).
Bulk Migration via Sync#
Got a pile of stacks and no patience for migrating them one by one in the UI? Describe them all declaratively via Syncs instead - TOML resource definitions that Komodo applies in a single pass. Details are in the official Sync Resources docs. For a homelab with a dozen or two containers, clicking through the UI is honestly usually faster than wrestling with TOML syntax - but once you’re at fifty stacks, Sync starts paying for itself. Thankfully I haven’t hit that number on a single host yet.
One Komodo Core can juggle several Docker hosts at once - you just need the Periphery agent running on each extra host. I’ve got a separate box running Immich in Docker that I connected exactly this way.
Periphery runs fine as a Docker container (already baked into our docker-compose.yaml for the local host), but for remote hosts, the officially recommended route is a systemd install instead - simpler, and it sidesteps the headaches of mounting the socket and paths through a container layer. Every installation method is covered in full in the official “Connect More Servers” docs.
Root Installation (Recommended Method)#
On the target host where you want to install the agent:
curl -sSL https://raw.githubusercontent.com/moghtech/komodo/main/scripts/setup-periphery.py \
  | sudo python3 - \
  --core-address="https://komodo.stilicho.ru" \
  --connect-as="immich-host" \
  --onboarding-key="O-your_key_from_UI"
Grab --onboarding-key from the Komodo UI under Servers → Add Server, which generates a one-time O-... key that links the new agent back to your Core.
Turn on autostart:
sudo systemctl enable periphery
sudo systemctl status periphery
User Installation (Without a Root Service)#
Not a fan of root services? Install Periphery as a user-level systemd service instead:
curl -sSL https://raw.githubusercontent.com/moghtech/komodo/main/scripts/setup-periphery.py \
  | python3 - --user \
  --core-address="https://komodo.stilicho.ru" \
  --connect-as="immich-host" \
  --onboarding-key="O-your_key_from_UI"
Make sure to enable linger, or the service dies the moment you log out of your SSH session:
sudo loginctl enable-linger $USERPitfalls I Hit (and How to Avoid Them from the Start)#
As of this writing, the user-install script does not touch root_directory in the config - it stays at the default /etc/komodo, which a regular user has zero write access to. So the service just crashes:
Failed to write private key pem to "/etc/komodo/keys/periphery.key"
Caused by: Permission denied (os error 13)
And here’s pitfall number two, which I only found out about later while trying to migrate an existing immich stack into Komodo: root_directory isn’t just “where the keys live” - it’s the only place Periphery is capable of seeing any files at all, full stop. That goes for the systemd install too, not just the container - I’d wrongly assumed otherwise. Point it at a narrow path like ~/.local/share/komodo, and Periphery simply won’t be able to find your real compose projects sitting elsewhere (say, ~/docker/immich) - try adding a Stack and you’ll just get No such file or directory.
Save yourself the trouble and set this correctly from the start - the parent directory holding all your compose projects on this host, present and future:
nano ~/.config/komodo/periphery.config.tomlroot_directory = "/home/<your_user>/docker"Create the directory as yourself, not with sudo mkdir - otherwise root ends up owning it again, and you’re right back where you started with permissions:
mkdir -p /home/<your_user>/dockerRestart:
systemctl --user daemon-reload
systemctl --user restart periphery
journalctl --user -u periphery -n 30 --no-pager
You should see this show up in the log:
INFO PeripheryStartup: PeripheryConfig { ... root_directory: "/home/<your_user>/docker", ... }
INFO Logged in to Komodo Core komodo.stilicho.ru websocket as Server immich-host
Already onboarded using the old, narrow path (like I did, unwittingly)? Once you change
root_directory, Periphery goes looking for the keys (periphery.key,periphery.pub,core.pub) at the new path - and they won’t be there. Easiest fix: just copy them over from the old location so you don’t have to onboard from scratch:mkdir -p /home/<your_user>/docker/keys cp /home/<your_user>/.local/share/komodo/keys/* /home/<your_user>/docker/keys/Restarting the service after that should just work, no re-onboarding needed.
Confirm the folder you need (immich, in my case) is now visible:
ls /home/<your_user>/docker/immichFiles showing up? Head back to the Komodo UI and create a Stack the exact same way we did for local stacks (Server → immich-host, Source → Files on Server, Run Directory → /home/<your_user>/docker/immich, File Paths → your compose file’s actual name - check it with docker compose ls on that host).
While you’re at it, confirm your user’s actually in the docker group - otherwise Periphery has no way to reach docker.sock:
groups $USER
sudo usermod -aG docker $USER   # if needed - then log back in
Checking in the UI#
Once onboarding succeeds, the new host shows up in the Komodo UI under Servers as “Connected,” complete with live metrics (CPU/RAM/disk) and that host’s full container list - Immich included, in my case. From there it’s all manageable straight from Komodo - deploy, restart, logs - no SSH required.
“Version Mismatch” - When Core and Periphery Drift Apart#
Here’s something that bit me separately, well after everything was up and running smoothly. Core on my main host sits on the floating tag COMPOSE_KOMODO_IMAGE_TAG=2, so it grabs whatever the latest minor version is every time the container gets recreated - mine quietly crept from v2.3.1 to v2.3.2 over a couple of weeks without me touching anything. Periphery on the remote host, though, doesn’t self-update like that - it just sits on whatever version the install script put there. Eventually the two drift apart, and Komodo’s UI flags it with a “Version Mismatch” warning right next to that server in the Servers list.
The fix is just reinstalling Periphery with the same script, minus the --onboarding-key flag - the server’s already connected, so there’s no need to pass the key again (it’s a one-time-use thing anyway and won’t work twice). The script only touches the binary; config and keys are left alone:
curl -sSL https://raw.githubusercontent.com/moghtech/komodo/main/scripts/setup-periphery.py \
  | python3 - --user \
  --core-address="https://komodo.stilicho.ru" \
  --connect-as="immich-host"
You’ll see Config ... already exists, skipping and service file already exists ... skipping in the output - that’s expected, nothing but the binary changes.
Next up, restart the service - and this is where a whole separate gotcha ambushed me:
systemctl --user restart peripheryGet Failed to connect to bus: No medium found, with journalctl showing no fresh restart entry afterward? That means XDG_RUNTIME_DIR isn’t set in your current SSH session - easy to check with echo $XDG_RUNTIME_DIR; empty output is your answer. For me, a fresh SSH session fixed it outright, since a proper interactive login lets PAM set that variable correctly on its own:
exit
# log back in via SSH
systemctl --user restart periphery
Still stuck? Check linger - a host reboot, for instance, can reset it:
loginctl show-user <your_user> | grep Linger
sudo loginctl enable-linger <your_user>   # if Linger=no
To confirm it worked, check both the version in the log and the current start time in the service status:
journalctl --user -u periphery -n 10 --no-pager | grep "Periphery version"
systemctl --user status periphery
Active: active (running) since ... should reflect the restart you just did, and the version needs to line up with Core’s. Once that’s true, the “Version Mismatch” warning in the UI clears up (though sometimes you’ll need to refresh the page for it to catch up).
Disk Monitoring and Alerts#
Komodo can alert you about disk usage on every connected server. To get an accurate number for the root partition specifically - rather than something skewed by how the counting works - compose.env already sets:
PERIPHERY_INCLUDE_DISK_MOUNTS=/etc/hostnameThis got me an alert almost immediately (this is my actual one, not a mock-up):
{
  "name": "Local",
  "path": "/etc/hostname",
  "used_gb": 178.38,
  "total_gb": 228.39
}- and no, that’s not a Komodo bug, that’s your disk actually being that full. I dug into what was eating the space:
docker system df -v
sudo du -xh --max-depth=1 / | sort -rh | head -20
Worth noting the -x flag on du - it keeps the command from wandering into other mounted filesystems (network shares under /mnt, say), so what you’re seeing is genuinely just local disk usage. And don’t skip sudo - without it, du quietly skips over directories like /var/lib/docker that a regular user can’t read, which’ll leave you with a number that’s way too low.
I cleaned out the clutter, and the alert went away on its own.
Wrapping Up#
Here’s what we ended up with:
- MongoDB as the database (without FerretDB/Postgres);
- bind mounts instead of named volumes for all data;
- Traefik routing by domain;
- login via Authentik (OIDC) with a fallback to the local admin;
- an additional host connected via Periphery as a systemd agent.
The biggest practical takeaway from all this is that root_directory/PERIPHERY_ROOT_DIRECTORY needs to be figured out before your first deploy, not after you’re staring at No such file or directory. This limit applies equally to the containerized Periphery and the systemd agent (remote hosts like my immich-host included) - point it at the parent directory holding all your compose projects on that host right from the start, not some narrow service folder. I burned a lot of time on this one just trying to figure out what was wrong with me, not the config.
Second lesson, this one more of an ongoing maintenance thing: if Core updates itself automatically off a floating tag while you’re installing Periphery on remote hosts by hand via script, the two will eventually drift apart. Not a disaster - a Periphery reinstall fixes it in a couple of minutes - but worth keeping on your radar, and maybe checking version parity every so often instead of waiting for the UI to flag it.
Along the way I also walked through what the interface actually looks like, and how to bring already-running compose stacks into Komodo with zero downtime.
Still on the to-do list: Builds and Repos - building images straight from git, and a proper CI/CD workflow. I’m planning a video on setting up Forgejo as a self-hosted git server and hooking it into Komodo for automatic builds and webhook-triggered deploys - more on that in a future article.