
If you enjoyed this article, you can become a sponsor on Boosty.
Introduction#
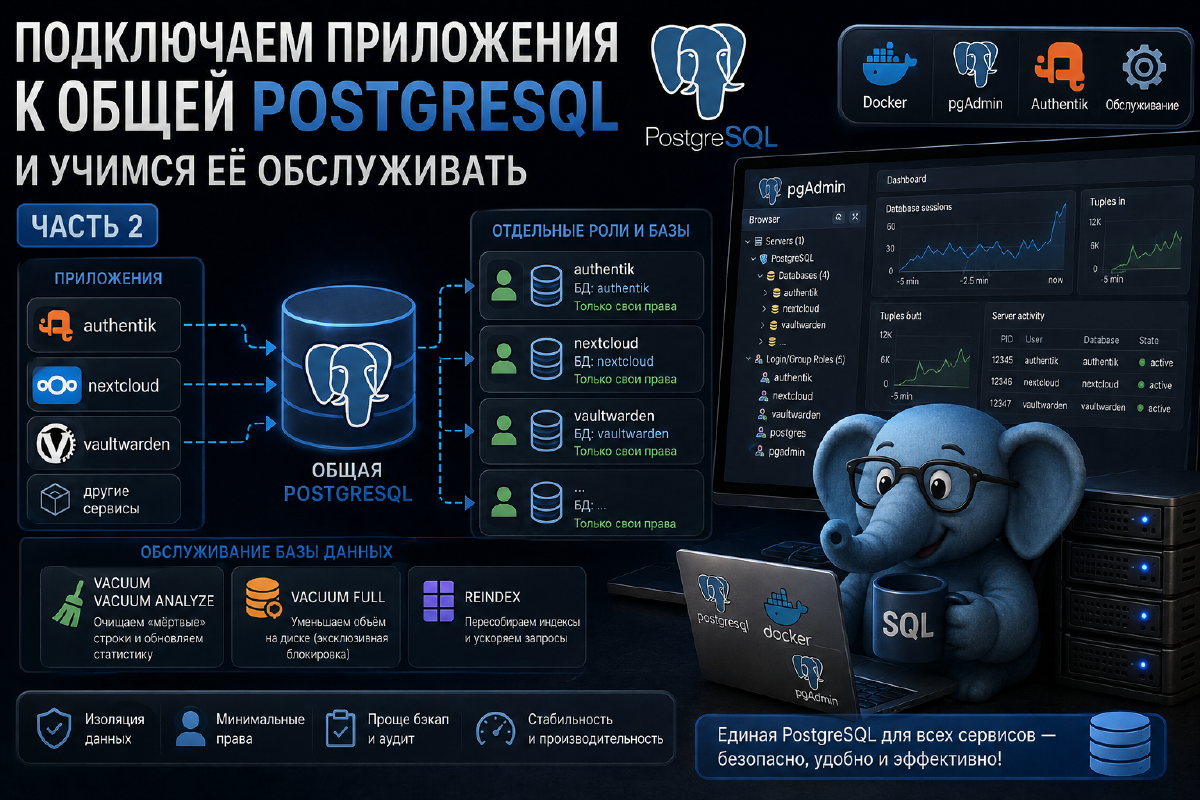
In part one we set up a shared PostgreSQL and pgAdmin in Docker and agreed that going forward we’d migrate every service that needs a database over to it, instead of each application having its own dedicated database container. Back then I left a disclaimer that connecting third-party applications to the shared database was a topic for a separate article. It only took me about three years to make good on that promise. Here’s that article.
Today we’ll cover three things that logically follow one another:
- How to properly create a user and database for a specific application - not just any old way, but following the principle of least privilege.
- How to actually connect a real service to our shared PostgreSQL - as an example we’ll use Authentik, since there’s already a separate series of articles about it on the blog.
- What “database maintenance” even means, and when you actually need to do it by hand versus when PostgreSQL handles it on its own.
Why you shouldn’t let every application connect as one superuser#
The simplest (and worst, even terrible) option is to hand out the login and password of the postgres superuser we created in part one to every application, and not bother with anything else. You really can do this, and it will work. But this approach has a cumulative downside that doesn’t show up right away:
- any application with superuser-level access could technically reach into other databases on the same server - including ones holding data for other services;
- if a vulnerability is found in one of the applications (SQL injection, RCE, whatever), it’s not just that app’s own database that gets compromised - the entire PostgreSQL instance is exposed;
- backing things up, cleaning access logs, and figuring out who did what to the database is much simpler when each application has its own user and its own database.
So the correct setup is: each application gets its own database and its own user, with permissions only and exclusively on that database. Below I’ll show how to do this in pgAdmin, using Authentik as an example - which, incidentally, is exactly the access pattern officially recommended for it (no surprise there).
Creating a user and database for an application#
Log into pgAdmin (see part one for how to connect to the server and set up a connection there) and repeat the steps below for each new application. The example is for Authentik - you can use whatever username and database name you like.
Step 1. Create a role (user)#
In the tree on the left: Servers → your Postgres server → Login/Group Roles, right-click → Create → Login/Group Role…
- General tab → Role name:
authentik - Definition tab → Password: come up with a password, you’ll need it in the application’s
docker-compose.yml - Privileges tab → enable only
Can login, leave everything else (superuser, create role, create db, etc.) disabled
Save. At this point the authentik user has no permissions on anything except being able to connect to the server - that’s intentional, we’ll grant permissions selectively in the next steps.
Step 2. Create the database#
Databases → right-click → Create → Database…
- Database:
authentik - Owner:
authentik(the same user from step 1)
Save - the database immediately belongs to the right user, no additional permissions need to be granted.
Step 3. Grant permissions on the public schema#
This is a required step for most applications (Authentik included) - they create their own tables on first launch, and for that they need permission to create objects in the schema. Right-click the authentik database → Query Tool, and run:
GRANT USAGE, CREATE ON SCHEMA public TO authentik;Step 4. Permissions on existing tables (if the database isn’t empty)#
If you’re creating the database from scratch, you can skip this - the application will create its tables already owned by the right user. But if you’re recreating the database for an already existing application (for example, migrating it from its own database container to the shared one, as in this article), you need to grant permissions on the already-migrated tables separately:
GRANT SELECT, INSERT, UPDATE, DELETE ON ALL TABLES IN SCHEMA public TO authentik;Step 5. Verify that everything works#
In the same Query Tool for the authentik database:
CREATE TABLE authentik_test (
    id SERIAL PRIMARY KEY,
    name TEXT
);
INSERT INTO authentik_test (name) VALUES ('ok');
SELECT * FROM authentik_test;
DROP TABLE authentik_test;
If all four commands run without access errors, the user and database are set up correctly, and you can move on to connecting the application itself.
By the way, here’s what we ended up with, laid out as a table.
| Component | Value |
|---|---|
| User | authentik |
| Database | authentik |
| Permissions | CONNECT + CREATE + full access to its own schema, and nothing beyond it |
Connecting Authentik to the shared PostgreSQL#
If you’re deploying Authentik from scratch, follow the initial setup article, with one difference: don’t create a dedicated postgresql container for Authentik in the docker-compose.yml - we already have a shared one from part one of this series.
Remove the postgresql service from Authentik’s compose file and add the Authentik service to the same database docker network where our shared Postgres lives:
services:
  server:
    image: ${AUTHENTIK_IMAGE:-ghcr.io/goauthentik/server}:${AUTHENTIK_TAG:-2026.5.1} # check the latest tag on the releases page before installing
    command: server
    environment:
      AUTHENTIK_SECRET_KEY: your_secret_key
      AUTHENTIK_POSTGRESQL__HOST: postgres          # the name of the container with the shared database from part one
      AUTHENTIK_POSTGRESQL__NAME: authentik
      AUTHENTIK_POSTGRESQL__USER: authentik
      AUTHENTIK_POSTGRESQL__PASSWORD: password_from_step_1
      AUTHENTIK_POSTGRESQL__PORT: 5432
    networks:
      - proxy
      - database                                    # the same network where the shared postgres lives
    # the remaining variables and redis are unchanged, see the initial setup article

networks:
  proxy:
    external: true
  database:
external: trueIt’s good practice to move all sensitive values out into a separate .env file.
If Authentik used to reach its database via the internal docker name authentik-postgresql, it now connects to the same postgres container as all the other connected services - just with its own login, password, and database name, which we set up in the previous section. From PostgreSQL’s point of view, these are two completely isolated “worlds,” physically running on the same instance.
If you’re migrating an already running Authentik from its own database to the shared one, rather than deploying from scratch, be sure to take a dump via pg_dump from the old container and restore it into the new database via pg_restore or psql before changing the environment variables and removing the old container. The exact procedure for this scenario deserves its own discussion - I won’t try to compress it into a couple of lines here, so as not to give you a false sense that it’s trivial.
The same principle - separate role, separate database, GRANT limited to its own schema - applies to any other application: Nextcloud, Linkwarden, Vaultwarden, and anything else that can work with an external PostgreSQL.
Basic PostgreSQL maintenance#
It’s worth dispelling a myth right away: PostgreSQL does not need to be manually maintained on a “log in once a week and hit VACUUM” basis. PostgreSQL has autovacuum enabled by default - a background daemon that watches tables and runs VACUUM/ANALYZE on its own once enough “dead” rows (deleted or updated but not yet physically freed) have accumulated. For the vast majority of home-scale self-hosted scenarios, autovacuum handles everything on its own, and there’s nothing to do by hand.
Manual maintenance makes sense in specific situations:
VACUUM and VACUUM ANALYZE#
VACUUM;
VACUUM ANALYZE;
VACUUM marks the space occupied by deleted/stale rows as reusable, but it does not return that space to the operating system - the file on disk doesn’t physically shrink. VACUUM ANALYZE additionally refreshes the table statistics used by the query planner - useful to run by hand after a bulk load or a large single-operation delete, when you don’t want to wait for autovacuum to get around to it.
VACUUM FULL#
VACUUM FULL;This is the only command that actually shrinks the database file on disk - it physically rewrites the table. But it comes at a cost: VACUUM FULL takes an exclusive lock on the table for the entire duration of the operation - nobody can read from or write to it until the command finishes. On a large table in a live service, that can mean noticeable downtime. Use it selectively - for example, after a one-off deletion of a huge number of rows (cleared out old logs, wiped half the database) - not as a routine scheduled operation. In a homelab, though, needing this operation at all is pretty much science fiction.
REINDEX#
REINDEX DATABASE authentik;Rebuilds the database’s indexes from scratch. Indexes in PostgreSQL accumulate bloat over time too, especially on tables with frequent updates - REINDEX is worth running if you notice queries have gotten noticeably slower than before, even though the data volume hasn’t grown much.
To access the console for a specific database, run docker exec -it postgres psql -U authentik -d authentik (swap in your own names) - or run the same commands via Query Tool in pgAdmin, as in the database-creation section above. Don’t forget the ; at the end of each command.
If you’re an Authentik user and the worker keeps dropping out#
A specific practical case worth keeping in mind especially for Authentik owners. If you occasionally get errors about the worker being unavailable or dropping, in my experience it usually helps to run the full set of maintenance commands together rather than one at a time:
- Connect to the console of the database container (in my case, an external container with the shared database, as in this article - yours may differ if Authentik hasn’t been migrated to the shared Postgres yet):
docker exec -it postgres psql -U authentik -d authentik- Run the full set of maintenance commands in sequence:
VACUUM;
VACUUM ANALYZE;
VACUUM FULL;
REINDEX DATABASE authentik;
For me this reliably resolves the issue. But as I mentioned above, VACUUM FULL locks the whole table for the duration of the operation - on a live instance under real load, do this during a maintenance window, not in the middle of the working day.
I didn’t find an official GitHub issue that directly links this specific worker error to needing VACUUM - the Authentik tracker has a few adjacent threads about worker issues with PostgreSQL after dropping Redis in version 2025.10.0 (#19302, #20644), but their fixes were through code changes in newer versions and connection tuning, not VACUUM. The one issue where VACUUM ANALYZE explicitly helped, with numbers to back it up (#24179), was about performance degradation caused by Postgres’s JIT compiler due to stale statistics, not about the worker itself. So the approach described above is my own working practice, not a documented fix from the developers. Use at your own risk.
For more on PostgreSQL maintenance, see the official documentation.
Summary#
Now we have more than just “a database in Docker” - we have a working setup: a shared PostgreSQL instance, with each application isolated behind its own user and its own database with permissions limited to it, plus an understanding of when maintenance needs to be done by hand versus when PostgreSQL handles it beautifully on its own via autovacuum. From here you can gradually migrate the rest of your self-hosted services from their own database containers to this shared setup - the principle is the same for all of them, only the username and database name differ.