
In Proxmox VE, SDN (Software Defined Networking) is the subsystem for managing virtual networks, on board since version 7. It takes a lot of the pain out of wrangling network infrastructure inside a cluster, and lets you spin up flexible, isolated, scalable networks for your VMs and containers.
The Basics of Proxmox SDN#
1. Why Bother With It#
- Makes standing up private networks inside a Proxmox cluster much easier.
- Isolates traffic between different users or projects.
- Scales cleanly across multiple cluster nodes.
- Automates routing, NAT, DHCP, and DNS configuration for you.
2. The Moving Parts#
- Zones - logical network segments (say, one per project or client).
- VNets - live inside zones, define the L2/L3 topology.
- Controllers - manage the actual network settings (via EVPN, VXLAN, BGP, etc.).
- IPAM/DNS - the built-in system handling IPs and names.
3. Zone Types on Offer#
- Simple (VLAN-aware bridge) - your standard bridge + VLAN setup.
- VXLAN - an overlay network, tunneled over IP.
- EVPN - the heavier-duty option for hooking into a proper datacenter network via BGP.
- QoS zones - lets you cap bandwidth.
4. A Quick Example#
- Say you’ve got a 3-node Proxmox cluster.
- You create a VXLAN SDN zone so VMs on different hosts land on the same L2 network.
- Proxmox quietly builds tunnels between the nodes, and your VMs/containers see each other as if they were sitting on the same LAN.
The Competition#
Proxmox SDN lets you pull off cloud-style setups reminiscent of OpenStack/VMware NSX - just in a much friendlier package.
About This Article#
This article’s a companion piece to the video up top. I’m going to walk through a basic SDN setup - enough to actually understand how SDN behaves inside Proxmox.
Before You Start#
SDN has shipped in Proxmox by default since 8.1. Running something older? You’ll need to grab the required packages from your node’s shell first:
apt update
apt install libpve-network-perl
Once that’s installed, make sure this line is sitting at the end of /etc/network/interfaces on every node (assuming you’re running a cluster) - that’s what actually pulls in and activates the SDN config:
source /etc/network/interfaces.d/*PVE’s built-in IP address management currently leans on dnsmasq for handing out DHCP leases. To make use of that, install dnsmasq on every node.
apt update
apt install dnsmasq
# disable default instance
systemctl disable --now dnsmasq #turn off the dhcp server so it doesn't fight with your router
Setting Up SDN for the First Time#
In the Datacenter menu, click the SDN tab. You’ll see whatever networks currently exist - how many there are depends on how many nodes you’ve got. In my case, just the one local network.
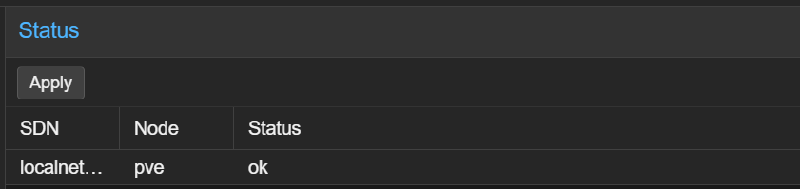
Time to create our first network (okay, technically second). Head into Zones, click add, and you’ll see a handful of zone types to pick from.
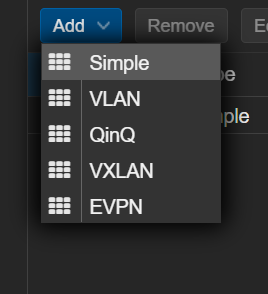
Since we’re keeping this basic, we’ll go with simple.
I’m using youtube as the ID. I’ll leave MTU at its default - though heads up, some regions do run into trouble with the default 1500 MTU, so 1460 is worth trying if that happens to you. Same menu, I’ll set DHCP to auto-configure. Click add.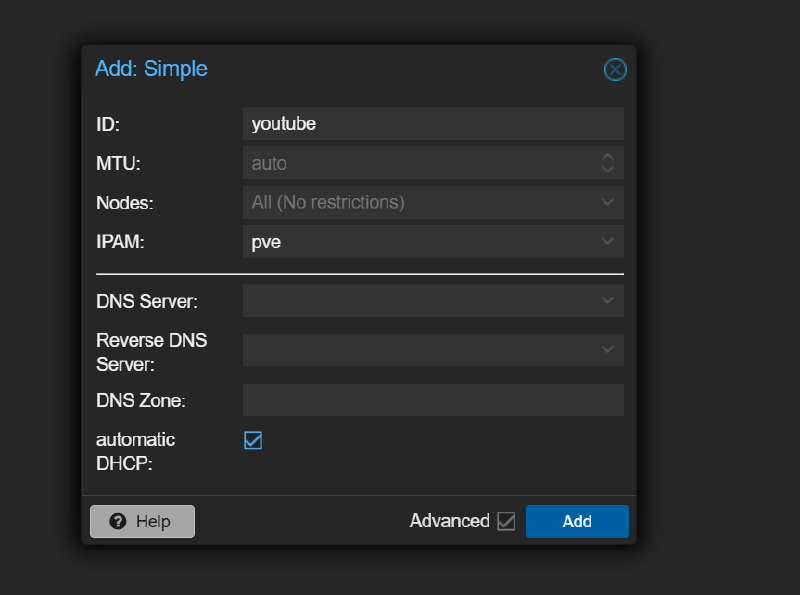
The final screen shows our zone’s settings. Next, over to VNET, and click create.
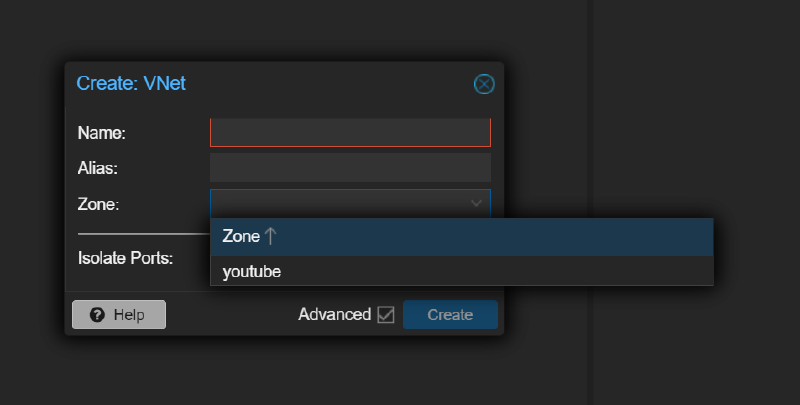
Pick whatever name and alias you like, then select the zone you just created. Leave everything else default - as mentioned, this is a bare-bones setup, no VLANs or anything fancier.
That’s our first virtual network sorted. Once it exists, a new subnet menu shows up. In the vnet menu, pick your new network and jump into the subnet tab.
Click create - we’re about to build our subnet, isolated from the rest of the home network.
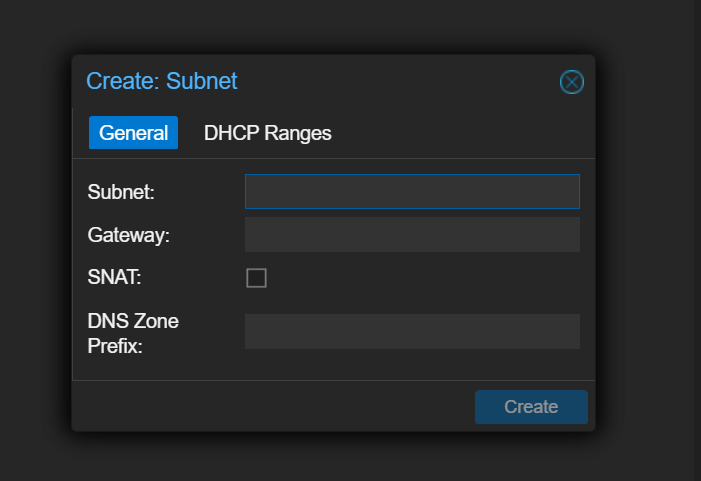
Let’s set the subnet’s address. I’ve got a thing for odd numbers, so I’ll go with 11.11.11.0/24 (not exactly best practice for production, mind you). Gateway address: 11.11.11.1. Check the snat box - this lets everything on the subnet share one external IP so it can reach the outside world. Leave DNS alone.
Best practice is to keep your networks inside proper private address ranges to dodge unpleasant surprises down the road - stick to something like 10.10.10.0/24. But since this subnet is meant to stay isolated from the outside unless we explicitly say otherwise, what we’ve got here will do just fine.
Now let’s set the DHCP range. Nothing fancy, 100 to 199 will do. Click create.
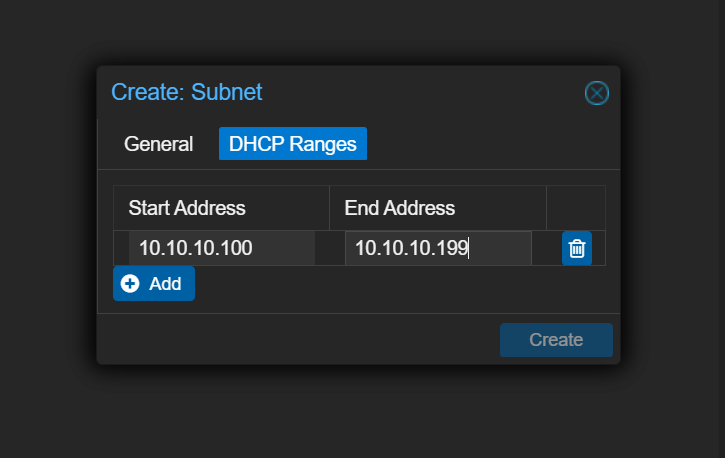
Zone, vnet, subnet - all done. To actually apply this, go to the SDN menu and hit apply. Check your node’s network list now and you’ll see the new network sitting right next to localnetwork. And that’s it - the foundation for our little SDN setup is in place.
To actually see this working, let’s spin up a bare-bones Ubuntu LXC container purely for testing. Set it up as usual, with one small but genuinely important exception.
When you’re picking the bridge for the container, under bridge:
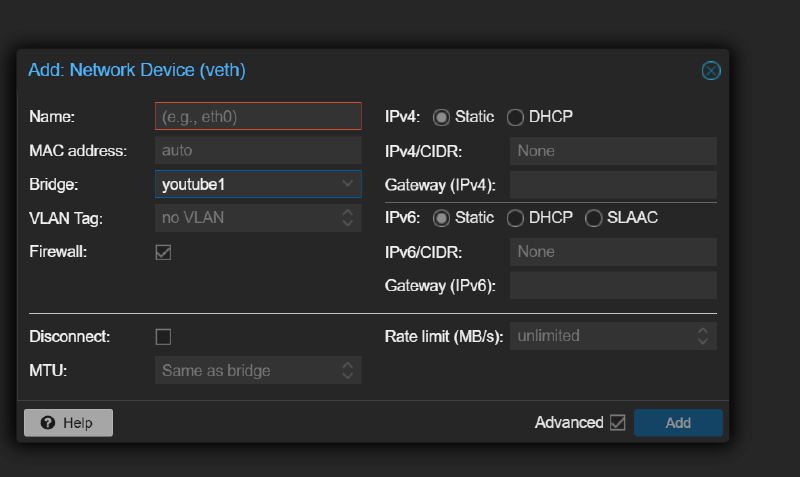
skip vmbr0 - the one you’re probably used to - and pick our newly created network instead. Everything else stays default. You can jump back to Datacenter right now and check IPAM to see the network info for your new container.
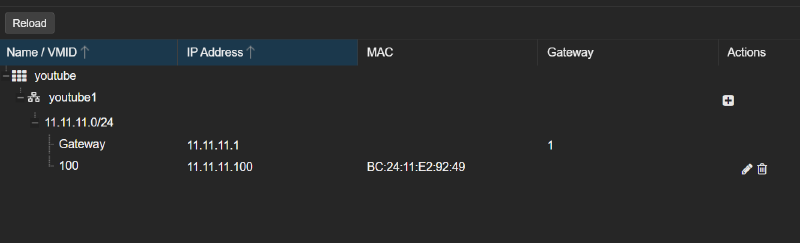
In this case, it landed 11.11.11.100.
Once the container’s up and running, worth checking whether it can actually reach the internet. You could ping <whatever>, but it’s simpler to just run apt update - if it comes back clean, that alone tells you the container’s working and has outbound access.
Now let’s confirm the reverse - that the container is NOT reachable from outside.
From any machine on your local network (not the Proxmox shell itself), try ping 11.11.11.100 - and you’ll get silence. That’s exactly the point: as I mentioned earlier, this container lives on an SDN network that’s isolated from the outside world. Worth noting though - ping it from your node’s own shell, and it’ll actually answer, since the network lives inside that node and we haven’t set up any firewall rules yet, so nothing’s stopping the node itself from reaching it.
Firewall configuration inside Proxmox, though - that’s a story for another article.