
Vaultwarden#
Installing Vaultwarden#
Update: I added an advanced setup with SSO (Authentik), push notifications, and moved secrets into an .env file - which is exactly how my own instance runs today.
Password managers in a nutshell#
A password manager encrypts your logins, passwords, notes, and other secrets and auto-fills them when you sign into a site or app. The payoff: strong unique passwords everywhere, on-demand random password generation, sync across all your devices, one place for passwords and SSH keys alike, and a full change history.
What Vaultwarden actually is#
Bitwarden’s official server is written in C# and honestly a bit heavy for a homelab box - which is exactly the gap Vaultwarden fills. It’s one Rust binary and one SQLite file, yet every real Bitwarden client - browser extensions, the phone apps, the desktop app - talks to it and never notices the difference. Same clients, same day-to-day experience, a fraction of the RAM and CPU, and code you (or the dozens of other people contributing to it) can actually read end to end.
Why bother self-hosting it#
The short version - what you actually gain:
- Data ownership: the database and backups live wherever you put them, under your control, not in someone else’s cloud.
- Privacy: no metadata, no backup copies leaking out to third-party services. You’re the only one with the keys.
- Flexibility: hook up LDAP/SMTP, plug in an external database, add SSO through your own identity provider, run your own TLS through a reverse proxy - it’s all yours to configure.
- Lighter footprint: Vaultwarden sips resources compared to the official Bitwarden Server, so it’s both cheaper to run and simpler to manage.
The catch: security is now on you - updates, TLS, backups, firewall rules, rotating secrets, all of it. There’s one point here people love to argue about, though. For some reason a lot of folks assume Bitwarden’s cloud is inherently safer just because it’s a paid commercial product. Sounds reasonable on the surface. In practice, though, corporate cloud services are constant attack targets, and every so often something gets through. Bitwarden itself has had leaks, and its cloud users have had accounts hijacked more than once. Counterintuitive as it sounds, you’ll end up guarding your own little Vaultwarden instance far more carefully than any provider guards theirs. And that’s not even counting the fact that - no offense - you’re just not that interesting a target to begin with.
The game plan#
- Start with a basic
docker-compose.yml- just enough to get a working server. - Move on to the advanced setup: secrets pulled into
.env, SSO via Authentik, push notifications, and some Rocket/logging tweaks - this is what I’m actually running. - Wire up a reverse proxy and TLS.
- Tour the admin panel, user registration, and organizations.
- Cover backups and the mistakes people keep making.
Basic setup#
If all you need is a working server without SSO or any of the extra bells and whistles, this is all you need. There’s a more advanced version further down, but starting here is easier.
services:
  vaultwarden:  # Definition of the Vaultwarden service - the main password manager container.
    container_name: vaultwarden  # Container name in Docker - convenient for commands and logs.
    image: vaultwarden/server:latest  # Official Vaultwarden image from Docker Hub (written in Rust).
    restart: unless-stopped  # The container will automatically restart if it crashes, but not after a manual stop.

    volumes:
      - /path/to/bind/mount/:/data/  # Mount a local host directory into /data inside the container.
                                       # This is where the database, attachments, and Vaultwarden config are stored.

    environment:
      - SIGNUPS_ALLOWED=false        # Disallow new user registrations (false) - improves security.
      - ADMIN_TOKEN=replace_with_a_hashed_token  # See the hashing section below - don't store the token in plain text.
      - WEBSOCKET_ENABLED=true       # Enable WebSocket - Bitwarden clients get instant updates.
      - DOMAIN=https://vaultwarden.domain.ru  # Specify the domain - needed for correct links (password reset, TOTP, etc.)
      - TZ=Europe/Moscow             # Set the timezone - correct time in logs and notifications.

    networks:
      - proxy                        # Attach the container to Traefik's external network so the proxy can discover it.

    labels:
      - "traefik.enable=true"

      # --- HTTP → HTTPS redirect ---
      - "traefik.http.routers.vaultwarden.entrypoints=web"
      - "traefik.http.routers.vaultwarden.rule=Host(`vaultwarden.domain.ru`)"
      - "traefik.http.middlewares.vaultwarden-https-redirect.redirectscheme.scheme=https"
      - "traefik.http.routers.vaultwarden.middlewares=vaultwarden-https-redirect"

      # --- HTTPS (secure) ---
      - "traefik.http.routers.vaultwarden-secure.entrypoints=websecure"
      - "traefik.http.routers.vaultwarden-secure.rule=Host(`vaultwarden.domain.ru`)"
      - "traefik.http.routers.vaultwarden-secure.tls=true"
      - "traefik.http.routers.vaultwarden-secure.service=vaultwarden"

      # --- Backend settings ---
      - "traefik.http.services.vaultwarden.loadbalancer.server.port=80"
      - "traefik.docker.network=proxy"

    security_opt:
      - no-new-privileges:true  # The container won't be able to escalate its privileges within the system.

networks:
  proxy:
    external: true  # Use the external Docker network that Traefik already uses.
Notes on the basic setup#
ADMIN_TOKEN- your key into the admin panel (/admin). No token, no access. Head to “Locking down ADMIN_TOKEN” below for how to hash it properly.SIGNUPS_ALLOWED=false- keep this off if the server’s reachable from the internet. Flip it totrueonly long enough to create your first account, then turn it right back off.WEBSOCKET_ENABLED=true- gives you real-time sync between clients. Your reverse proxy needs to support proxyingUpgrade: websocketfor this to actually work.
Advanced setup: .env, SSO, and push notifications#
Once real people start using the service, you’ll want secrets out of the compose file, single sign-on through your own identity provider (mine’s Authentik), and actual push notifications on mobile instead of relying on polling or websockets alone. Here’s what I’m running right now.
docker-compose.yml#
services:
  vaultwarden:
    container_name: vaultwarden
    image: vaultwarden/server:latest
    restart: unless-stopped
    volumes:
      - /path/to/docker/vaultwarden/data:/data
      - /path/to/docker/vaultwarden/logs:/data/logs
    ports:
      - 18083:80
    environment:
      - ADMIN_TOKEN=${VAULTWARDEN_ADMIN_TOKEN}
      - SIGNUPS_ALLOWED=${VAULTWARDEN_SIGNUPS_ALLOWED}
      - SIGNUPS_VERIFY=${VAULTWARDEN_SIGNUPS_VERIFY}
      - INVITATIONS_ALLOWED=${VAULTWARDEN_INVITATIONS_ALLOWED}
      - WEBSOCKET_ENABLED=true
      - ROCKET_ENV=prod
      - ROCKET_WORKERS=10
      - TZ=${VAULTWARDEN_TZ}
      - LOG_LEVEL=error
      - EXTENDED_LOGGING=true
      - DOMAIN=${VAULTWARDEN_BASE_URL}
      - SMTP_HOST=${VAULTWARDEN_EMAIL__HOST}
      - SMTP_PORT=${VAULTWARDEN_EMAIL__PORT}
      - SMTP_FROM=${VAULTWARDEN_EMAIL__USERNAME}
      - SMTP_USERNAME=${VAULTWARDEN_EMAIL__USERNAME}
      - SMTP_PASSWORD=${VAULTWARDEN_EMAIL__PASSWORD}
      - SMTP_SECURITY=${VAULTWARDEN_EMAIL__SECURITY}
      - SSO_ENABLED=true
      - SSO_AUTHORITY=https://authentik.domain.ru/application/o/vaultwarden/
      - SSO_CLIENT_ID=${VAULTWARDEN_SSO_CLIENT_ID}
      - SSO_CLIENT_SECRET=${VAULTWARDEN_SSO_CLIENT_SECRET}
      - SSO_SCOPES="openid email profile offline_access"
      - SSO_ALLOW_UNKNOWN_EMAIL_VERIFICATION=false
      - SSO_CLIENT_CACHE_EXPIRATION=0
      - SSO_ONLY=false            # true - completely disables master-password login, SSO only
      - SSO_SIGNUPS_MATCH_EMAIL=true  # the first SSO login is linked to an existing account by email
      - PUSH_ENABLED=true
      - PUSH_INSTALLATION_ID=${VAULTWARDEN_PUSH_INSTALLATION_ID}
      - PUSH_INSTALLATION_KEY=${VAULTWARDEN_PUSH_INSTALLATION_KEY}
      - PUSH_RELAY_URI=https://api.bitwarden.eu
      - PUSH_IDENTITY_URI=https://identity.bitwarden.eu
    networks:
      - vaultwarden
    # The reverse proxy is configured separately - see the Traefik/Nginx section below.
    # Example Traefik labels (if the container is on the same network as the proxy):
    #labels:
    #  - "traefik.enable=true"
    #  - "traefik.http.routers.vaultwarden.entrypoints=web"
    #  - "traefik.http.routers.vaultwarden.rule=Host(`vaultwarden.domain.ru`)"
    #  - "traefik.http.middlewares.vaultwarden-https-redirect.redirectscheme.scheme=https"
    #  - "traefik.http.routers.vaultwarden.middlewares=vaultwarden-https-redirect"
    #  - "traefik.http.routers.vaultwarden-secure.entrypoints=websecure"
    #  - "traefik.http.routers.vaultwarden-secure.rule=Host(`vaultwarden.domain.ru`)"
    #  - "traefik.http.routers.vaultwarden-secure.tls=true"
    #  - "traefik.http.routers.vaultwarden-secure.service=vaultwarden"
    #  - "traefik.http.services.vaultwarden.loadbalancer.server.port=80"
    #  - "traefik.docker.network=proxy"
    security_opt:
      - no-new-privileges:true

networks:
  vaultwarden:
external: trueHere the container publishes port 18083:80 directly and the Traefik labels are commented out. That’s handy if your reverse proxy lives elsewhere - say, a separate Traefik config file instead of Docker labels - or if traffic comes in through a different proxy entirely. If you’re using labels like in the basic setup above, uncomment that block and drop the external port publication so it’s internal-only.
The .env file#
Secrets, and anything that tends to differ between environments, belong in an .env file sitting next to docker-compose.yml:
VAULTWARDEN_ADMIN_TOKEN=<hashed token, see section below>

# Temporary settings for the first registration
VAULTWARDEN_SIGNUPS_ALLOWED=false
VAULTWARDEN_SIGNUPS_VERIFY=true
VAULTWARDEN_INVITATIONS_ALLOWED=true

# Email for notifications
VAULTWARDEN_EMAIL__HOST=smtp.gmail.com
VAULTWARDEN_EMAIL__PORT=465
VAULTWARDEN_EMAIL__USERNAME=<your email/SMTP login>
VAULTWARDEN_EMAIL__PASSWORD="<app password>"
VAULTWARDEN_EMAIL__SECURITY=force_tls  # options: starttls, force_tls, off

# SSO (Authentik)
VAULTWARDEN_SSO_CLIENT_ID=<client id from Authentik>
VAULTWARDEN_SSO_CLIENT_SECRET=<client secret from Authentik>

# Push notifications
VAULTWARDEN_PUSH_INSTALLATION_ID=<installation id from bitwarden.com/host>
VAULTWARDEN_PUSH_INSTALLATION_KEY=<installation key from bitwarden.com/host>

# Locale
VAULTWARDEN_TZ=Europe/Moscow

# Base URL (needed for email confirmation and SSO redirect to work correctly)
VAULTWARDEN_BASE_URL=https://vaultwarden.domain.ru.env holds passwords and secrets in plain text on disk. If your compose files live in a git repo, add it to .gitignore without exception, and lock down the file’s permissions (chmod 600 .env).
What’s different from the basic setup#
| Parameter | Why |
|---|---|
ROCKET_ENV=prod | Puts the Rocket web framework - what Vaultwarden’s built on - into production mode: less debug noise, slightly different logging behavior. |
ROCKET_WORKERS=10 | How many worker threads handle requests. The default is fairly conservative; bump it up once you’ve got several active users or organizations. |
LOG_LEVEL=error + EXTENDED_LOGGING=true | Only errors get logged, but with extra context (timestamps, module names) - good for debugging without drowning in noise. |
A separate /data/logs volume | Logs get written to a file instead of just stdout, which makes it easy to ship them off to something like Promtail/Alloy for a monitoring stack. |
SIGNUPS_VERIFY=true | Forces email confirmation on signup - worth having when INVITATIONS_ALLOWED=true and you’re inviting people directly. |
Setting up SSO with Authentik#
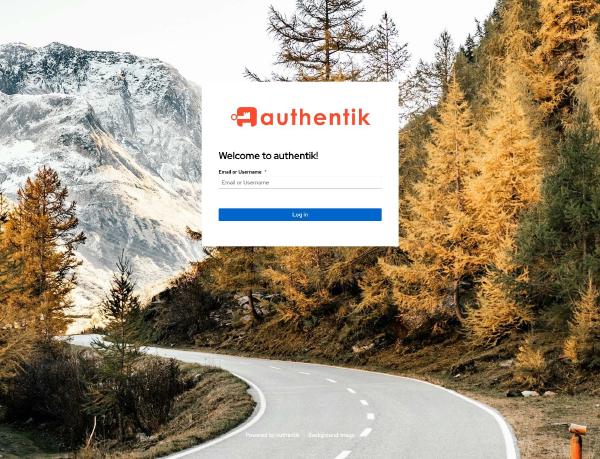
Vaultwarden supports OpenID Connect logins, so Authentik, Keycloak, Authelia, or any other OIDC provider will work. The logic is the same everywhere; I’ll walk through it with Authentik.
- In Authentik, spin up a new OAuth2/OpenID Provider with a redirect URI like
https://vaultwarden.stilicho.ru/identity/connect/oidc-signin. - Create an Application, point it at the provider from step 1, and give it a slug (mine’s
vaultwarden, which is whySSO_AUTHORITYends in.../application/o/vaultwarden/). - Grab the Client ID and Client Secret and drop them into
VAULTWARDEN_SSO_CLIENT_IDandVAULTWARDEN_SSO_CLIENT_SECRET. - In the compose file, set
SSO_ENABLED=trueand pointSSO_AUTHORITYat your OIDC provider’s base URL - Vaultwarden will fetch.well-known/openid-configurationon its own from there. SSO_SIGNUPS_MATCH_EMAIL=truemeans that if a user already has a Vaultwarden account, their first SSO login gets matched to it by email instead of spawning a duplicate.- Keep
SSO_ONLYset tofalseuntil you’ve actually confirmed SSO login works end to end - otherwise a hiccup on the provider’s side can lock you out entirely.
Once SSO logs you in successfully for the first time, also test logging in with your regular master password (assuming SSO_ONLY=false) - think of it as your emergency exit if Authentik ever goes down.
Push notifications#
PUSH_ENABLED turns on push notifications for Bitwarden’s mobile clients - instant one-time login codes, new-device alerts, and so on - without the app having to poll constantly.
For that you’ll need PUSH_INSTALLATION_ID and PUSH_INSTALLATION_KEY, both issued free at bitwarden.com/host once you register a self-hosted installation. In the example above, PUSH_RELAY_URI/PUSH_IDENTITY_URI point at the European relay (api.bitwarden.eu / identity.bitwarden.eu); if your users aren’t in the EU, swap in the global relay (api.bitwarden.com / identity.bitwarden.com) instead.
Locking down ADMIN_TOKEN#
You could just generate a random, sufficiently complex token with any password generator and drop it straight into ADMIN_TOKEN - but storing it as plain text is a bad idea, and Vaultwarden will nag you about it both in the logs and right there in the admin panel.
The easiest way to hash it properly is Vaultwarden’s own built-in command (available since version 1.28), no extra packages required:
docker exec -it vaultwarden /vaultwarden hash --preset owaspIt’ll prompt you for the password interactively and spit out a ready-to-use string like $argon2id$v=19$m=...$... - that’s what goes into ADMIN_TOKEN. (No need to escape $ inside an .env file; but if you’re writing the value straight into docker-compose.yml without .env, you’ll need to double every $ to $$, or Compose will try to interpret them as variable references.)
More detail is in the Vaultwarden wiki.
Once that’s done, (re)start the container:
docker compose up -dWorth remembering: /admin is the single most tempting target for brute-forcing on the whole instance. If you want to harden it further with rate-limiting or ban scanners outright at the Traefik level, check out the articles on middlewares in Traefik and CrowdSec.
Logging into the admin panel for the first time#
Once the container’s up, check its logs - through Portainer, say, or just docker logs vaultwarden.
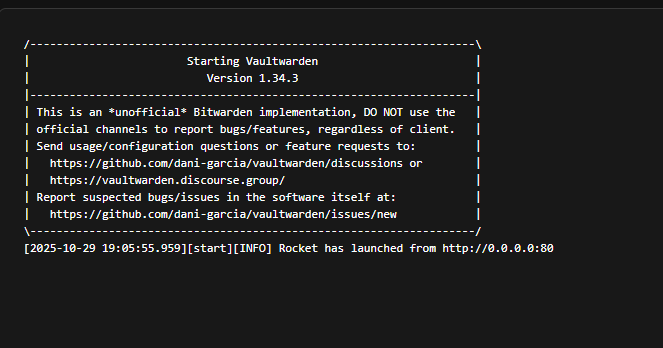
If everything checks out, the app stays quiet - meaning the token’s properly hashed. Otherwise you’ll get a warning that the token is stored in plain text and that this is insecure (it won’t break anything by itself, but it does weaken the admin panel’s defenses).
To get to the admin panel, type your Vaultwarden address into the browser and tack on /admin at the end.

Enter the admin password and you’re in. Head to the General settings tab - that’s the main configuration hub.
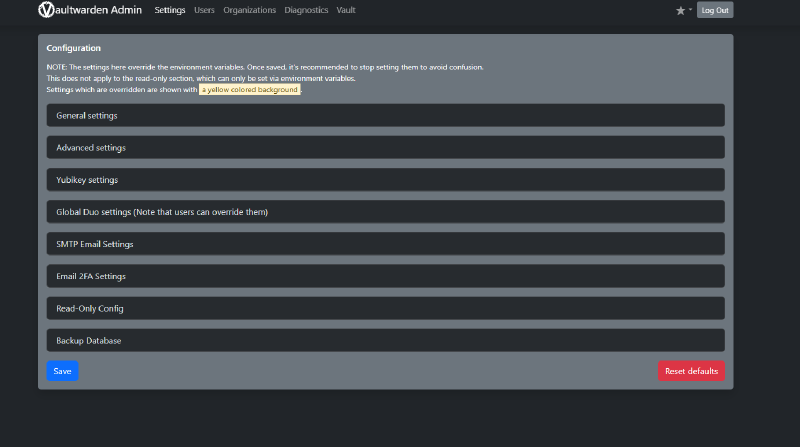
Right up top there’s a reminder that anything you set here in the admin panel overrides whatever’s in your environment variables (mail server settings, for instance) or the app’s own defaults. Values that will get overridden are highlighted in yellow.
Touring “General settings”#
Domain#
- What it is: the main domain Vaultwarden runs on.
- Example:
https://vaultwarden.stilicho.ru - What it’s for: used in links - invitations, password reset, email notifications, SSO redirects.
- Heads up: change the domain and you’ll also need to update
WEBSOCKET_ADDRESSand the redirect URI in your OIDC provider.
WebSocket Address#
- What it is: the WebSocket endpoint that keeps Bitwarden clients in sync.
- Example:
wss://vault.stilicho.ru/notifications/hub - What it’s for: instant sync - a password added on one device shows up immediately on the others.
- Note: if you’re behind Traefik or another proxy, make sure
/notifications/hubis actually forwarded.
Web Vault Enabled#
- What it is: toggles the web vault interface on or off.
- Default: on.
- Why turn it off: if you only want people using the Bitwarden Desktop/Mobile clients.
User Registration (Allow new signups)#
- Environment variable:
SIGNUPS_ALLOWED - Options:
truelets anyone register;falsemeans signups only happen manually - admin creates accounts via/adminor sends invites. - Tip: turn this off on a public-facing server. Only flip it on briefly to create your own first account.
Require email verification on signups#
- Variable:
SIGNUPS_VERIFY - My take: turn it on once SMTP’s configured, especially if
INVITATIONS_ALLOWED=true- it catches email typos before they become a problem.
Invitation (Allow invitations)#
- Variable:
INVITATIONS_ALLOWED - My take: leave it on if you’re using Organizations at all - otherwise nobody can actually join one.
SMTP Enabled#
- Variables:
SMTP_* - My take: get SMTP working before you create any organizations, or before someone inevitably needs a password reset.
SSO Enabled#
- Variable:
SSO_ENABLED - What it is: turns on OpenID Connect login. The admin UI also shows you the current connection status to the provider plus some diagnostics - handy when
SSO_AUTHORITYisn’t quite right.
E-mail Domain Whitelist#
- Example:
stilicho.ru,prohomelab.com - What it’s for: restricts registration to specific domains - your own, or a company’s.
Allow password hints#
- My take: feel free to disable this - no reason to hand an attacker a hint.
YubiKey OTPs Enabled#
- Variables:
YUBICO_CLIENT_ID,YUBICO_SECRET_KEY - What it’s for: two-factor auth via physical YubiKeys.
WebSocket Notifications Enabled#
- Note: needs a properly configured reverse proxy. WebSocket Docs
Admin Token#
- What it is: shows the token currently guarding the admin panel. It can only be changed via the environment variable (
ADMIN_TOKENin.env) - the panel itself won’t let you swap it live without restarting the container.
Disable Two-Factor remember#
- My take: turn this on for public servers, for extra safety. Worth knowing: on recent Vaultwarden versions, “remembered” 2FA sessions expire after 30 days regardless of this setting.
One section you really shouldn’t skip is SMTP EMAIL SETTINGS. If you’re planning to invite anyone - family, coworkers, whoever - these settings are non-negotiable.
Everything else is up to taste, but personally I’d shut off open self-registration in the app. Doing so has zero effect on invitations or SSO.
The Users section#
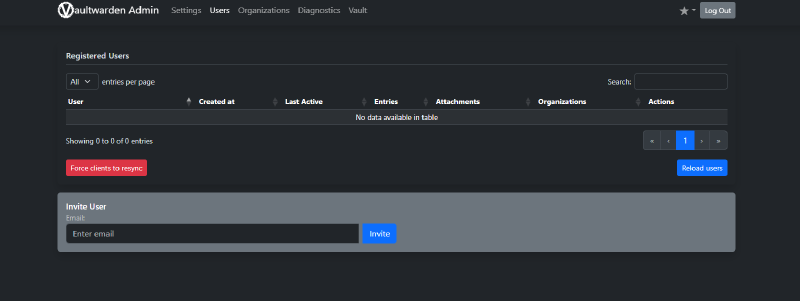
The “Users” table lists everyone with access to the vault, along with their status, confirmation level, and activity. You can also invite new users here, and manually confirm SSO accounts if SSO_SIGNUPS_MATCH_EMAIL didn’t catch them automatically.
What an Organization actually is#
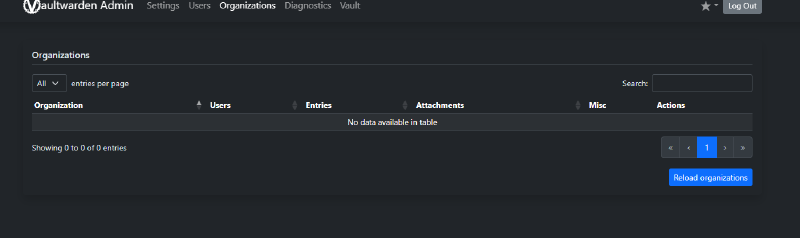
An Organization is a group of users sharing certain items - logins, passwords, secure notes, whatever - with each other. Think of it as the equivalent of a corporate or family vault in Bitwarden Cloud.
The basic idea#
- You’ve got a personal vault that only you can see.
- Inside an Organization, you can spin up shared collections, for example:
- “DevOps” - CI/CD passwords, SSH keys, API tokens
- “Marketing” - social media and ad account logins
- “Family” - shared subscriptions (Netflix, Spotify, you name it)
How it actually works#
- The admin creates an organization (say, “ProHomelab”).
- Adds members by email - they need an account on the same server, whether via regular signup, an invite, or SSO.
- Sets up Collections (categories for shared data).
- Assigns access rights per collection: read, write, or admin.
- Those entries then show up directly in each user’s Bitwarden client - web, desktop, or mobile.
Example structure#
Organization: ProHomelab
 ├── Collection: Infrastructure
 │    ├── Proxmox login
 │    ├── Traefik dashboard
 │    └── Grafana API key
 ├── Collection: Media
 │    ├── Jellyfin admin
 │    └── Audiobookshelf credentials
The role types#
- Owner - full control over the organization.
- Admin - manages users and collections.
- Manager - manages just their own collections.
- User - uses whatever access they’ve been granted, no admin rights.
A few important details#
- You don’t need Organizations at all for purely personal use.
- Invitations require
INVITATIONS_ALLOWEDturned on and working SMTP. - Nothing stops you from running several organizations on one server.
- Personal encryption keys are supported, so even the admin can’t peek at a member’s password contents.
Registering your first user#
Head to your Vaultwarden’s address (mine’s vaultwarden.stilicho.ru) and hit Create Account.
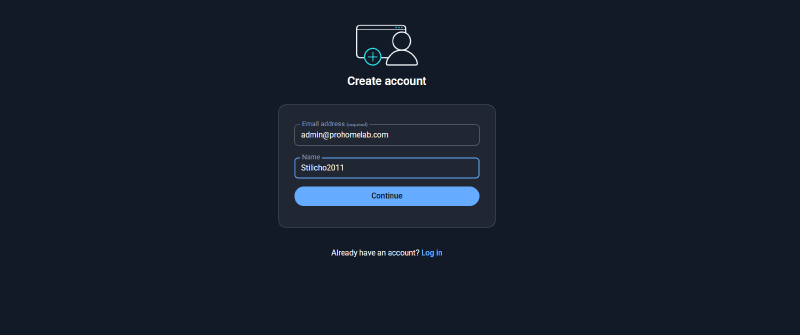
Fill in an email and a nickname.
To register that very first user, you’ll need to temporarily allow open registration (SIGNUPS_ALLOWED=true). Once your first (admin) account exists, flip it back to false.
If you’ve already got SSO enabled with SSO_SIGNUPS_MATCH_EMAIL=true, it’s still simplest to create that first user through regular signup or an invite, then just log in via SSO afterward - the accounts will link up automatically by email.
By default the password needs to be at least 12 characters; Vaultwarden checks it for complexity and offers to check whether it’s shown up in a known breach.
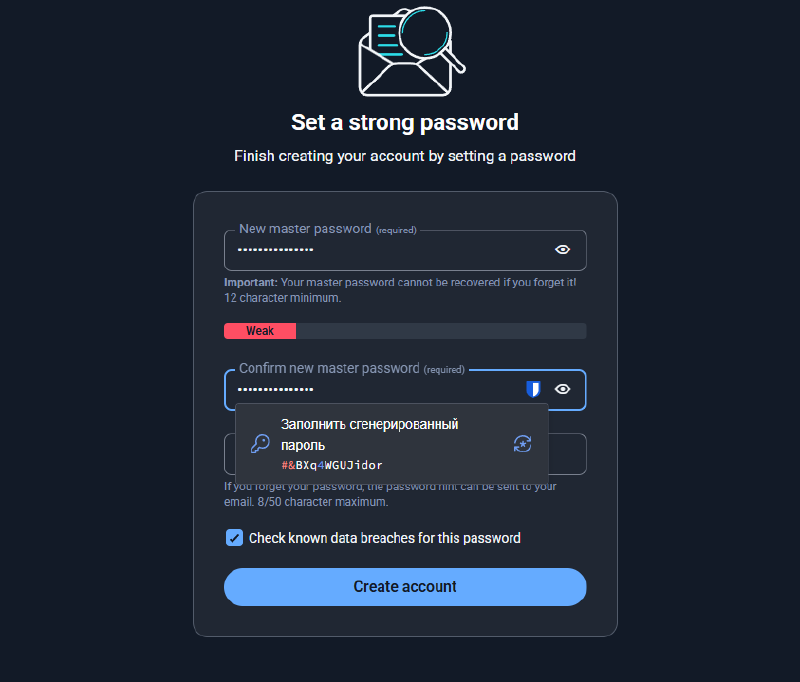
From there, you’re in the vault.
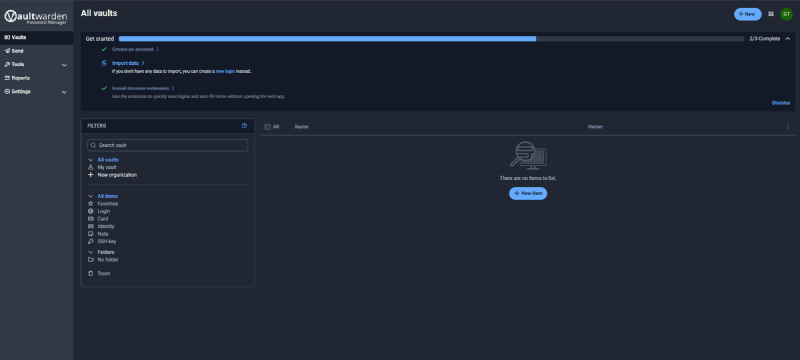
At the top you’ll see a nudge through the first three steps: create an account, install the browser extension, import data from another password manager. Export formats vary depending on where you’re coming from, but the drill is always the same - export a file there, import it here.
User Settings#
User settings are whatever a regular Vaultwarden user sees after logging into the Web Vault at https://vaultwarden.<your-domain>.ru.
Let’s look at Vaults - the heart of the whole system, where passwords, tokens, notes, and other secrets actually live.
💡 So you don’t mix these up:
- Vaults - the personal store (plus shared ones via Organizations).
- Settings - how the vault behaves.
- Admin Panel (
/admin) - server-side configuration.
The basic layout#
1. Items (vault entries)#
| Type | What it’s for | Example |
|---|---|---|
| Login | Login + password + URL | GitHub, an SSH panel, Grafana |
| Card | Bank card details | Visa, MasterCard |
| Identity | Personal info | Full name, address, email |
| Secure Note | Free-form text | SSH key, API token, a config snippet |
Every item has a name, a type, its own fields (username, password, URL, and so on), and optionally a TOTP code, attachments, notes, and a link to an Organization/Collection.
2. Collections#
If you belong to an Organization, you’ll see a list of Collections in the left panel - shared folders holding entries available to a group of people. No organization, no Collections shown.
3. Navigation tabs#
| Tab | What it’s for |
|---|---|
| All Items | Every entry, personal and shared |
| Favorites | Items you’ve starred |
| Folders | Your own personal folder structure |
| Trash | Deleted entries you can still restore |
| Organizations | Access to shared vaults |
4. Adding new entries#
The + New Item button opens the entry creation form. You’ll find “Generate password” (the built-in generator), “Add TOTP” (a one-time 2FA code), and “Attach file” (if ENABLE_ATTACHMENTS=true is set).
5. Search and filtering#
Search runs against name, username, domain, and notes - entirely locally, so nothing gets sent to the server in plain text. You can also filter by item type, organization/collection, or tags.
6. Folders#
A personal structure that has nothing to do with organizations. Anything in a folder stays visible only to you, even if other members share your organization.
7. Trash#
Deleted entries don’t vanish right away - they sit in the trash, where you can restore them or wipe them for good.
8. The item context menu#
View, Edit, Clone, Move to Folder/Collection, Add Favorite, Delete.
9. Password Generator#
Spins up a password to whatever length and complexity you need - letters, digits, symbols, the option to exclude lookalike characters - available right from the Vault.
Backups#
One question that comes up constantly is how exactly you’re supposed to back up Vaultwarden. Here’s a setup that works and doesn’t take much effort.
For SQLite (the default database), it’s enough to copy the whole data directory while the container isn’t actively writing to it - or, better, use sqlite3 .backup to get a consistent snapshot without stopping the service at all:
#!/usr/bin/env bash
set -e

SRC="/path/to/docker/vaultwarden/data"
DEST="/backup/vaultwarden/$(date +%F)"

mkdir -p "$DEST"
sqlite3 "$SRC/db.sqlite3" ".backup '$DEST/db.sqlite3'"
cp -r "$SRC/attachments" "$DEST/" 2>/dev/null || true
cp -r "$SRC/sends" "$DEST/" 2>/dev/null || true
cp "$SRC/rsa_key"* "$DEST/" 2>/dev/null || true

# clean up backups older than 14 days
find /backup/vaultwarden -maxdepth 1 -mtime +14 -exec rm -rf {} \;
Hook this up to cron - once a day is plenty - and actually test that these backups restore. A backup nobody’s ever restored is, as the saying goes, just a file taking up disk space.
Running PostgreSQL or MySQL instead? Use pg_dump or mysqldump respectively instead of copying the SQLite file.
Common mistakes#
DOMAINdoesn’t match your real HTTPS address - breaks email confirmation and TOTP/2FA. Double-check it matches exactly what the browser sees, protocol included, no trailing slash.- WebSocket won’t connect - the reverse proxy isn’t forwarding
/notifications/hubwith theUpgrade/Connectionheaders. Check your proxy config. - SSO redirects straight to an error - either the redirect URI configured in your OIDC provider doesn’t match Vaultwarden’s actual address, or
SSO_AUTHORITYisn’t pointing at the provider’s/application’s root URL. - Push notifications never arrive -
PUSH_INSTALLATION_ID/PUSH_INSTALLATION_KEYare stale or wrong, or you’ve got the wrong relay region selected (.cominstead of.eu, or vice versa). - Logs warn about a plain-text ADMIN_TOKEN - the token isn’t hashed; see the
vaultwarden hash --preset owaspsection above.
FAQ#
Can I run Vaultwarden without owning a domain? Technically, yes - over IP. But the Web Vault needs a secure context (HTTPS) for the Web Crypto API to function, and getting a proper TLS cert without a domain is a real headache. In practice, without a real domain, it just won’t work well.
Is SSO required? No, it’s entirely optional. Regular master-password login works fine on its own. And turning on SSO doesn’t disable built-in authentication either - you keep both.
Can I migrate my data from Bitwarden Cloud? Yes - export your vault from Bitwarden Cloud (Settings → Export Vault) and import it into a fresh Vaultwarden account.
What if I lose ADMIN_TOKEN?
Generate a new one with vaultwarden hash --preset owasp, update .env or the environment variable, and restart the container. None of your users’ data is affected.
Wrapping up#
| Section / Item | What it’s for |
|---|---|
| All Items | Every entry the user owns |
| Folders | Personal categories |
| Collections | Shared categories (within organizations) |
| Trash | The trash bin |
| Add Item | Add a login / note / card |
| Search | Search across the Vault |
| Password Generator | Generate strong passwords |
| SSO | Single sign-on through an external identity provider |
| Push | Instant push notifications on mobile |
No single article can cover everything this app is capable of, so for the full picture, check the official Vaultwarden documentation.