
Introduction#
All of us use some backup solution or another for our data and systems. But the subject of today’s review stands out a bit from the crowd.
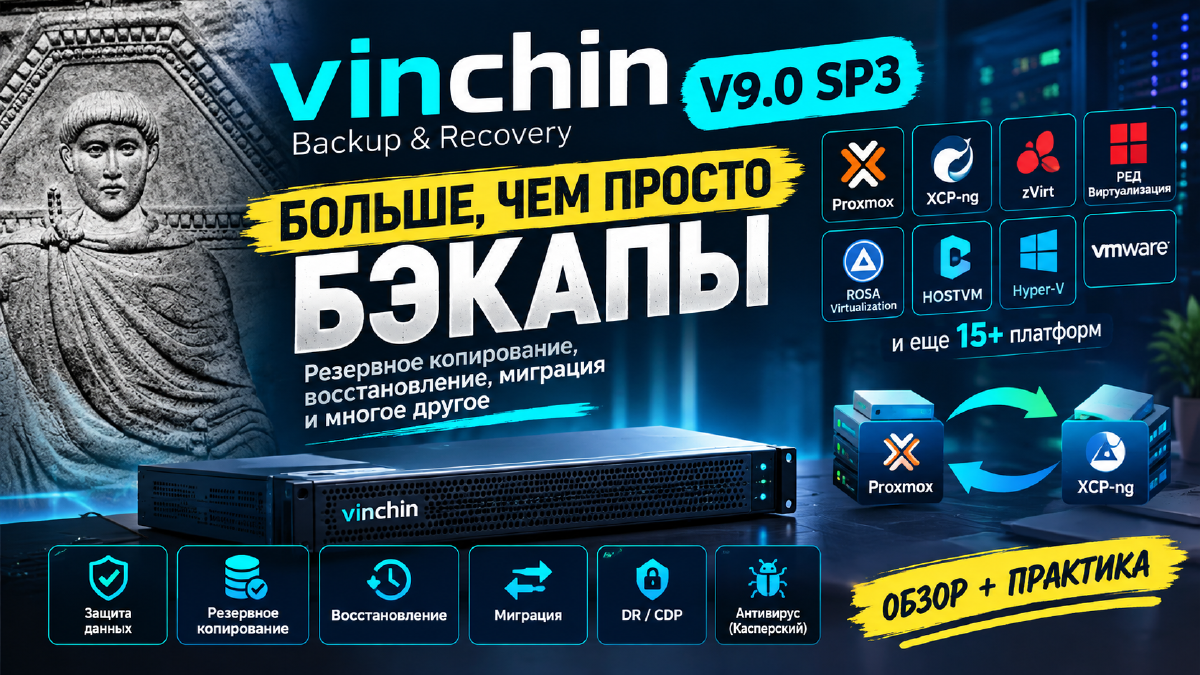
Vinchin Backup & Recovery V9.0 SP3 isn’t just another backup tool - it’s a full platform: backup, recovery, migration, and data protection all in one product, for virtual, physical, cloud, and hybrid infrastructure.
The product’s key selling point is that it isn’t tied to a single hypervisor the way Proxmox Backup Server is tied to Proxmox - one tool supports 15+ virtualization platforms, including zVirt, RED Virtualization, ROSA Virtualization, and HOSTVM, all relevant to the Russian market. In this article we’ll take a detailed look at the application’s architecture, its installation, Proxmox VE support, and a comparison with PBS.
I don’t have VMware, so the migration source in the hands-on part is Proxmox VE. The migration target ended up being neither oVirt nor RHV, but XCP-ng. RHV was out immediately - its official lifecycle ended on August 31, 2026 (the product has been replaced by OpenShift Virtualization). oVirt didn’t work out either: the ready-made oVirt Node NG appliance image, which is what the simpler install scenarios rely on, was flagged by the developers themselves in January 2026 as not recommended for use - deploying it for a test now doesn’t make much sense, and the alternative path (installing plain EL9 plus packages by hand) isn’t as simple as I’d like for a home lab. And honestly, who’s running EL9 in 2026 anyway?! XCP-ng, unlike either of those two stories, installs from a single ISO image - just like Proxmox VE - and is actively developed by Vates, without any of that mess. Plus, there’s going to be a review of XCP-ng on the channel regardless, so why put it off, I figured.
An important nuance worth mentioning right away: Vinchin backs up VMs, not the Proxmox host itself as a whole (more on this in section 11). And a quick comparison with PBS: PBS is free and more deeply integrated if all you have is Proxmox, while Vinchin wins out when the infrastructure is mixed, or when a move to another platform is on the horizon. More on the pros and cons for a home lab is in section 13.
1. General Product Positioning#
Vinchin Backup & Recovery V9.0 SP3 is an enterprise-grade solution for backup, recovery, migration, and data protection across virtual, physical, cloud, and hybrid IT infrastructure.
Key capabilities: full VM backup with individual file recovery, cross-platform VM migration (V2V and other types), continuous data protection (CDP), disaster recovery, and failover.
For ProHomelab’s homelab context, what matters most about this positioning is the practical layer - Vinchin does everything a familiar Proxmox Backup Server does, but adds support for a whole range of other platforms under one license and console on top of that.
2. Broad Virtualization Platform Support#
One of Vinchin’s key strengths is its broad support for a wide range of virtualization platforms. Vinchin Backup & Recovery supports backup and recovery for a whole list of hypervisors, including (among others) Hyper-V, Proxmox, XCP-ng, oVirt, H3C CAS/UIS, ZStack, Sangfor HCI, OpenStack, Huawei FusionCompute, Red Hat Virtualization, Oracle OLVM, and XenServer/Citrix Hypervisor.
Worth calling out separately, the platforms relevant to the Russian market and local infrastructure:
- Proxmox VE - the main platform for this review, supported since Vinchin 7.2. And if there’s support for Proxmox, the Alt Linux-based solution should work too;
- zVirt - a Russian virtualization platform built on oVirt/KVM from “Orion soft”;
- RED Virtualization - a platform from “RED SOFT”;
- ROSA Virtualization - a platform from NTC IT ROSA, also built on oVirt/KVM;
- HOSTVM - another Russian virtualization solution.
Fun fact for the record: while this review was being put together, ZStack (the very same vendor from the list above) released ZSvirt Community Edition - an open version of its ZSphere engine, positioned as a VMware alternative, with live migration, encryption, and Terraform support. The v1.0.0 release is very fresh, and this review doesn’t test the platform - it’s too early to draw conclusions about stability and real-world compatibility specifically with Vinchin (the vendor’s support list mentions the enterprise ZStack Cloud, not this new open-source fork). But it’s an interesting thing, and I think it’s worth a review of its own down the line.
Support for RED Virtualization and ROSA Virtualization arrived in Vinchin starting with version 8.0, along with support for the companion OSes RED OS and Astra Linux in virtualized environments.
3. Relevance for the Russian Market#
For the Russian market, scenarios involving a move away from VMware, Hyper-V, and other foreign platforms toward alternative virtualization solutions are especially relevant. Vinchin’s own developers emphasize this fact themselves.
Vinchin can be of interest to companies that:
- are considering alternatives to VMware;
- run a mixed infrastructure with several virtualization platforms at once (say, Proxmox is already deployed, but part of the workload still sits on other, older systems);
- are moving to domestic or open-source platforms (zVirt, RED, ROSA, HOSTVM);
- want to manage backup and recovery centrally across different environments instead of a pile of disconnected tools per platform.
4. Migration and Recovery Across Different Environments#
Beyond standard backup and recovery, Vinchin has a rich set of scenarios for migrating and moving workloads between different environments:
- V2V - migrating virtual machines between different virtualization platforms;
- P2V - migrating a physical server into a virtual environment;
- P2P - migrating between physical servers;
- C2C - migrating between cloud environments;
- C2V - migrating from a cloud environment into a virtual one;
- P2C - migrating a physical server into a cloud environment.
For the Russian market, migration scenarios specifically from VMware to alternative platforms are especially relevant. According to the vendor, V2V migration is supported between 19 leading virtualization platforms, including both global brands and the domestic solutions listed above.
A telling example of this kind of move is a VMware → zVirt migration. The vendor has a dedicated video walkthrough for this scenario. I don’t have VMware in my home lab (only Proxmox VE is used), so what follows is a description of the general principle, not a step-by-step personal account. Broadly, the scenario works like this: Vinchin connects simultaneously to the source VMware infrastructure and the target zVirt, takes an image of the VM from VMware, and restores it directly onto zVirt, bypassing intermediate manual disk conversion and configuration from scratch. Vinchin’s capabilities here go beyond plain V2V: the product can be useful in complex infrastructure migration and modernization projects as a whole, not just as a one-off image converter.
The key architectural difference from PBS here isn’t that Vinchin is “better at moving between different platforms” - it’s that PBS simply can’t restore a VM anywhere except Proxmox VE, it has no mechanism for that at all. With Vinchin, the recovery process is decoupled from the source: the backup is stored as a platform-agnostic image and can be deployed to any target platform on the supported list.
Initially I planned to keep the hands-on part of this review to Proxmox VE alone, but in the end I decided to demonstrate this mechanism not on a pair of identical Proxmox hosts, but truly cross-platform and in both directions: first a test VM is deployed on XCP-ng (the second Chuwi UBox), backed up via Vinchin, and restored onto the home Proxmox VE; then the process repeats in reverse - a VM from Proxmox is backed up and restored onto XCP-ng. This demonstrates the general principle of Vinchin’s platform-agnostic recovery. The actual steps of this migration are in section 8, item 10, “The Migration Itself.”
5. Automation and Management#
Worth a quick separate mention: Vinchin simplifies the day-to-day work of IT teams through centralized management of backup jobs, logs, notifications, job status monitoring, and other management functions - all available from a single web console, with no need to switch between separate tools for different platforms.
6. What’s New in V9.0 SP3#
Version V9.0 SP3 adds and improves the following capabilities:
- support for H3C UIS 6.5 backup and recovery;
- support for ZStack Cloud on ARM architecture;
- improvements to recovery processes and backup integrity checks;
- optimizations for NAS, file copies, Hadoop, object storage, and tape archiving;
- improvements to Server CDP, including failover and recovery;
- interface, log, notification, and job-information display optimizations.
7. Architecture: Server, Node, Proxy#
Vinchin actually consists of three components (for a home lab, the first one is usually all you need):
- Backup Server - the central node with the web console, where jobs, retention policies, repositories, and recovery are configured. In the vast majority of home and small-scale scenarios, this is the only component you need, and it’s enough on its own.
- Backup Node - an optional component for scaling to large infrastructures, or for ROBO (Remote Office/Branch Office) scenarios, where the backup server sits at the head office and the nodes are at remote sites, all under unified management.
- Backup Proxy - a “shim” component, only needed for specific backup-acceleration scenarios on certain platforms; not required for Proxmox VE.
For Proxmox VE, Vinchin works on the same principle as with every other platform - agentless: nothing gets installed inside the guest OS of any VM. That doesn’t extend to the host itself - there, Vinchin works through its own backup plugin (details and install steps in section 8, item 4).
flowchart LR
    A["Vinchin Backup Server<br/>web console, policies, repository"] -->|"via backup plugin, no guest agent"| B["Proxmox VE host 1"]
    A -->|"via backup plugin"| C["Proxmox VE host 2"]
    A --> D[("Backup Repository<br/>Local/NFS/CIFS/iSCSI/FC")]
    A -.->|"optional, for scaling"| E["Backup Node"]
8. Installation: It’s an ISO Appliance, Not a Docker Container#
An important point for my self-hosting audience: Vinchin doesn’t deploy as a Docker container. It’s a full appliance distribution - an ISO image with an integrated OS (recent versions are built on Rocky Linux) that you install either on physical hardware or as a separate virtual machine. There’s no docker-compose here at all, so there’s no casually spinning it up just to poke around.
For this review, Vinchin is installed on bare metal - a dedicated Chuwi UBox mini-PC (based on an AMD Ryzen 6600H) was set aside for it, outside the main Proxmox cluster. The final test bench for the hands-on part looks like this:
- UBox #1 - Vinchin Backup Server (bare metal);
- UBox #2 - XCP-ng, the second platform for demonstrating cross-platform V2V migration in both directions (Proxmox → XCP-ng and XCP-ng → Proxmox) (bare metal);
- Home PVE (the third UBox, already used for real services) - the source of VMs to back up: backup jobs are taken from it (read-only, no changes to production) (bare metal).
The home PVE serves both as a backup source and as a recovery target in the reverse direction (XCP-ng → Proxmox) - but recovery always creates a new VM with a separate ID, without touching existing working machines, so this poses no threat to real production services.
I walk through the whole installation process, connecting both Proxmox VE and XCP-ng, and the actual migration between them, in the video on the channel (link at the top of the article) - the steps below are a written version of that same process, step by step, with the exact menu item names. Menu item names may differ from version to version - check against the current UI when installing.
1. Installing Vinchin Backup Server from ISO
- Register on the Vinchin website (name, email, hypervisor) - the ISO image arrives by email; the license key in this case comes separately.
- Write the ISO to a bootable USB drive (Rufus/UltraISO).
- Boot the UBox from the flash drive, and in the installer menu, choose “Install Backup & Disaster Recovery System (Server).”
- Installation wizard steps (Anaconda/Rocky Linux-based interface):
- pick the time zone (Time Zone) → Done;
- pick the install disk (Installation Destination) → Done;
- configure networking and hostname (Network & Host Name) - a static IP is set here.
- After reboot - log into the web console at the specified IP.
In practice, step 2 (“just write the ISO”) turned out not to be as simple as it sounds, and here’s what I actually ran into. First, Rufus refused to offer DD Image mode for this ISO, and instead immediately warned about a revoked bootloader - the ISO is built on Rocky Linux 9.2, and its shim/GRUB ended up on Microsoft’s list of revoked UEFI bootloaders (part of the ongoing Secure Boot revocation rotation following the BlackLotus vulnerability). The fix - disable Secure Boot in the BIOS/UEFI on the target UBox (not on the machine running Rufus, but the one Vinchin is being installed onto).
Second, without DD mode, Rufus only offered writing in ISO mode, where the only available filesystem is (Large)FAT32. And FAT32 has a hard limit - no file can be larger than 4 GB. The Vinchin image (Full Installation ISO, ~17.7 GB) contains files larger than that limit, and in ISO mode Rufus simply couldn’t fit them onto the flash drive in full - the result was a truncated set of data: the system booted (the bootloader and kernel are small files and copied fine), but the Installation Source screen only showed a bare minimal repository instead of the full package tree.
Trying to write the same ISO with balenaEtcher (a byte-for-byte write, bypassing the FAT32 repackaging) threw a “Missing partition table” warning - a clear sign the previous Rufus write had been incomplete. After disabling Secure Boot and writing via Etcher, the flash drive was properly recognized by the installer as a full package source.
2. Activating the license
- On first login - change the default admin password. It was emailed to you when you registered on the site.
- In the console, go to the licensing section and upload your license key (a file like
license-*.key, sent by email).
3. Connecting Proxmox VE to Vinchin
- Resources → Infrastructure → Virtual Platform.
- Click Add.
- In the Platform dropdown, choose Proxmox VE.
- In the IP/Domain field, enter the Proxmox VE host’s address and port in the format
server_ip:8006. - Enter the Proxmox VE administrator’s Username and Password.
- OK - the platform will appear in the Virtual Platform List.
The Vinchin server needs access to Proxmox VE on ports 8006, 29203, and 29204 - otherwise the platform won’t be added and backups won’t run. It’s worth checking ahead of time that these ports aren’t blocked by a firewall between the Vinchin UBox and the Proxmox host (in my case, the home PVE).
4. Installing the backup plugin on Proxmox VE hosts
Unlike VMware backup, where Vinchin works entirely without any plugins on the host, for Proxmox VE the vendor requires installing a lightweight backup plugin directly on the Proxmox hosts - not inside the guest VMs, only on the hypervisor itself:
- Download the plugin installer from the Vinchin console.
- Upload and install it on the master host of the Proxmox VE pool (and on every slave host too, if it’s a cluster - this is mandatory).
- Confirm that after installing the plugin, the Proxmox VE host in the Vinchin console moves to the so-called licensed state (if the license is “Per CPU Sockets,” a host initially shows as Unlicensed until a license is specifically allocated to it).
5. Setting up a repository
- Go to the backup storage management section.
- Add a repository - a local disk/partition on the Vinchin UBox, or an NFS/CIFS share on a NAS.
6. First backup job
- VM Backup → Backup.
- Step 1. Select Backup Source - pick the Proxmox VE host, check the VMs you need (the Sync button, if freshly added VMs aren’t showing up).
- Step 2. Select Backup Destination - pick the Target Node and Target Storage (the repository from the previous item).
- Step 3. Select Backup Strategies - schedule (Backup as scheduled or a one-off Once-off backup), data transfer method (LAN or LAN-Free/SAN, if configured).
- Step 4 - job name, review the details, Submit.
- The job will show up on the Monitor Center → Jobs page - from there you can run it manually and watch its progress in real time.
Rocky Linux 9.2, which recent Vinchin versions are built on, requires CPU support for the x86-64-v2 instruction set. The Ryzen 6600H is a modern Zen3+ chip, so there’s no issue here, but on older hardware, check against the LiveCD verification tool Vinchin provides ahead of time.
Sources used in the checklist above - the official Vinchin help center: Installation, Proxmox VE Backup & Restore, Connect Proxmox VE to Vinchin, Install Proxmox VE Backup Plugins, Backup Proxmox VE VMs.
7. Installing XCP-ng on UBox #2
This is much simpler than the oVirt/RHV story - installation from a single ISO image, just like Proxmox VE:
- Download the current stable ISO (at the time of writing this review - 8.3, the LTS branch) from the official download page or from a mirror.
- Write the image to a USB flash drive.
- Boot UBox #2 from the flash drive and choose Install XCP-ng. It’s important to decide right away between BIOS and UEFI mode - you can’t change this after installation, or the system may stop booting.
- Go through all the usual installation steps: keyboard layout → accept the EULA → pick the install disk (a separate physical disk is required, dual-boot isn’t supported) → root password → network settings (interface, DHCP or static IP, hostname, DNS) → time zone and NTP setup.
- After the system installs and reboots, the console will display the host’s IP address. Go to it in a browser (
https://<UBox2-IP>) - the built-in XO Lite, a basic management web UI available right after install with no extra setup, will open.
For a basic scenario (create a test VM, connect Vinchin), the built-in XO Lite is enough. The full Xen Orchestra (a unified console for multiple hosts/pools, with its own built-in backup tool) is a separate add-on, deployed via the Deploy XOA button directly from XO Lite, or built “from sources” (free); it’s not required for this review, since Vinchin connects directly to the XCP-ng host’s XAPI, bypassing Xen Orchestra - but the video actually uses XOA.
8. Installing the backup plugin on the XCP-ng host
Just like with Proxmox VE, for XCP-ng Vinchin also requires a lightweight backup plugin on the host itself (dom0) - only here the package format is different, .rpm instead of .deb (XCP-ng is built on a CentOS-compatible base):
- On the Vinchin web console login page, click Download Backup Plugin.
- Type → VM Backup Plugin, Platform → XCP-ng, Version → the exact version of your XCP-ng (8.3 in this review). An
.rpmfile will download. - Using WinSCP (or any SCP/SFTP client), upload the
.rpmto the XCP-ng host - loginroot, the XCP-ng password. - Open the host console (via the built-in XO Lite/XOA console, or directly over SSH) and run:where
rpm -i vxe-backup-agent-xxx.xe.x86_64.rpmxxxis the actual file name (easiest to fill in with Tab-completion rather than typing it out). - If you have a multi-host pool, the plugin needs to be installed on every host, including the master, otherwise backup will only work for VMs on the host where it’s installed.
Don’t leave the plugin uninstalled for long on either Proxmox or XCP-ng - while it’s missing (or removed without an immediate reinstall), every backup job for VMs on that host will fail with an error.
Sources: Install XCP-ng Backup Plugins - Vinchin Help Center, How to install backup plugin for XCP-ng?
9. Connecting XCP-ng to Vinchin
Just like with Proxmox VE (see item 3 above):
- Resources → Infrastructure → Virtual Platform → Add.
- In the Platform list, choose XCP-ng.
- IP/Domain - the address of the XCP-ng host (UBox #2).
- Username / Password - root and the password set during installation.
- OK - the platform will appear in the list next to Proxmox VE.
10. The migration itself: moving a VM between Proxmox and XCP-ng in both directions
This is the hands-on part I promised earlier in the text - showing the actual transfer process, not just installing the components. In Vinchin, this isn’t done with a separate “migration wizard” but through the regular recovery function - you just need to explicitly switch to Cross Platform Restore at one of the wizard steps, instead of leaving recovery pointed at the source platform by default.
Proxmox → XCP-ng:
- Create a test VM on the home Proxmox VE and include it in a backup job (see item 6 above), wait for it to finish.
- VM Backup → Restore.
- Step 1. Select Restore Point - pick the restore point you want for this VM.
- Step 2 - here it’s important to explicitly pick Cross Platform Restore as the recovery type (not Instant Restore, which only temporarily and virtually spins the VM up straight from the repository). Set the recovery target to the XCP-ng host instead of the original Proxmox.
- Step 3. Restore strategies - for a test, you can leave the defaults and just click Next.
- Step 4. Submit - the job starts. Once it’s done, the VM will show up on XCP-ng.
XCP-ng → Proxmox (the reverse direction):
- Create a test VM on XCP-ng, include the XCP-ng host in a separate backup job (the same way it was done for Proxmox), and wait for it to complete.
- VM Backup → Restore, pick the restore point for the VM from XCP-ng.
- Again choose Cross Platform Restore, with the home Proxmox VE as the recovery target.
- Restore strategies - defaults.
- Submit - the VM shows up on Proxmox as a new machine with a separate ID, without touching existing working VMs.
The difference between Instant Restore and Cross Platform Restore is fundamental, and it’s clearly visible in the job log: with Instant Restore, the log shows something like “has cached data ‘36 MB’” for a VM whose actual size is tens of gigabytes - meaning the data physically stays in the Vinchin repository, and the target platform only has a thin “stub” that pulls data over the network on the fly. For a real, final migration (rather than a temporary emergency spin-up), you need Cross Platform Restore specifically - it copies the data in full.
Links to the official Vinchin step-by-step guides:
9. System Requirements#
Vinchin’s official recommendations are aimed at production workloads and look like overkill for a home lab:
| Component | Production Recommendation |
|---|---|
| CPU | 2x Intel Xeon E5 (2.5 GHz, 4 cores/8 threads or higher) |
| RAM | 32 GB or more |
| Network | 2x 10 Gbps RJ45 or higher |
| OS Disk | 2x 100 GB SSD |
| Repository space | ~150% of the data being protected |
For a test or a typical homelab scenario (a handful of VMs, gigabit or 2.5 Gbit networking), that’s obviously overkill - Backup Server runs perfectly fine on a compact mini-PC like the Chuwi UBox, and the network and repository disk should be sized to your actual data volume, not the numbers from an enterprise guide. But it’s worth understanding this isn’t a “200 MB RAM container” anymore - it’s a full, separate system that eats up a noticeable amount of hardware resources on its own.
10. Editions and Licensing#
Vinchin has three editions, and the license is sold either as a one-time purchase (Perpetual, “buy it, own it forever,” tied to the number of physical CPU sockets on the target hosts) or as a subscription from 1 to 3 years:
- Free Edition - free forever, protects up to 3 virtual machines. Supports the basics: agentless backup, compression, flexible scheduling, various repository storage types (local disk, NFS, CIFS, iSCSI, Fibre Channel). Updates, technical support, and some advanced features aren’t available in Free, but for some people that’s plenty for a home scenario.
- Standard Edition - for SMB infrastructure, adds more advanced backup and recovery features, includes 5x12 technical support.
- Enterprise Edition - for large and complex infrastructures, maximum functionality, also 5x12 support out of the box (7x24 available on request).
If you have an offsite copy (say, a second Vinchin server for offsite copies), Vinchin issues a separate free Offsite Copy License of the same type and duration as the main server’s license - no need to pay extra for a second instance running pure offsite-copy duty.
11. Proxmox VE Support#
Proxmox VE appeared on the list of supported platforms starting with Vinchin 7.2 (late 2023); the current lineup (v9.x) supports Proxmox VE versions 7.2-9.0. From Vinchin’s documentation and help center on Proxmox, the following functionality stands out:
- Agentless backup - nothing gets installed inside each VM’s guest OS (the host-level backup plugin nuance is covered in section 7 and section 8, item 4).
- Changed Block Tracking (CBT) - speeds up incremental backups by tracking changed blocks (in Vinchin’s terminology for non-VMware platforms, this is called SpeedKit).
- Forever-incremental backup - after the first full backup, every subsequent job only captures changes; a full backup never re-runs, which saves a lot of time and money.
- LAN-Free backup - with a SAN available (FC/iSCSI/NFS), data can be transferred bypassing the production network, reducing load on it during backup.
- Flexible scheduling and retention policies, including GFS (grandfather-father-son) for long-term storage of restore points by week/month/year.
- Deduplication, compression, and BitDetector - a combination of three mechanisms for shrinking stored data volume: deduplication and BitDetector look for repeated blocks, swap files, partition gaps, and unused space, leaving only genuinely unique data in the repository, while compression squeezes down what’s left.
- Full recovery and individual file recovery, plus Instant VM Recovery to minimize downtime.
- V2V migration - restoring a backup taken from Proxmox straight onto another platform (say, zVirt or RED Virtualization) without intermediate conversions.
Licensing for Proxmox is tied to hosts: in the web console, hosts of the relevant Proxmox VE cluster are individually “licensed,” after which backup jobs become available for the VMs on those hosts.
It’s important not to confuse backing up VMs with backing up the Proxmox host itself. Vinchin (like PBS) protects virtual machines running on PVE, not the hypervisor as a whole - it doesn’t take a full image of the host with the entire cluster configuration and storage layer (LVM/ZFS). To protect the PVE configuration itself, the vendor only describes a file-level backup of directories like /etc/pve. So “moving the host to new hardware” in practice isn’t implemented as transferring a hypervisor image, but as the combination “clean Proxmox VE install on the new host + VM recovery through Vinchin.”
Backing Up Physical Servers (Including Windows) - a Separate Mechanism#
Everything described above is backup at the hypervisor level (section 7). But Vinchin also has a second, fundamentally different mechanism - physical server backup (Windows and Linux), which works by installing a lightweight agent directly on the protected system, the way classic enterprise backup solutions do.
For a home lab, this is a separate, standalone case: if, besides the VMs on Proxmox, you also have a separate physical PC or laptop running Windows, Vinchin can protect it too, once the corresponding agent is installed. Showing the process here based on the vendor’s documentation (I didn’t record video for this part):
1. Installing the agent on a Windows machine
- On the Vinchin web console’s login page, click Download Backup Plugin (or, once inside the console: Resources → Infrastructure → Agents → Add).
- Pick the agent type - for a full OS backup you need the regular Backup Agent (not the Database Backup Agent, which is separate, for databases), OS - Windows. An
.exeinstaller downloads. - Run the installer on the machine being protected as an administrator.
- Choose a connection mode: Connection mode 1 (the agent installs on its own, and you then manually add it in the Vinchin console) or Connection mode 2 (the agent registers itself on the Vinchin server right during install - you need to specify the server’s address during setup for this).
- Once installed, the agent shows up on the Resources → Infrastructure → Agents page in the Vinchin console.
2. Creating a physical server backup job
- Physical Backup → Server Backup → Backup.
- Step 1 - in the Group tree, pick the host you need (the Windows agent from the previous step); you can selectively exclude specific partitions/disks - by default, for Windows, the system disk, the EFI partition, and the Microsoft Reserved Partition are included.
- Step 2 - pick the destination repository (the same one configured for VM backups, or a separate one).
- Step 3 - schedule and backup strategy.
- Step 4 - job name, Submit.
Restoring this kind of backup works the same way as the P2V conversion discussed in the migration section - meaning, if you want, you can not only back up a physical Windows machine, but also spin it up as a VM on Proxmox or XCP-ng.
Sources: Agents Deployment - Vinchin Help Center, Server Backup - Vinchin Help Center, How to Backup Windows Operating System with Vinchin Backup & Recovery?
12. Features That Set Vinchin Apart#
Beyond basic backup/recovery, Vinchin has a set of features that PBS either implements partially or doesn’t implement at all (because PBS deliberately focuses on simplicity - that’s a literary way of putting it, no offense meant, PBS fans):
- AES-256 encryption for backups in the repository.
- Anti-ransomware / Malware Scan (since v9.0) - automatically scans backups for malware before recovery, integrated with the Kaspersky antivirus engine.
- WORM protection and backup integrity checking (Backup Data Integrity Check) - for when you need copies to be immutable to meet retention requirements.
- DR Lab - a built-in sandbox for testing disaster recovery without touching production: you can spin up a VM from a backup in an isolated environment and confirm the recovery actually worked without a hitch.
- Server CDP (Continuous Data Protection) - continuous data protection with failover, improved in V9.0 SP3.
- Any-to-Any Migration - migrating VMs between practically any supported platforms: V2V, P2V, C2C, and other combinations.
- Kubernetes backup - if your lab also runs a k8s/k3s cluster besides VMs, that’s covered by the same tool too.
13. Pros and Cons of Vinchin for a Home Lab#
Pros:
- Free Edition is genuinely free forever, no crippled trial - just a 3 VM limit.
- Proxmox VE support is official and actively developed.
- One tool for a mixed and transitional infrastructure - no need to run a separate backup stack per platform, including the Russian zVirt/RED/ROSA/HOSTVM.
- DR Lab, CDP, and malware scanning - features you’d normally have to cobble together from several tools in the open-source world.
- V2V migration is useful if you’re at all inclined to experiment with different hypervisors (a common thing for a homelab) or move from one platform to another.
Cons:
- It’s not a Docker service - a separate machine (a VM, or, as in this review, dedicated physical hardware) and one more OS to maintain (updates, security patches).
- No LXC container support - and LXC containers get used very often in Proxmox setups.
- The Free Edition’s 3-VM limit gets hit pretty fast even in a home lab.
- Less independent, user-reported data on real-world performance and deduplication ratios compared to PBS.
- The product’s core targets enterprise scenarios - part of the interface and terminology (SAN, HBA, Backup Node for ROBO) is clearly overkill for a single Proxmox host.
14. Bottom Line#
If you have a clean Proxmox VE setup and nothing else, Proxmox Backup Server will almost always be the better choice: free with no restrictions, more deeply integrated, and able to back up LXC containers, which a typical homelab user usually has even more of than full VMs.
Vinchin is worth looking at if at least one of these applies:
- you genuinely have a mixed infrastructure across several virtualization platforms at once;
- a move from one platform to another is planned (including to domestic solutions - zVirt, RED, ROSA, HOSTVM), and you’d rather do it with a proper V2V tool than by hand;
- three VMs comfortably cover your critical perimeter, and you’d rather not stand up a separate PBS just for them;
- you’re interested in ready-made DR/CDP features (sandboxed test recovery, malware scanning, continuous protection) without building it all yourself.
In every other case, for a pure Proxmox lab, PBS remains the primary tool.