
Foreword#
Frankly, I wasn’t planning to record a new video about Proxmox Backup Server, nor to write a full article. But I made the mistake of quickly upgrading Proxmox VE to the new kernel version 7.0.0.3.
As a result, the system stopped booting and consistently went into a kernel panic with an unpleasant pink screen. Rolling back to the previous kernel version didn’t work in my case.
A search on the official Proxmox forum showed that the problem wasn’t isolated but widespread. In the end, I had to reinstall the node from scratch.
For an average user, this could mean losing all the information stored in the virtual machines or LXC containers. However, I use Proxmox Backup Server, and the backups are stored on a NAS, so I got off relatively lightly.
I had to redeploy the node, install PBS, connect the old datastore, and restore everything from backups.
After that, I shared the situation on my Telegram channel, warned about the problems with the fresh Proxmox VE kernel build, and reminded everyone about the importance of backups. In response, I was offered to go somewhere to record a fresh overview video about restoring a node.
Although I already have a video about PBS on my channel, it’s noticeably outdated by industry standards. So I decided to update the material.
In this article, I won’t just cover setting up Proxmox Backup Server, but also show my real-world scenario: creating two datastores - one for “hot” and one for “cold” backups.
Introduction#
Backup is one of the key tasks both in a home lab (homelab) and in corporate infrastructure. Losing a virtual machine, disk corruption, or a failed update can have serious consequences if a backup system isn’t set up in advance.
To address this, the Proxmox team developed Proxmox Backup Server (PBS) - a specialized system for storing backups of virtual machines, containers, and physical servers.
PBS supports:
- data deduplication
- incremental backups
- efficient compression
- convenient integration with Proxmox VE
This allows you to significantly save disk space and speed up backup and restore processes.
Proxmox Backup Server 4.x adds:
- support for S3-compatible storage
- improved sync jobs
- extended capabilities for working with namespaces and datastores
- base system update to Debian 13
In this article, we’ll install Proxmox Backup Server 4.2, set up storage, connect it to Proxmox VE, and perform our first virtual machine backup.
What is a Datastore in Proxmox Backup Server#
General description#
A Datastore in Proxmox Backup Server (PBS) is the main backup storage. You can think of it as a folder or logical container in which PBS stores all backup data, indexes, metadata, and deduplication information.
What’s inside a Datastore#
When creating a Datastore, PBS uses the specified directory, for example:
/mnt/backup/pbs-datastoreInside, a directory structure is created:
pbs-datastore/
├── .chunks/
├── vm/
├── ct/
├── host/
└── .lock
The Datastore holds:
- Virtual machine backups
- LXC container backups
- Physical server backups via PBS Client
- Deduplicated data chunks
- Indexes and metadata
How deduplication works#
PBS splits data into small blocks (chunks) and stores only new or changed data.
Example:
- The first backup of a virtual machine takes up 100 GB.
- The next day, only 2 GB of data changed.
- PBS will only store the new chunks, totaling 2 GB.
As a result, a Datastore can contain many backups while taking up significantly less space thanks to deduplication.
Multiple Datastores on a single PBS#
You can create several Datastores on a single PBS server for different purposes.
Examples:
| Datastore | Purpose |
|---|---|
| local-ssd | Fast daily backups |
| hdd-backup | Long-term storage |
| offsite | Replication to a remote site |
Example configuration:
Datastore: fast-backup
Path: /mnt/ssd/pbsDatastore: archive
Path: /mnt/hdd/pbsEach Datastore has its own settings:
- Retention policies (Prune)
- Backup verification (Verify)
- Synchronization (Sync)
- Access permissions
- Read/write speed limits
Recommendations#
- Use a reliable Linux file system (for example, ZFS)
- Don’t modify Datastore contents manually
- Remove old backups via Prune jobs
- Regularly run Verify to check data integrity
- Monitor disk health and free space
Important#
- Manually deleting Datastore files can corrupt backups and result in data loss.
- Losing or corrupting a Datastore makes all backups stored in it unavailable.
Analogy#
If you think of PBS as a library:
| Component | Analogy |
|---|---|
| PBS Server | Library |
| Datastore | Book warehouse |
| Backup | Book |
| Chunk | Page of the book |
| Deduplication | Storing identical pages only once |
In the video, I’ll create only two datastores:
- fast, daily copies
- long-term data, which I’ll store on my TrueNAS
System requirements#
Before starting the installation of Proxmox Backup Server 4.2, you need to prepare a separate server or virtual machine. Although PBS can run even on fairly modest hardware, it’s recommended to estimate the volume of backups and the number of protected systems in advance. For a home environment, the first factor is of course the important one.
Right now, in the international YouTube segment, for some reason it’s popular to install PBS in an LXC container. I don’t like this approach, because such an installation requires either a privileged container or certain complications with mounting disks. At the same time, installing it in a virtual machine (in case you can’t dedicate a separate server/mini-PC) doesn’t add any noticeable overhead in a homelab scenario. PBS is a fairly lightweight solution.
To perform the installation you’ll need:
Minimum requirements#
64-bit processor with virtualization support
2 CPU cores
2 GB of RAM
8 GB of disk space for the system
A separate disk or partition for storing backups
Network connection of at least 1 Gbit/s
Recommended requirements#
4 or more CPU cores
8-16 GB of RAM
SSD for the system partition
A separate SSD or HDD array for storing backups
ZFS file system for the datastore
2.5 Gbit/s network connection or higher when working with a large number of virtual machines
Ironically, finding a server meeting only the minimum requirements is practically impossible in 2026. At the same time, if we’re talking about a home environment, the minimum requirements are sufficient for continuous operation. The reason is that the system load only occurs during those short intervals when the system is performing backups and comparing chunks. As you understand, in a home environment this happens at best once a day, and the whole process fits within an hour.
Test bench#
For this article and video, Proxmox Backup Server 4.2 is installed on a Lenovo ThinkCentre M720q with the following specifications:
| Parameter | Value |
|---|---|
| CPU | Intel Core i5-8400T |
| RAM | 16 GB |
| System disk | 256 GB NVMe |
| Backup disk | 500 GB SSD |
| Network | 1 Gbit/s |
Such a configuration isn’t just more than enough for a home lab and backing up several virtual machines and LXC containers, it’s actually overkill.
It’s recommended to use a separate disk or a ZFS pool for storing backups. This allows you to make the most efficient use of built-in data deduplication and protect the system from losing backups if the system disk fails.
Installing Proxmox Backup Server#
Installing PBS shouldn’t cause any difficulties - the installer interface is identical to PVE.

You agree to the license agreement,

Choose the disk or array where the operating system will be installed, as well as the file system.

Set the root user’s password, and specify the email address where the system will send notifications. Note that simply specifying an email address isn’t enough - you’ll later need to provide the values obtained from your email provider.

Next, choose the primary network interface (in case you have more than one), the hostname (I always later install a proper SSL certificate from Let’s Encrypt), and the network values for the host and gateway.

Initial configuration#
We’re greeted with an interface fairly similar to PVE, which makes sense. Unification is an important point here. First, we go to the Administration > Repositories section.
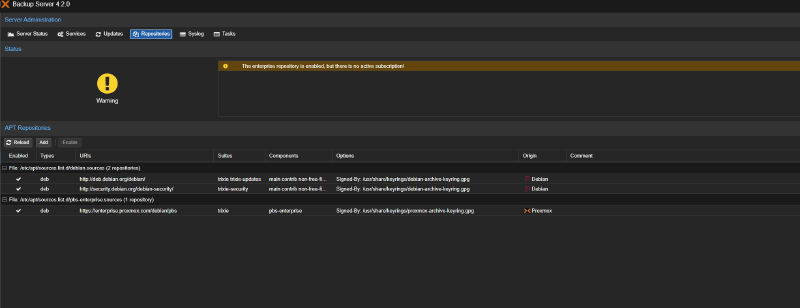
and connect the free repositories, while deactivating the paid repositories.
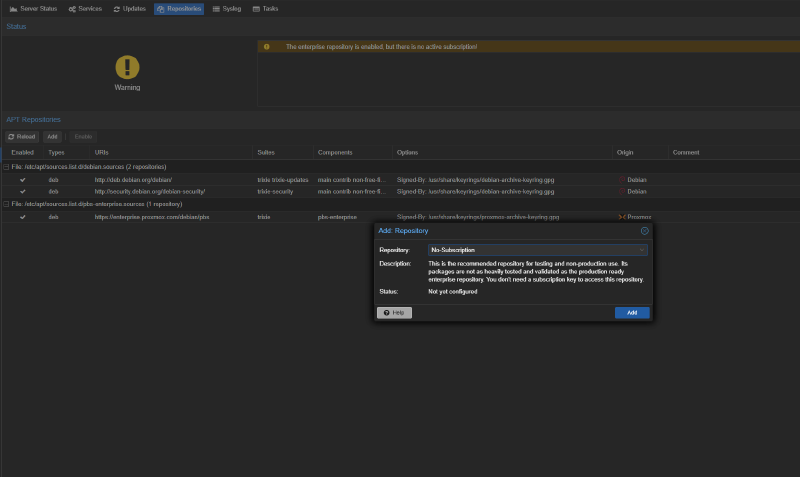
after that, we go to the neighboring Updates menu and update the package database. If necessary, restart the PBS instance.
Preparing disk space and configuring the Datastore#
In our case, we already have a share (a dataset in TrueNAS) that already served as a datastore at some point. We also have a separate 512 GB SSD disk for daily backups. Let’s start with preparing this disk. In the Storage > Disks section we see the list of connected disks. In my case, the system is installed on an NVMe disk. The SSD disk is recognized in the system as /dev/sda.
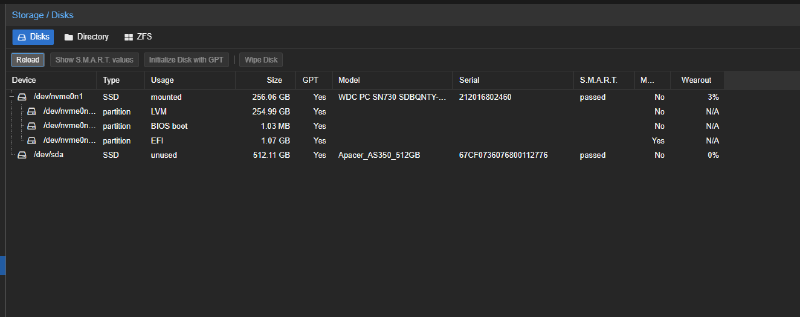
First of all, we need to partition it. In the disks section, select the disk we need and choose Initialized Disk with GPT.
After that, go to the command line menu (Shell). Install the parted utility with the command
apt install partedcreate a partition
parted /dev/sda -- mkpart primary ext4 0% 100%resulting in:
/dev/sda1Format the partition.
For PBS, the following are usually used:
ext4- simple and reliablexfs- good for large backup storagezfs- if you need RAID/compression/snapshots
The simplest option:
mkfs.ext4 /dev/sda1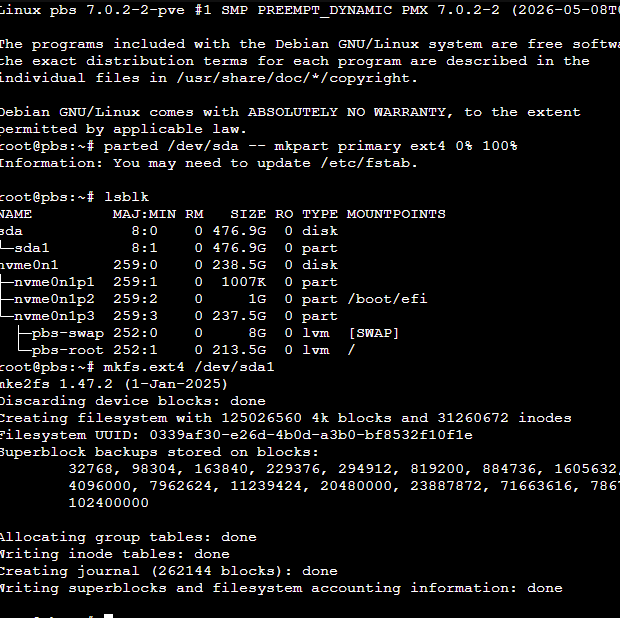
Write down the resulting UUID somewhere, you’ll need it later when mounting the new datastore for daily backups. However, if for some reason the UUID gets lost, you can always find it out with the command
blkid /dev/sda1First, create two folders that will serve as directories for storing data:
- lenovo - daily backups
- truenas - long-term backups
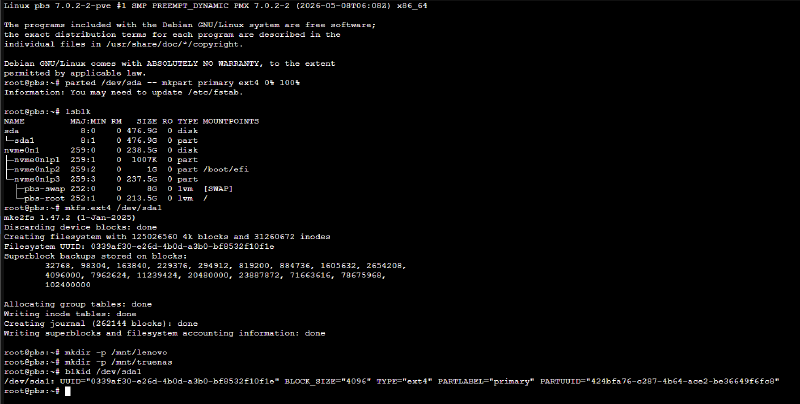
Now let’s edit the fstab file
nano /etc/fstab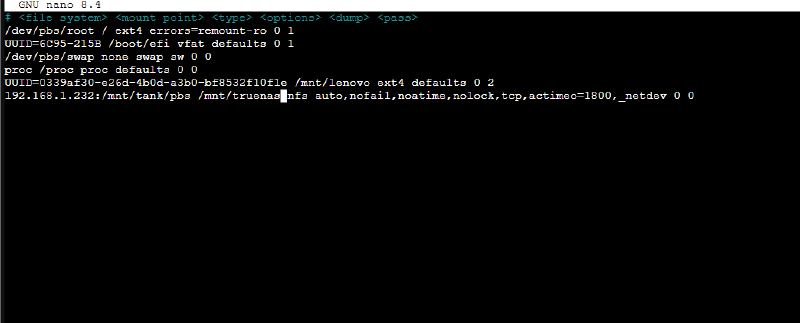
this way we’ve mounted the corresponding partition and remote share to specific directories. Save the changes with Ctrl+S, exit with Ctrl+X.
Enter the command
mount -aIf everything is fine and we haven’t made any mistakes, the system will suggest reloading the daemon with the command
systemctl daemon-reload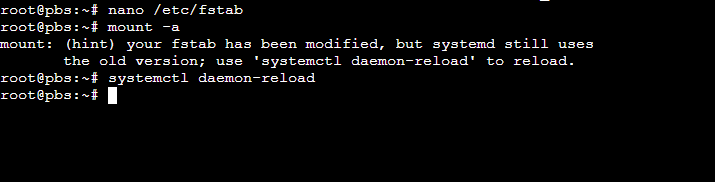
Creating the datastore#
After we’ve mounted the shares and partitions we need into the corresponding directories, we proceed to creating the datastore. As I mentioned above, we’ll have two:
- a local one for daily backups. Let’s call it lenovo.
- a remote one for long-term storage, located on an NFS share on my TrueNAS.
Go to the Datastore > Add Datastore section.
Set the datastore name, choose its type. For the path, we need to enter an absolute path. We won’t touch the GC Schedule and Prune Schedule menus for now. We’ll configure that part later.
Since I also need to connect an already existing datastore, I go into the advanced menu and check the reuse existing datastore option.
In Proxmox Backup Server 4.2, the “Reuse existing datastore” option means:
use an already existing folder with backups as a datastore, without creating it from scratch.
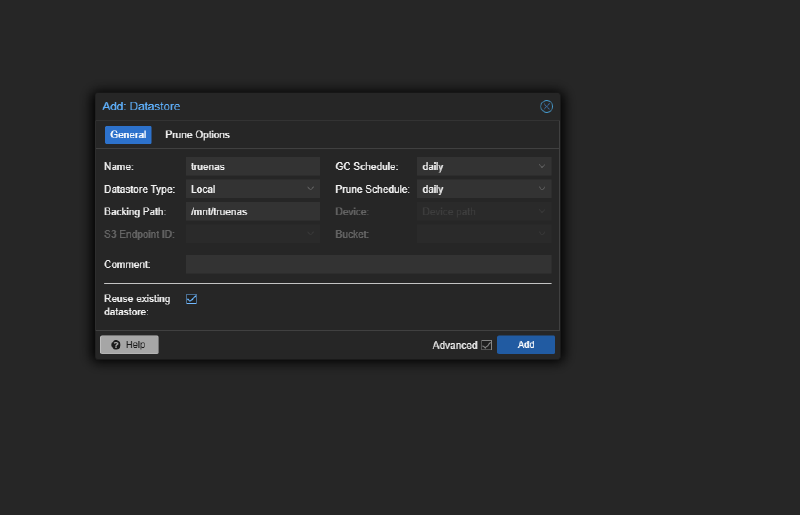
Repeat the same steps, but for the new datastore.
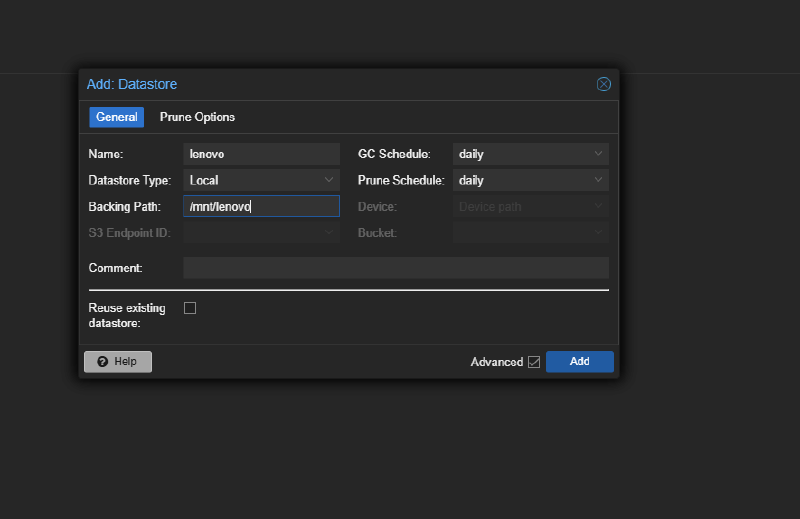
Since this is a new datastore, it’s enough to give it a name and specify the storage path.
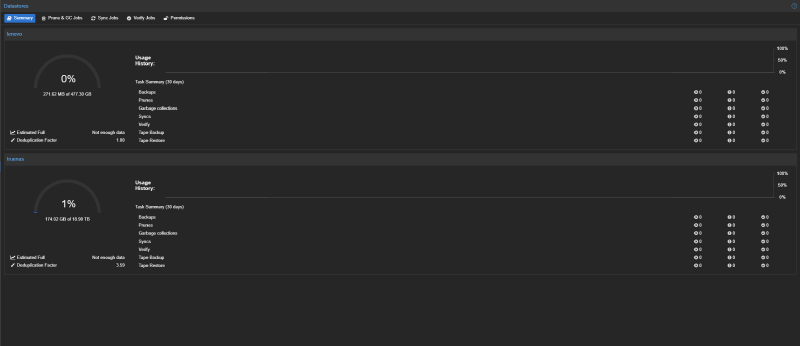
As a result, we’ll see the created datastores in the control panel, along with data on used storage volume, a list of jobs, and a summary.
Connecting the created datastores to Proxmox Virtual Environment#
In Proxmox VE, you can’t connect a datastore directly as a disk.
You connect the PBS server, and the datastore is selected inside it.
Make sure the datastore is created in PBS#
On the PBS side, the datastores we need are already created.
Adding PBS to Proxmox VE#
In the PVE web interface:
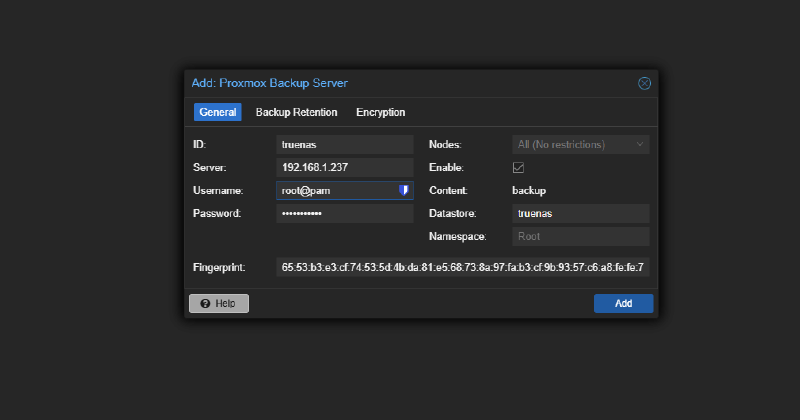
Datastore > Storage > Add > Proxmox Backup Server
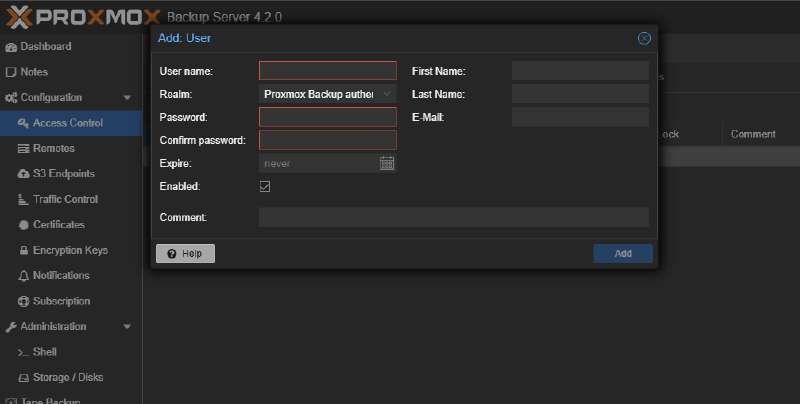
Filling in the parameters#
Server#
IP or DNS name of PBS:
192.168.1.10Datastore#
This is NOT a path in the file system.
Specify the datastore name from PBS:
truenasUsername#
It’s recommended to use a separate user, but you can use:
root@pamor:
backup@pbsbackup is the name of the user created in PBS.
Password#
The password of the PBS user.
Fingerprint#
We get this from PBS:
Dashboard > Show Fingerprint
Connection result#
After adding it in PVE, the storage will appear:
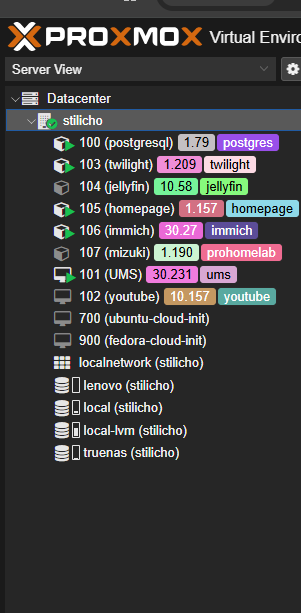
Now you can use it to back up VMs and CTs.
How PVE works together with PBS#
- PBS stores data and deduplicates it
- PVE sends backups over the network
- The Datastore inside PBS manages the data
For this, we first need to configure the backup schedule and where backups are stored (by default, PVE stores backups on its own LVM partition).
In PVE, go to the Datacenter section.
Datacenter > Backup
and configure the backup schedule, the list of items to back up, and where we’ll save the backups.
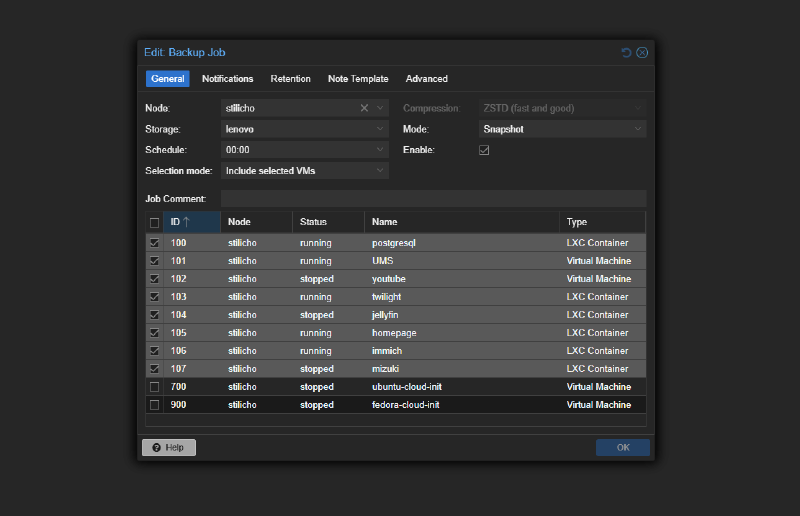
Now every 24 hours PVE will create copies of the selected resources and save them to our lenovo storage, which is the datastore for daily backups in PBS.
Configuring backup handling in PBS#
Go to the corresponding section in the datastore menu in PBS.
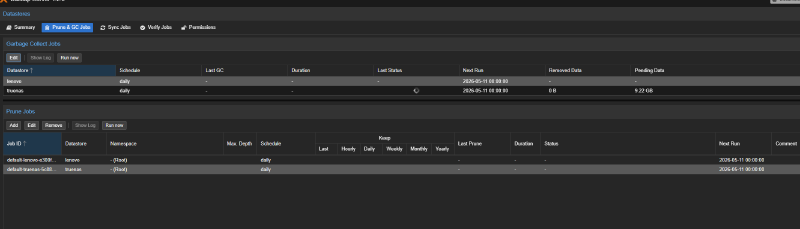
Configuring the Prune Job, Garbage Collection, and Verification Job in Proxmox Backup Server#
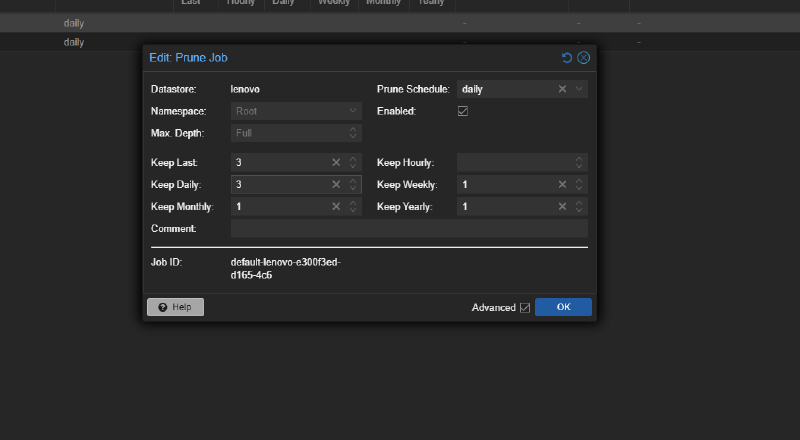
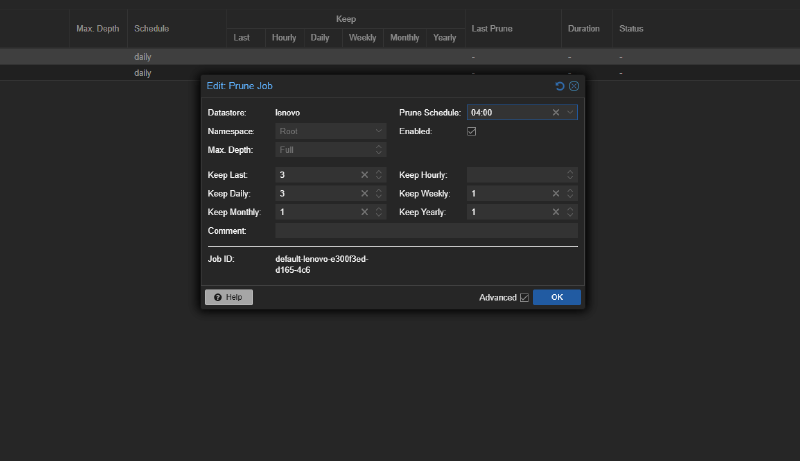
Prune Job (retention policy)#
The Prune Job is responsible for removing old snapshots according to a defined retention policy. It’s important to understand that prune only removes references to backup snapshots, not the physical data right away.
Configuring the Prune Job#
Schedule
You can use a simple schedule or cron:
daily 0 2 * * *
Retention policy (keep options)#
As an example of a reasonably balanced policy:
keep-daily: 7 keep-weekly: 4 keep-monthly: 6
This means:
- keep the last 7 days
- the last 4 weeks
- the last 6 months
Prune doesn’t free up disk space immediately, since the data may remain in chunks until Garbage Collection runs.
Garbage Collection (data cleanup)#
Garbage Collection removes physically unused chunks left over after pruning.
How it works
PBS uses deduplication, so a single chunk can be used across multiple backups. After pruning, references are removed, but the data itself remains until GC runs.
GC goes through and removes:
- unused chunks
- stale data with no references
Configuring Garbage Collection#
Datastore → Garbage Collection → Add
Example of a recommended schedule
weekly 0 3 * * 0 (every Sunday night)
- requires high disk load
- better to run at night
- can take a long time on large datastores
Verification Job (integrity check)#
The Verification Job checks data integrity and detects corrupted chunks.
What it checks:
- corrupted blocks
- silent corruption
- correctness of the chunk structure
Why this matters:
Even SSDs and HDDs can:
- corrupt data without any OS errors
- suffer hidden degradation
Verification helps detect this in advance.
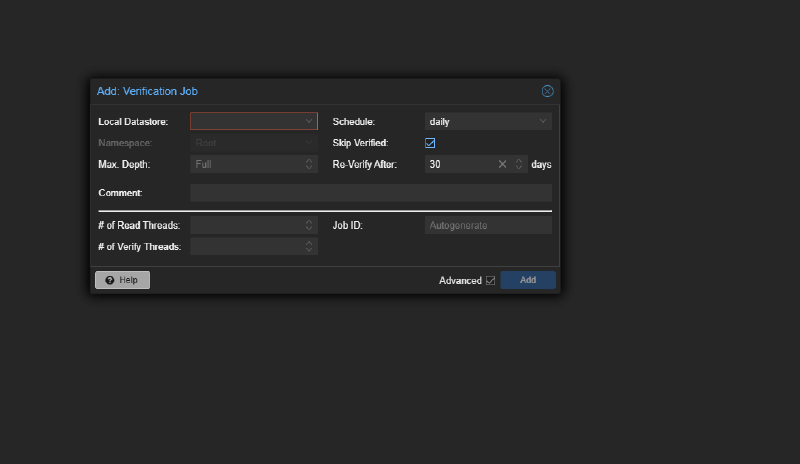
Configuring the Verification Job#
Datastore → Verification Jobs → Add
Schedule option
Home lab: monthly Production: weekly or bi-weekly
The correct order of tasks#
It’s very important to follow the correct order of tasks:
- Prune Job
- Garbage Collection
- Verification Job
Common mistakes#
- Only Prune without GC → space isn’t freed
- Too frequent GC → unnecessary load on the SSD
- No Verification → risk of silent data corruption
Summary#
In the end, the three tasks work together:
Prune manages the retention period GC frees up disk space Verification protects against data corruption
Properly configuring these processes ensures stability, space savings, and reliability of the backup system.
Configuring synchronization between datastores#
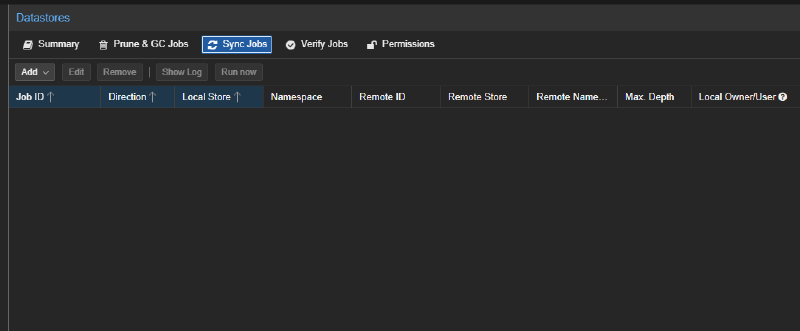
Sync jobs are configured to fetch the contents of a datastore from a remote server (Remote) and copy it into a local datastore.
You can manage sync jobs through the web interface - in the Sync Jobs tab of the Datastore panel, or inside the Datastore itself. You can also manage them via the proxmox-backup-manager sync-job command.
The sync job configuration is stored in the file:
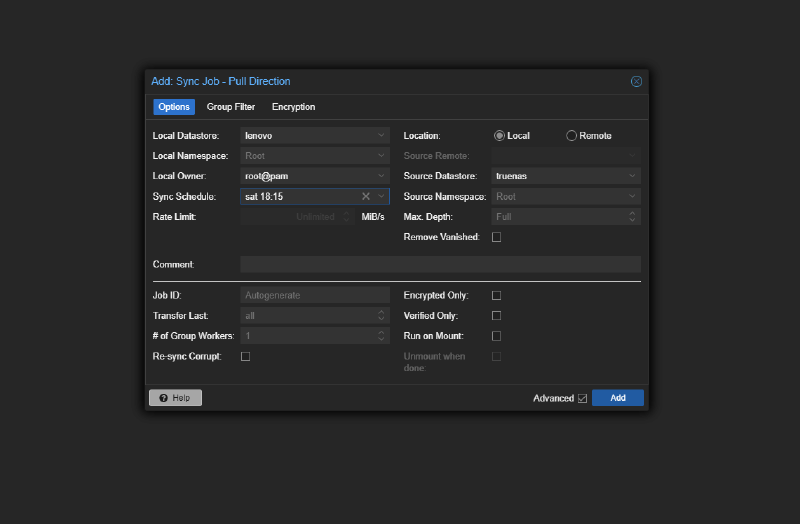
/etc/proxmox-backup/sync.cfgTo create a new sync job, click the Add button in the GUI or use the create command in the CLI.
After creating a sync job, you can:
- run it manually through the GUI
- run it via the CLI with the
runcommand - or set a schedule (see Calendar Events) so it runs regularly
In my case, I want the copies from the lenovo datastore, where we store daily copies, to sync with the truenas datastore, where the long-term storage copies will be kept.
as you understand, the backup schedules for different datastores will differ
Conclusions#
Setting up Proxmox Backup Server isn’t just about connecting a disk and creating storage - it’s a full-fledged system for managing the lifecycle of backups.
If you’re not on Proxmox, or you just want something more general-purpose, take a look at Duplicati or Zerobyte - both work fine without being tied to a specific hypervisor.
A properly configured combination of datastore + prune + garbage collection + verification + sync job provides a complete set of mechanisms for reliable, scalable backups.
Key advantages of the system#
- Controlled data retention (Prune Jobs) Let you set a retention policy and prevent the disk from filling up.
- Freeing disk space (Garbage Collection) Removes unused chunk data left after snapshots are deleted.
- Integrity checking (Verification Jobs) Detects data corruption and silent corruption before it becomes a problem.
- Synchronization between servers (Sync Jobs)
Allows copying a datastore from a remote PBS to a local or backup server.
This is used for:
- backup replication
- offsite storage
- protection against loss of the primary server
- Process automation All tasks can run on a schedule without manual intervention.
When properly configured, Proxmox Backup Server becomes a full-fledged, production-level backup system that:
- makes efficient use of disk space
- ensures high storage reliability
- allows you to build distributed and fault-tolerant setups
- minimizes manual maintenance
It’s precisely the combination of prune, GC, verification, and sync that turns PBS into more than just storage - it becomes a complete data lifecycle management system.